Picture image – Sanyo PLC-XP100BKL User Manual
Page 46
46
Auto picture control
Use the Point 7 8 buttons to select the desired Auto picture
control position (Off, L1 or L2).
Off . . . . Auto picture control OFF position.
L1 . . . . . Auto picture control LEVEL 1 position.
L2 . . . . . Auto picture control LEVEL 2 position.
Clear the check mark if you do not want to apply the adjusted
color data; select the check mark and then press the SELECT
button. The check mark disappears.
Return to the COLOR MANAGEMENT POINTER. (If you press
the MENU button on the side control or the remote control, it
returns to the COLOR MANAGEMENT POINTER and you will
need to reselect and readjust the color.)
Return to the IMAGE ADJUST Menu. Any settings that
have been changed will not be stored. To store the changed
settings, be sure to select “LIST” and go to the COLOR
MANAGEMENT LIST.
LIST MODE
Return to the COLOR SELECTION mode so that you can
readjust the setting for the color in that line. (This option is
not available if the check mark is cleared.)
Select the DEL box if you want to delete the adjusted data.
Press the SELECT button and a confirmation box appears and
then select [Yes]
Delete all the data in the list. Press the SELECT button and a
confirmation box appears and then select [Yes].
The same function as stated above.
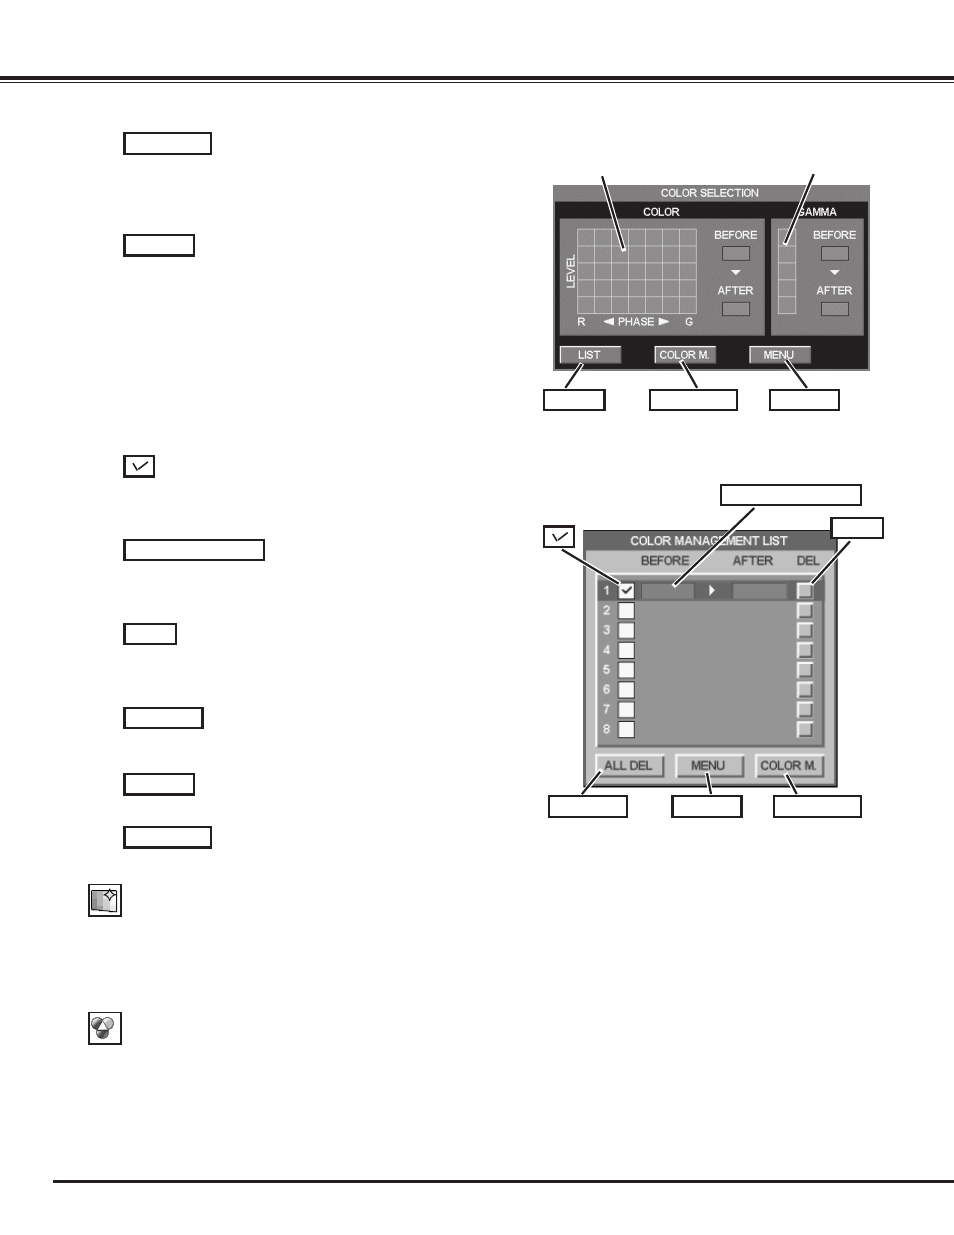
Level and phase
adjustment palette.
Gamma
adjustment palette.
Color temp .
Use the Point 7 8 buttons to select the desired Color temp. level
(High, Mid, Low, or XLow).
COLOR M .
MENU
COLOR PALETTE
DEL
ALL DEL
COLOR M .
LIST
COLOR M .
MENU
COLOR PALETTE
DEL
ALL DEL
MENU
COLOR M .
COLOR SELECTION MODE
LIST MODE
COLOR SELECTION MODE (continued)
In the COLOR MANAGEMENT LIST, the adjusted color data
are checkmarked. You can decide whether or not to apply the
adjusted color data in the list to the projected image (see
below).
4
MENU
The same function as stated above.
Picture Image