13 [3] network configuration, Procedure of connecting the monitor to the network – Sanyo POA-LN01 User Manual
Page 13
13
[3] Network configuration
When you connect a monitor to a network, the network number of monitor must be the
same as the network you intend to connect. You should configure monitorʼs network first.
Make sure that the monitor is connected to the network correctly. To configure the network,
use the computer. Refer to the chart below.
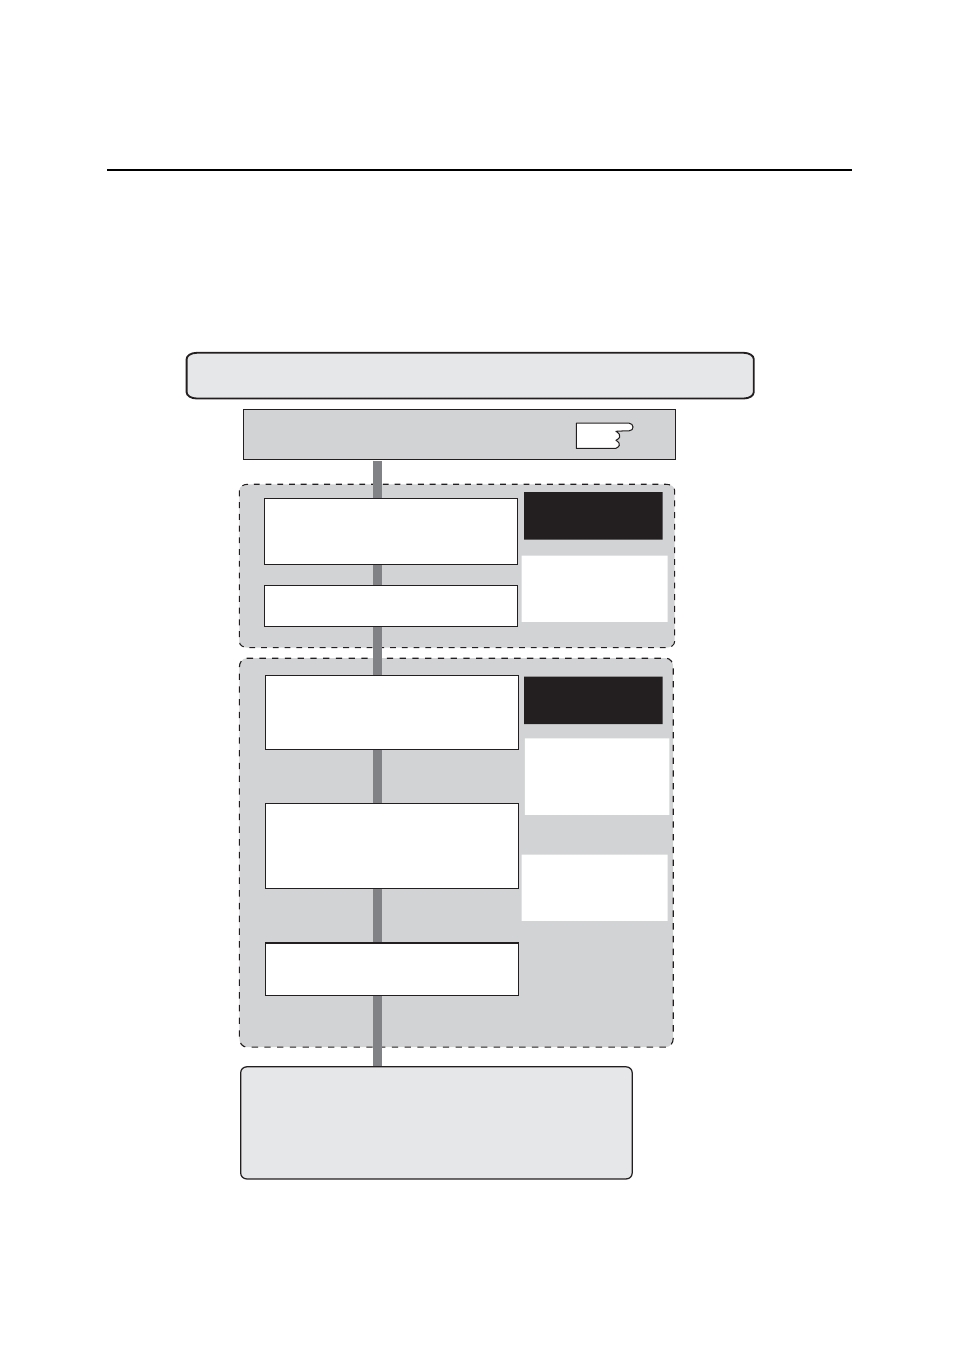
Network configuration
Configure the network with computer
Temporarily set up the computer's
network with the default network
number of the PJ-Net Organizer.
Restart the Computer, if required
Using the web browser and login to
the setting page of the PJ-Net
Organizer by accessing the default
IP address.
Change the network address you
want to connect to the existing
network through the setting menu
on the browser.
Restart the PJ-Net Organizer
Reset to the computer's original
network configuration.
Completing the network configuration. Perform the basic
setting and operation of the monitor by using the web
browser. Please see chapter "2: Basic Setting and
Operation" on page 21 for further information.
Please see further
informatin on pages
14-19.
Please see further
informatin on pages
22-25.
Example of monitor's configuration
IP Address : 192.168.0.5
Subnet Mask : 255.255.255.0
Default Gateway : (blank)
DNS : (blank)
Default Network Address of the PJ-
NetOrganizer
IP Address : 192.168.0.2
Subnet Mask : 255.255.255.0
Default Gateway : 0.0.0.0
DNS : 0.0.0.0
Example of monitor's configuration
IP Address : 172.21.95.224
Subnet Mask : 255.255.255.0
Default Gateway : 172.021.095.001
DNS : 172.21.1.53
p.14
Procedure of Connecting the monitor to the network