Picture shift setting, B, e c, d b, e c, d, Project the image on the screen – JVC DLA-HD10KSU/E User Manual
Page 34: Pres s the [menu] b utton, Pres s the [menu] b utton to end, The main menu is displayed on the screen, The menu will disappear from the screen, 1 cinema image
34
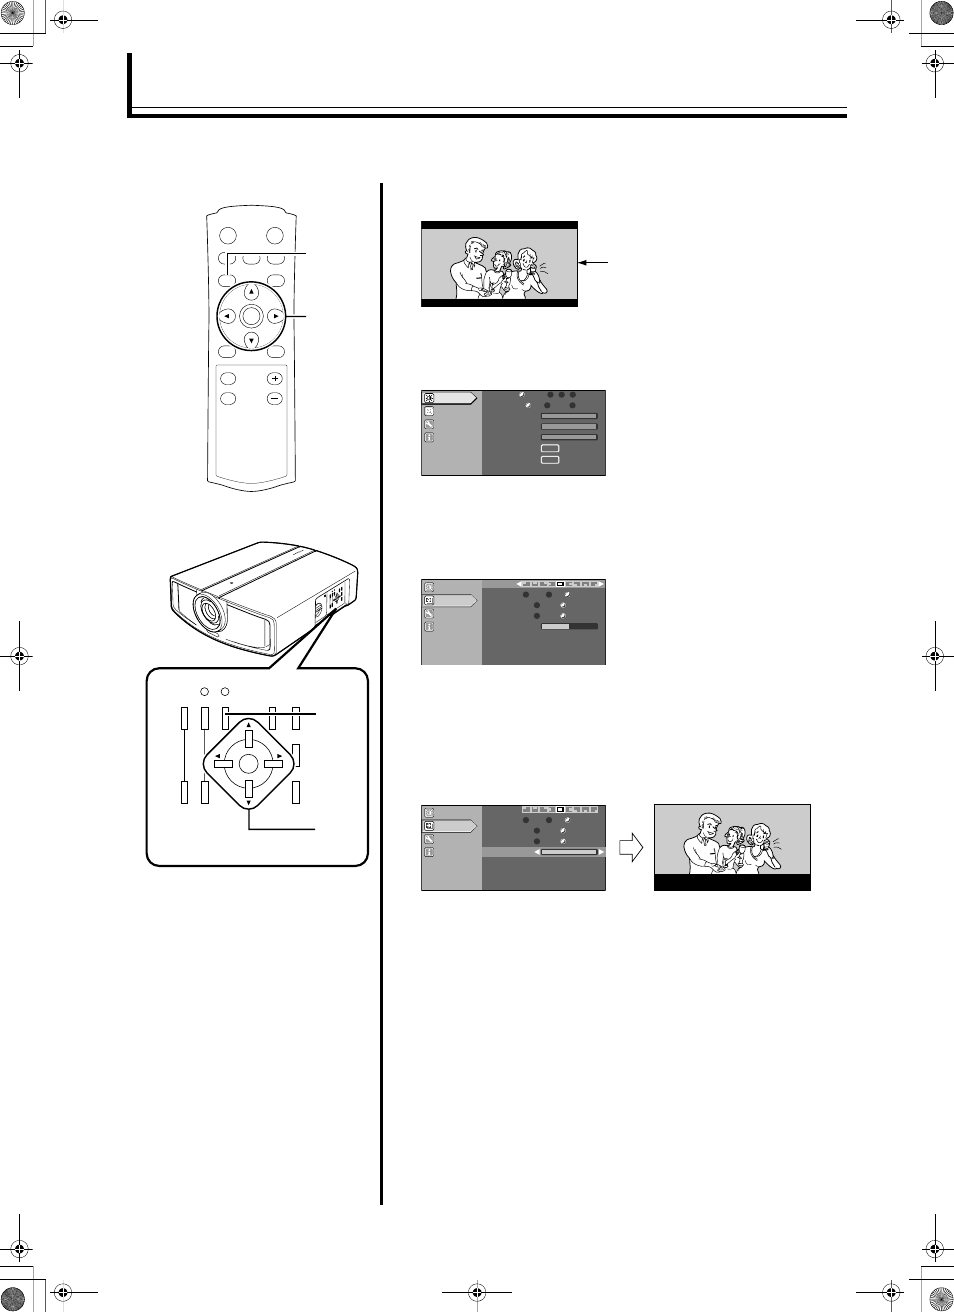
Picture Shift Setting
a
Project the image on the screen
b
Press the [MENU] button
● The main menu is displayed on the screen.
c
Press the [
J/K] buttons to select
ASetupB, followed
by pressing the [ENTER] button
● The ASetupB menu appears on the right side of the screen.
d
Press the [
J/K] buttons to select
APicture ShiftB,
followed by pressing the [
H/I] buttons to move the
image upwards or downwards
● Set value in the positive (+) direction to move the image upwards and
negative (
-) direction to move downwards.
e
Press the [MENU] button to end
● The menu will disappear from the screen.
When projecting images with black bands at the top and bottom (cinema image), use this to move the image up
or down while retaining one of the black bands at the upper or lower end.
ON
ENTER
OFF
CHP
TEST
MENU
EXIT
LIGHT
OPERATE
HIDE
PRESET
ZOOM
T
W
FOCUS
T
W
ZOOM
+
-
FOCUS
MENU
EXIT
OPERATE
ON
OPERATE
OFF
HIDE
RS232C
Rx
Tx
b, e
c, d
b, e
c, d
E.g.: When
APicture ShiftB value is changed from “0” to “30”
Image Adjust
Setup
Options
Information
Green
Blue
Red
Gamma
Normal
A
Custom
B
Color Temp.
Test Pattern
User2
User1
D65
ENTER
Pixel Adjust
ENTER
Mask
Off
5%
2.5%
Picture Shift
Flip V
On
Off
On
0
Off
Flip H
Menu Position
Image Adjust
Options
Information
Setup
Image Adjust
Options
Information
Setup
Mask
Off
5%
2.5%
Flip V
On
Off
On
Off
Flip H
Menu Position
Picture Shift
30
2.35:1 Cinema Image
DLA-HD10_EN-FR.book Page 34 Thursday, November 10, 2005 12:54 PM