Sound equalization, Using a rear view camera, Displaying the rear view screen – JVC LVT2086-001B User Manual
Page 29: 29 english, Select a sound mode, Storing your own adjustments, Repeat steps ~ and ÿ , then
29
ENGLISH
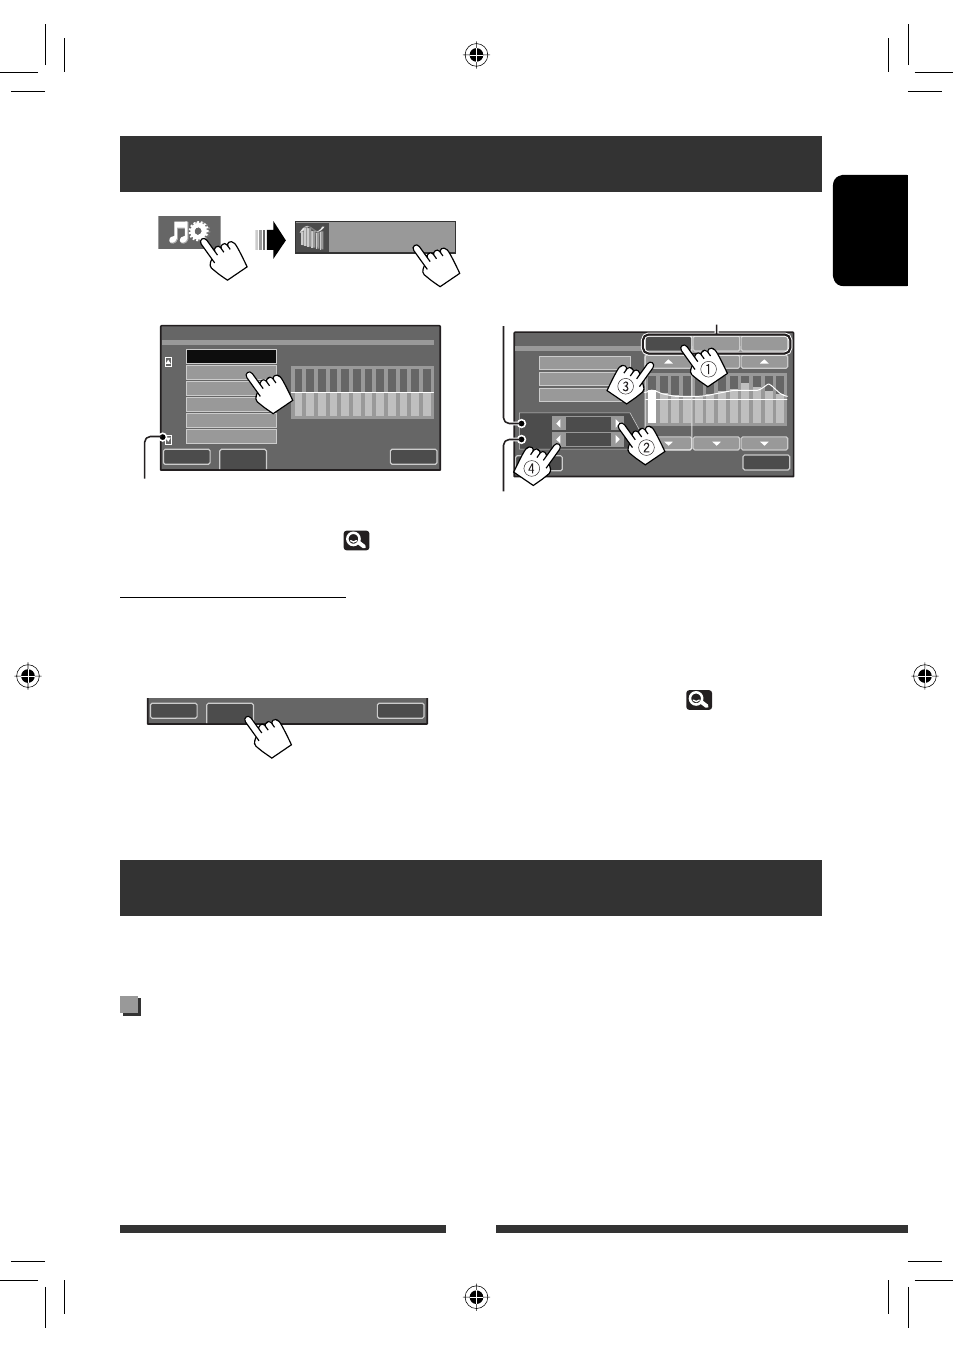
Sound equalization
~
Ÿ
Select a sound mode.
• You can also change the sound mode by
pressing the short cut icon. (
7)
Storing your own adjustments
You can store your adjustments into <User1>,
<User2>, and <User3>.
1
Repeat steps ~ and Ÿ, then...
Move to other six sound modes
2
Select the band (1), frequency (2),
adjust the volume (3), then adjust the
quality factor to make the sound natural
(4).
3
Select
store the adjustment.
The adjustment is stored.
• When <High Pass Filter> is set to <On>, the
setting of low band is invalid. Select <Through> to
activate the low band setting. (
35)
* When adjusting “High” band, the quality factor value is
fixed.
Using a rear view camera
• To use a rear view camera, the REVERSE GEAR SIGNAL lead connection is required. For connecting a rear view
camera, see the Installation/Connection Manual.
The rear view screen is displayed when you shift the
gear to the reverse (R) position.
• While the pictures through the camera are shown on
the screen, no message will be displayed.
• When you perform one of the following operations,
the rear view screen is cleared.
– Press DISP.
– Shifting the gear to another position other than the
reverse (R) position.
Equalizer
Back
Edit
Exit
Natural
Flat
Dynamic
Bass Boost
Super Bass
Vocal Boost
60
100
1.0k 2.5k
10k 15k
Back
Edit
Exit
Back
User2
User1
60
1.0k 2.5k
10k 15k
User3
Q
Freq
Low
Mid
High
60 Hz
1.0
100
User Store
Exit
Frequency
Quality factor*
Band
Equalizer
Displaying the rear view screen
EN_KW-AVX838[J]001B.indb 29
EN_KW-AVX838[J]001B.indb 29
10.5.6 2:21:21 PM
10.5.6 2:21:21 PM