Editing, Tape dubbing – JVC 0597TOV*UN*VP User Manual
Page 37
37
EDITING
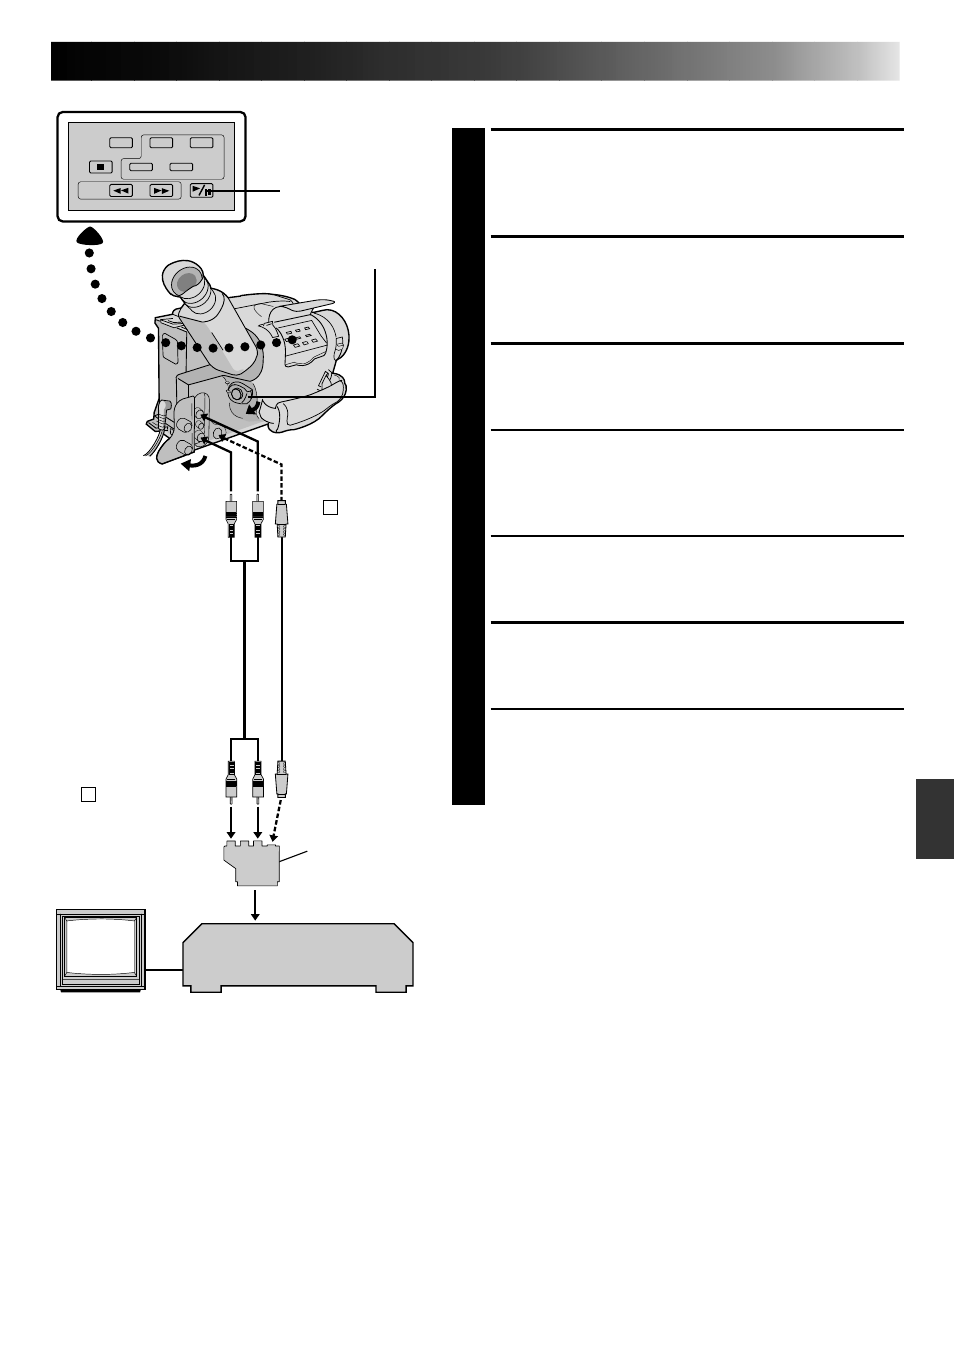
VCR (Recording deck)
PLAY/PAUSE
“Y/C”/”CVBS”
video out
select switch
S-VIDEO cable
(optional)
Tape Dubbing
CONNECT EQUIPMENT
1
Following the illustration at left, connect the
camcorder and the VCR. (refer also to page 32 and
33)
PREPARE FOR DUBBING
2
Set the camcorder’s Power switch to “PLAY”, turn
on the VCR’s power, and insert the appropriate
cassettes in the camcorder and the VCR.
SELECT VCR MODE
3
Engage the VCR’s AUX and Record-Pause modes.
FIND EDIT-IN POINT
4
Engage the camcorder’s Play mode to find a spot
just before the edit-in point. Once it’s reached, press
PAUSE on the camcorder.
START EDITING
5
Press PLAY on the camcorder and engage the VCR’s
Record mode.
STOP EDITING TEMPORARILY
6
Engage the VCR’s Record-Pause mode and press
PAUSE on the camcorder.
EDIT MORE SEGMENTS
7
Repeat steps 4 through 6 for additional editing, then
stop the VCR and camcorder when finished.
NOTES:
● If your VCR has an S-VIDEO input connector or a
SCART connector compatible with Y/C signals, connect
the camcorder and the VCR using the S-VIDEO cable.
This can improve the dubbed picture quality.
● If you use the provided cable adapter, set the “Y/C”/
“CVBS” video out select switch as required.
Y/C
: When connecting to a VCR which accepts Y/C
signals and uses an S-VIDEO cable.
CVBS : When connecting to a VCR which does not
accept Y/C signals and uses an audio/video
cable.
Power switch
To AUDIO
and VIDEO
connectors
To
S
-VIDEO
connector
To AUDIO,
VIDEO and
S
-IN connectors
If your VCR has the
SCART connector,
use the provided
cable adapter.
A/V cable
(optional)