Mounting the camera (continued) 1 2 3 – JVC VN-685U User Manual
Page 28
28
Connection/Installation (VN-V686WPBU)
Mounting the Camera
1
Mount the fall prevention wire
● Mount the fall prevention wire of the camera to the fall
prevention wire anchor bolt that was installed earlier.
● Secure the fall prevention wire tightly with a nut and
washer.
2
Pull out the cables (from the wall) from the
cable connection hole.
3
Mount the camera to the wall
● Mount the camera to the camera anchor bolts that
were installed earlier.
● Secure the camera tightly with a nut and washer.
Note:
● This product weighs approximately 5.5kg. When
installing, pay extra attention as it may fall.
● For your safety, hold the arm section during
installation.
● After installing, paint the nuts and washers to prevent
corrosion.
Memo
:
● To remove the camera, follow the reverse procedures.
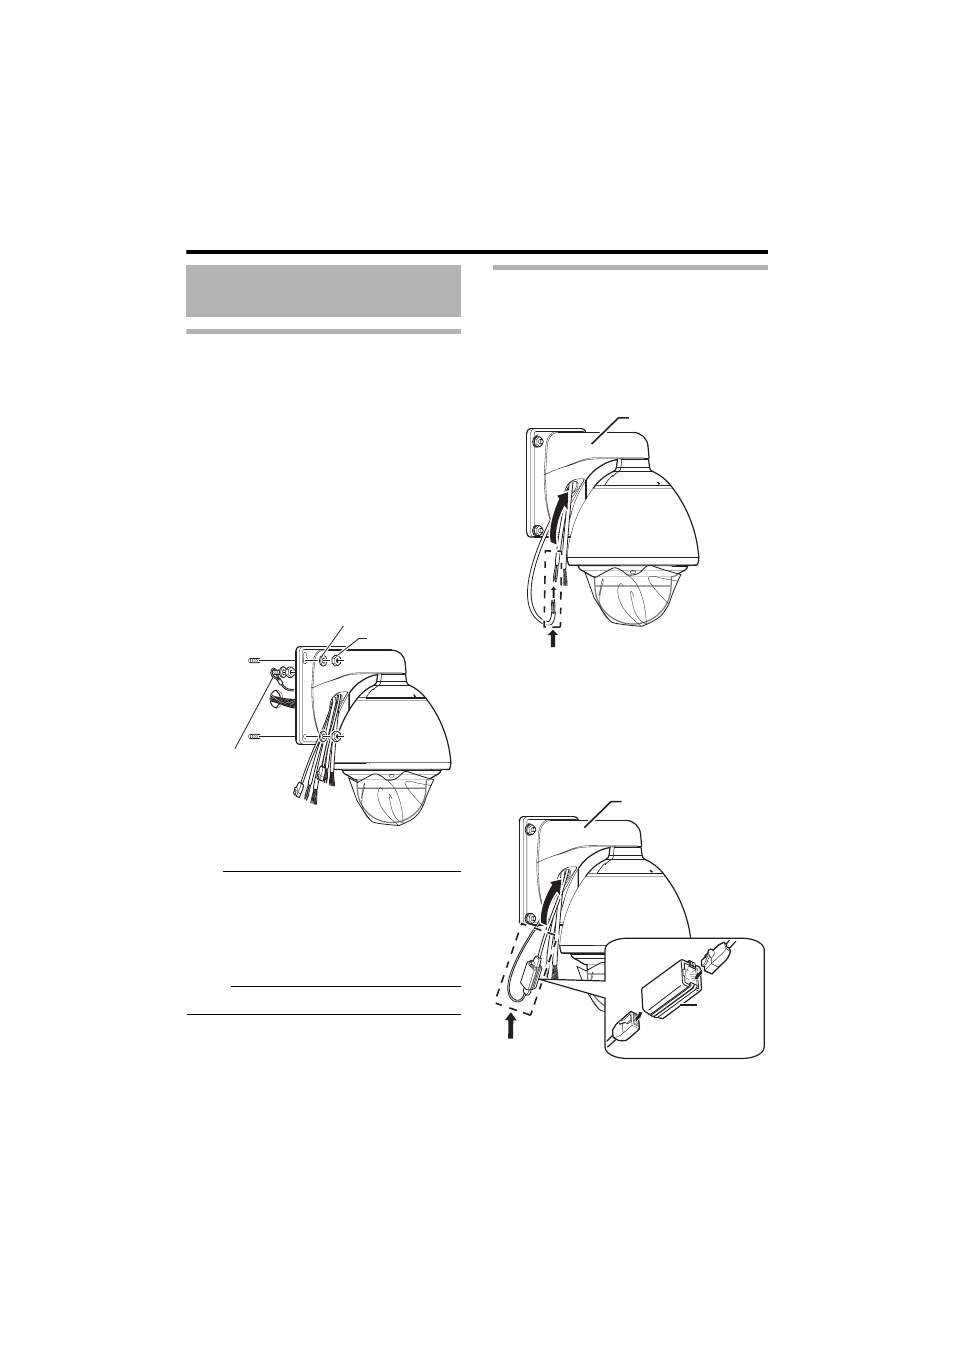
Cable Connection
1
Connecting the power cable
Connect the power cable and wind the
waterproof tape (adhesive).
After connecting, push the cable into the arm of
the camera.
2
LAN Cable Connection (
A Use the provided RJ-45 conversion connector
and connect the LAN cable.
B Wind the connector section with waterproof
tape (adhesive) and push the cable into the
arm of the camera.
Mounting the Camera
(continued)
1
2
3
Fall Prevention
Wire
Washer
Nut
Wind the waterproof tape (adhesive)
Arm
B
A
Wind the
waterproof tape
(adhesive)
Arm
RJ-45
conversion
connector
(provided)