Assembly – Ironman Fitness LEGACY User Manual
Page 6
Assembly
Assembly requires the included Allen wrench and Phillips screwdriver.
Do not plug in the power cord until all assembly steps are completed.
6
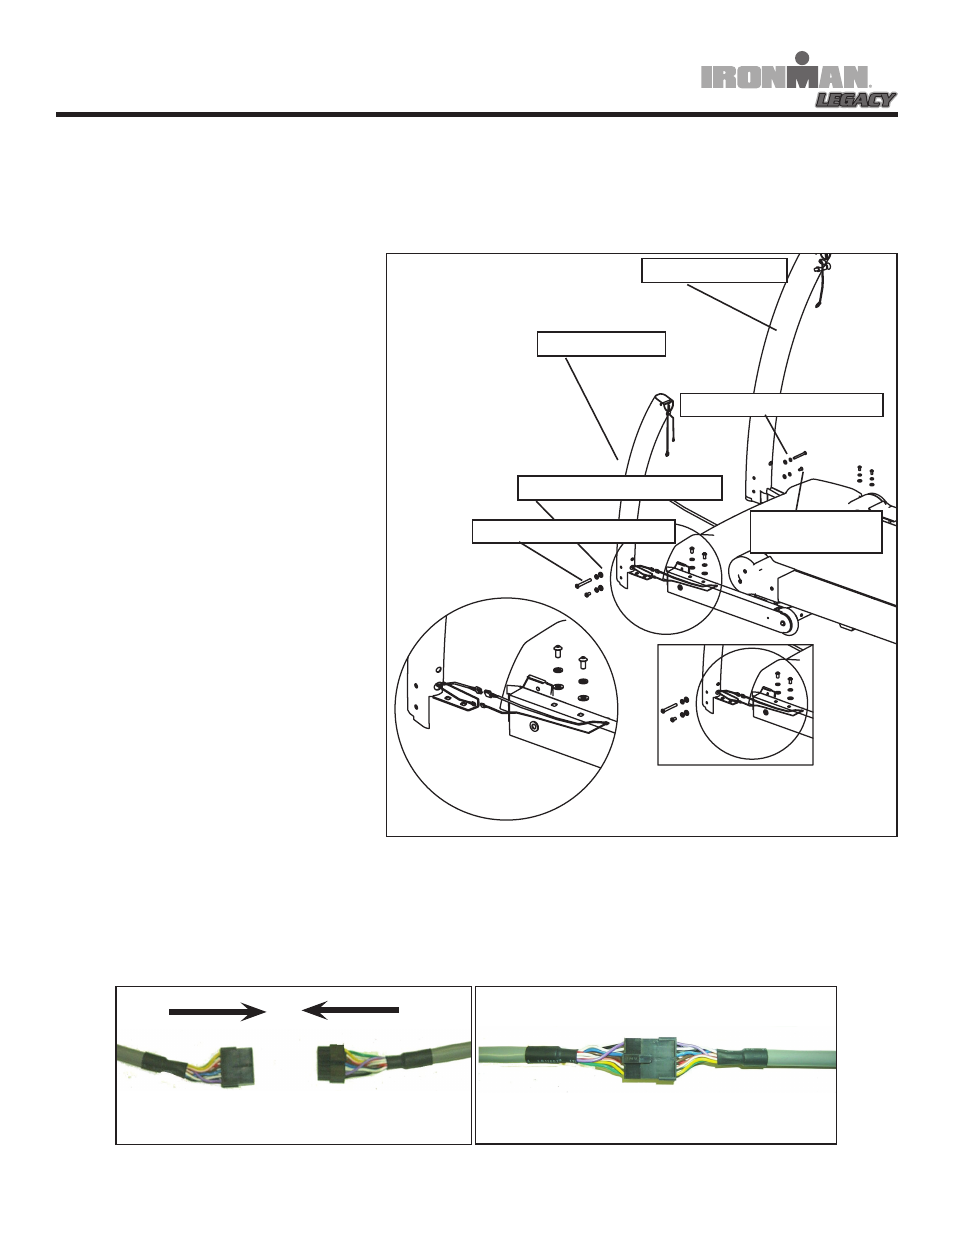
Figure 1: Console Harness Location
Figure : Console Harness Connection
1. Leave the unit on the original
packing material to assemble all
parts.
2. Connect the console harness
together. One side of harness is
located near the motor cover on
the bottom left side. The other end
is located inside the Left Upright
assembly. See Figure 1 and 2. Pull
the wiring harness from top of
upright tube making sure harness
connectors are pulled into large
hole at bottom of upright.
Caution:
Make sure harness is installed inside the upright and pay attention not to pinch the
wire harness.
3. Install the Left and Right
Uprights to the treadmill base
frame by inserting the upright con-
necting bracket into base frame as
seen in Figure 1, using Allen Bolt
5/16”-18 x 70 (Qty. 2), Spring
Washer 8 mm (Qty. 4), and Washer
9*16*1.6 mm (Qty. 4).
Next, install the Allen Bolt 5/16”-18
x 15 (Qty. 6), Spring Washer 8 mm
(Qty. 6), and Washer 9*16*1.6 mm
(Qty. 6). Refer to Figure 3.
Note: Do not tighten hardware in
step 4 until step 7 is completed.
Ensure that the Allen Bolt 5/16”-
18 x 70 is placed in the upper hole
on the upright and the Allen Bolt
5/16”-18 x 15 is placed on the
lower whole of the upright.
LEFT UPRIGHT
RIGHT UPRIGHT
WASHER 9*16*1.6MM
SPRING WASHER 8 mm
ALLEN BOLT
5/16” - 18x15
ALLEN BOLT 5/16” - 18x70