Recording (continued) – Memorex MVDR2100 User Manual
Page 47
46
RECORDING (CONTINUED)
NOTES:
•
Make sure a blank DVD+R or DVD+RW with enough space is inserted in the unit.
•
If the unit is in the standby mode, it will wake up two minutes before recording.
•
During recording, press the STOP (
■
) button to stop recording.
•
The length of the recording is determined by the disc capacity and recording quality as set on page 42.
•
To delete a schedule, highlight it using the Navigation (
➐
,
❷
) buttons, then press the ADD/CLEAR button.
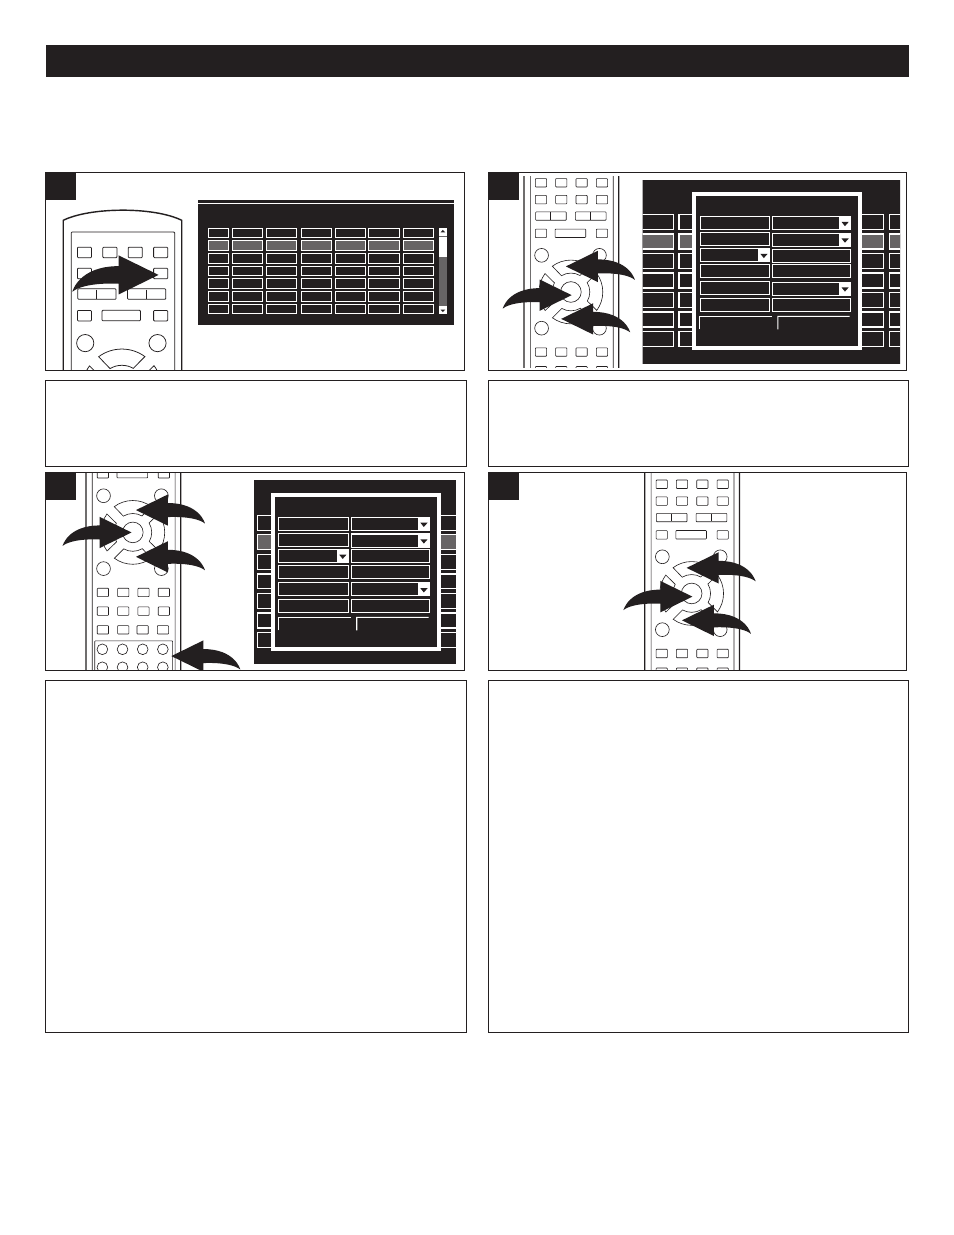
TIMER RECORD
Before setting the Timer Record, make sure the clock is set (see page 24).
1
1
3
2
Use the Navigation (
➐
,
❷
) buttons
1
to select SOURCE and
press the ENTER button
2
to confirm selection. Use the
Navigation (
➐
,
❷
) buttons
1
to select the options, then press the
ENTER button
2
to confirm. (For Entry Time or Date, using the
Number button to input the time/date, then press the ENTER
button
2
to confirm. Repeat this procedure for the following:
QUALITY: Select the record quality (HQ, SP, EP or SLP).
FREQUENCY: Select how often you want the program recorded:
Once, Daily or Weekly.
DATE: Set the desired date using the Number buttons
3
. Six
digits must be pressed, two for the month, two for the date and
two for the year.
START TIME: Set the desired start time using the Number
buttons
3
.
AM/PM: Select AM or PM for the desired start time.
END TIME: Set the desired end time using the Number buttons
3
.
During input of the settings, if the entry is incorrect, the TV screen
will show an "ERROR" message. When the error sentence
occurs, you need to input the setting again.
3
Press the TIMER button; the Record Scheduler box will
appear.
1
Press the Navigation (
➐
,
❷
) buttons
1
followed by the
ENTER button
2
to select a schedule number.
NOTE: If no schedules have been set, then the first
schedule number will be selected.
1
1
2
Select CONFIRM using the Navigation (
➐
,
❷
) buttons
1
followed by the ENTER button
2
; the schedule will then be
set.
Five minutes before the start time, a record dialog box will
appear on the screen. To confirm recording, select OK, to
cancel, select CANCEL.
Press the TIMER button to exit the Record Scheduler
screen.
NOTE: If you do not select OK or CANCEL, after a few
minutes, the Record dialog box will disappear and the
recording will start when the Starting recording time is
reached.
1
1
2
4
2
Record scheduler
End
AM/PM
Start
Date
Quantity
Source
NO
1
2
3
4
5
6
Item Editor
CH001
SP
01:48
02/13/04
PM
02:18
Once
Start
Quality
Source
AM/PM
End
Confirm
Cancel
Record scheduler
End
AM/PM
Start
Date
Quantity
Source
NO
1
2
3
4
5
6
Item Editor
CH001
SP
01:48
02/13/04
PM
02:18
Once
Start
Quality
Source
AM/PM
End
Confirm
Cancel
Record scheduler
End
AM/PM
Start
Date
Quantity
Source
NO
1
2
3
4
5
6
☎
☎
☎
☎
☎
☎
☎
☎
☎
☎