Netcommand-controlled recording, continued – MITSUBISHI ELECTRIC WD-57833 User Manual
Page 64
64
6. NetCommand
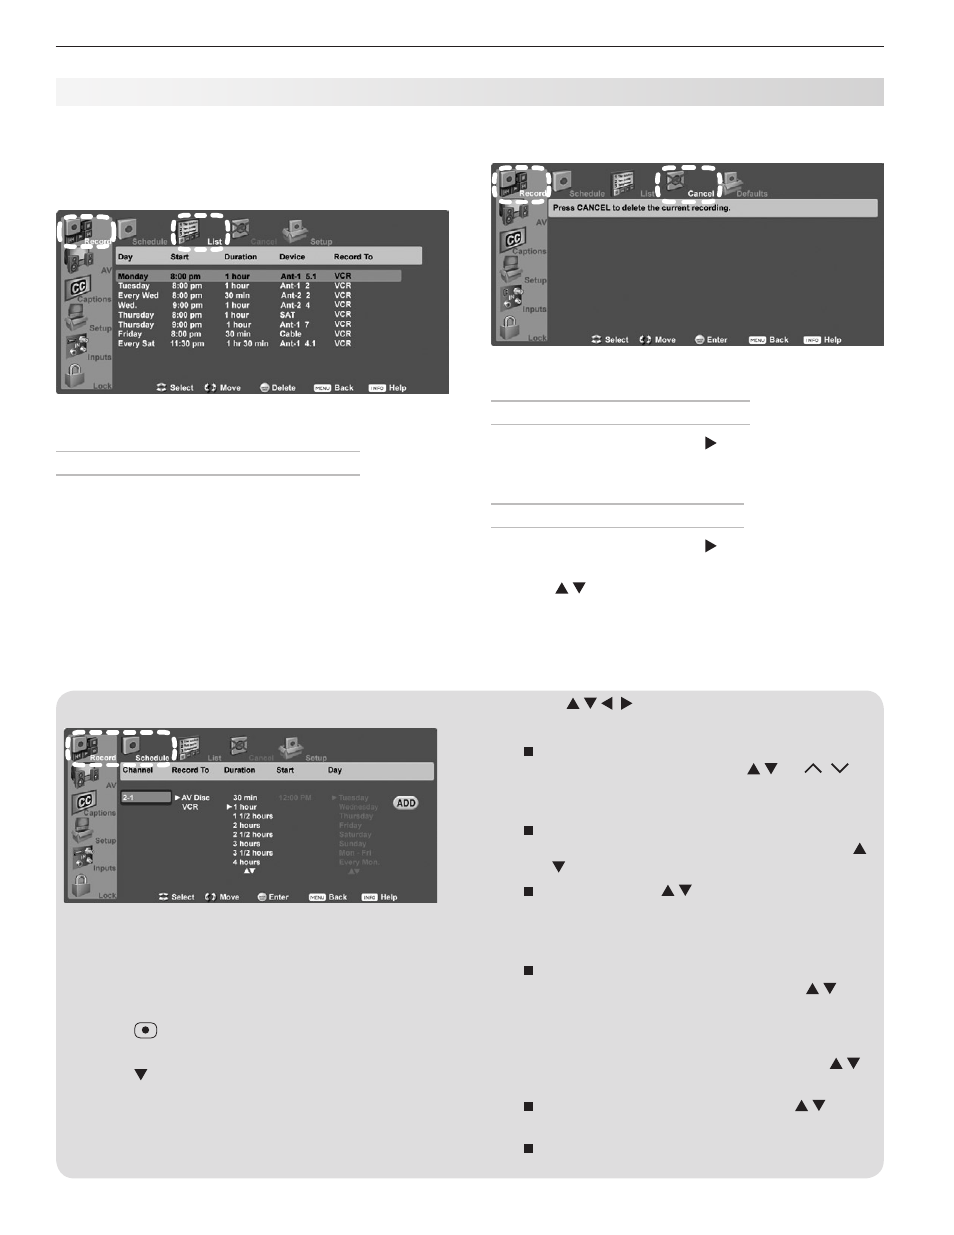
Using the Record > Schedule Menu
The Record > Schedule menu
To display the menu:
• Press
MENU, highlight the Record icon, then high-
light
Schedule.
or
• Press
(RECORD) (available only if the key has not
already been “learned” for another device).
• Press to move the highlight into the lower part
of the menu.
• Press MENU to move the highlight back to the top
row of icons.
• Press to highlight each option you
need to change:
Channel. If the source is an antenna, select
a memorized channel using ,
CH / ,
or enter the channel number from the remote
control and press
ENTER.
Record To. If you have more than one
recording device connected to the TV, use
to select it.
Duration. Use to select a recording
duration of from 30 minutes to six hours in
30-minute increments. The default is one
hour.
Start Time (for future recordings)
a. With the hour highlighted, press to
change the hour, including
AM or PM.
Press
ENTER to set the hour and move the
highlight to the minutes.
b. With the minutes highlighted, press
to change the minutes.
Day (for future recordings). Use to
select a day of the week.
ADD. Highlight ADD and press ENTER to add a
recording to the Record List.
NetCommand-Controlled Recording, continued
b. Highlight
List to display the Record List.
7. Press
MENU to return to the top row of icons or press
EXIT to return to TV viewing.
Record List
TV Guide On Screen and the Record List
Programs scheduled through TV Guide On Screen do
not appear in the Record List. Refer to the separate TV
Guide On Screen
®
Interactive Program Guide User’s
Manual for information regarding scheduling recordings
with TV Guide On Screen.
If there is a conflict between a recording scheduled
through TV Guide On Screen and the Record List, the
TV Guide On Screen recording takes priority.
Cancelling Recordings
Use the Record menu’s Cancel option to cancel a
recording in progress.
To Cancel a Recording in Progress
1. Press
MENU and then press to highlight the Record
menu
Cancel icon.
2. Press
CANCEL.
To Cancel a Scheduled Recording
1. Press
MENU and then press to highlight the Record
menu
List icon.
2. Use to highlight the recording you wish to
cancel.
3. Press
CANCEL.
4. Press
EXIT to close the menu.