Getting started, Continued), Installing the "automatic bypass" module – MGE UPS Systems pulsar EX15 User Manual
Page 39
Pulsar EX: 51032306XT/BB
29
MGE UPS SYSTEMS
21
15
31
24
26
23
30
29
6
12
AC outlet
7
5
XB2
XB1
1
2
3
27
getting started
(continued)
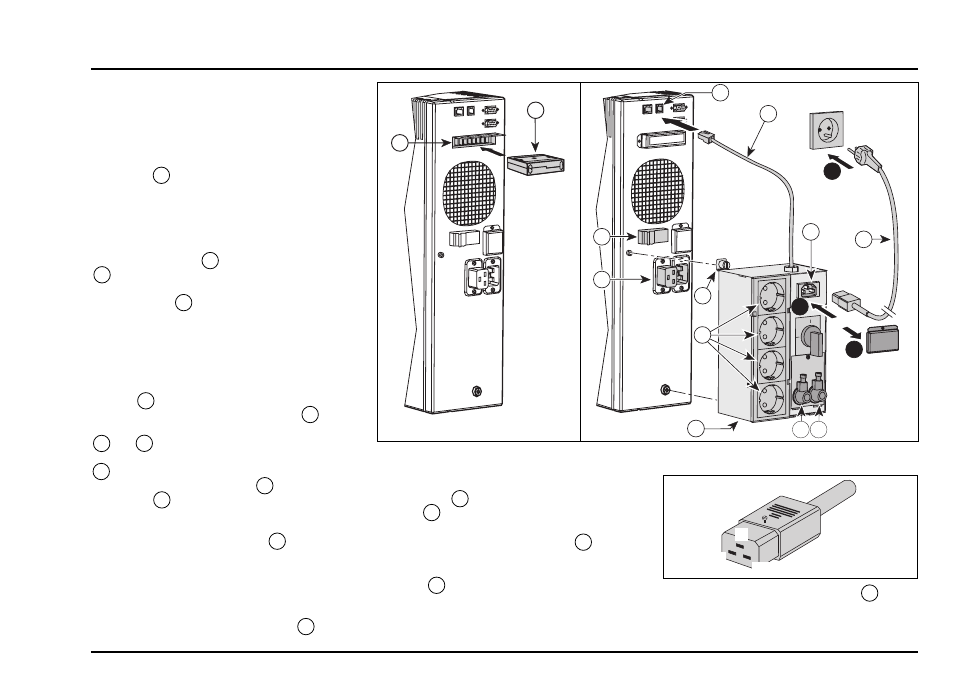
installing the "automatic
bypass" module
(option)
The "automatic bypass" module plugs into
the back of Pulsar EX:
c
unscrew the cover protecting the
connector 15 for the "automatic bypass"
module;
c
remove the wire linking two of the
terminals of the connector (grounding the
neutral when the automatic bypass module
is not connected);
c
plug the module 21 into the connector
15 (see figure 3);
c
tighten the module using the 2 screws in
the connector 15 .
Pulsar EX with the "manual
bypass" module ("Hot-
swap" version)
c
ensure that the "automatic bypass"
module 21 is properly installed;
c
take the "manual bypass" module 25 ;
c
plug the rear connectors into connectors
4 and 6 of Pulsar EX (see figure 4);
c
tighten the module using the 2 screws
24 ;
c
plug the connecting cable 26 into the
connector 12 of Pulsar EX;
c
connect the loads having to be supplied
by Pulsar EX:
v
either directly in the sockets 23 of the
module,
v
or, in the case of cable connection, open
the cover protecting the terminal blocks,
pass the cable in the left cable-clamp and
connect the 3 wires (phase, neutral and
ground) in the output terminal block 29
(XB2) and put back the protective cover.
Figure 3
c
connect Pulsar EX to the AC outlet by the
power cable 5 connected to the input
socket 27 of the module, having first
removed the protective cover.
If you cannot use the power cable 5
included with the module, you can made this
cable by yourself, by taking the female plug
of cable 5 included and connecting on it
the 3 wires (phase, neutral and ground) of
your cable as indicated in figure opposite.
G
N
Ph
c
do not connect the power cable 5 to the
AC outlet if the battery extension module
option has to be installed, else directly
consult the "operation" section.
Figure 4