MITSUBISHI ELECTRIC WD-57831 User Manual
Page 44
44
Chapter 3. TV Setup
Additional Setup Using the
NetCommand Menu, continued
To Replace One Device with Another on an
Input Jack
1. Disconnect the device you wish to remove.
2. Connect the new device to the vacated jack.
3. Before selecting the input from the Input Selec-
tion menu, open the Input Name menu from the
NetCommand menu.
4. Highlight the input name box and press to select
a new device name from the list associated with the
input.
5. Press
INPUT to open the Input Selection menu. High-
light the input icon and press
ENTER.
6. Press
MENU and return to the NetCommand menu.
7. Highlight the
Learn button and press ENTER.
8. When the Learn screen displays, continue as
described earlier under “Initial NetCommand Setup for
Most Device Types.”
9. Press
EXIT when finished.
Other Options on the NetCommand Menu
• For
Input Name and Icon Order options, see chapter
5, “TV Menu Settings.”
• Use the
PC DVI Input option to specify the type of
video signal coming from your computer. For more
about this option, see chapter 7, “Using the TV with a
Personal Computer.”
Set Up NetCommand Control of an A/V
Receiver
Perform this setup to:
• Operate the A/V receiver’s power and volume
functions with the TV’s remote control.
• Enable the A/V receiver to switch automatically to
the correct audio input when you select a device
in the TV’s Input Selection menu.
You must have at hand the remote controls for both the TV
and A/V receiver to perform this procedure.
Learn A/V Receiver Power and Volume Keys
1. Connect your A/V receiver to the TV. See chapter 2,
“TV Connections,” for suggestions.
2. Open the NetCommand menu and under
AV
RECEIVER SETUP, highlight Learn and press ENTER.
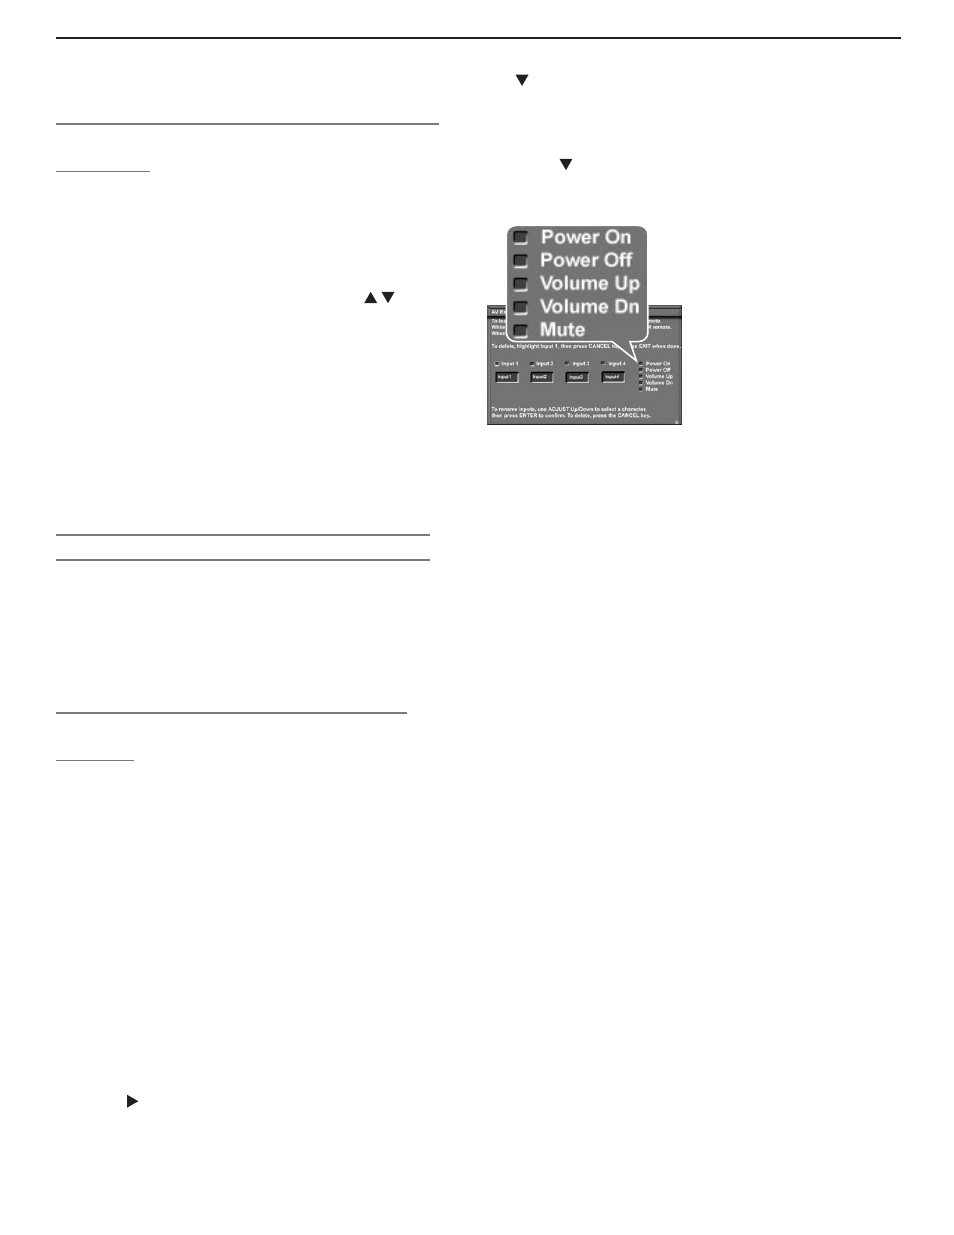
3. In the NetCommand AV Receiver (AVR) Learn screen,
press to highlight the check box for
Power On.
4. Press
ENTER on the TV’s remote control and while the
text
Power On is flashing, press and hold the POWER
or
POWER ON key on the A/V receiver’s remote control.
5. If your A/V receiver has a separate
POWER OFF key, press
to highlight the check box for
Power Off. Repeat
the preceding step to “learn” the
POWER OFF key.
If your A/V receiver has no POWER OFF key, skip this
step.
6. Press to highlight additional check boxes and
repeat step 4 for the other A/V receiver keys.
7. When all keys have been learned, press
EXIT.
Figure 13. AV Receiver
(AVR) Learn screen. Perform
NetCommand “learning” for
these A/V receiver functions.
Set Up Automatic Switching of A/V Receiver
Audio Inputs
There are two parts to this setup:
Part 1: “Learn” IR codes to control A/V receiver switching
to the specified A/V receiver audio inputs.
Part 2: Tell the TV where connected devices send audio.
Because the TV’s Auto Input Sensing feature never detects
audio connections, the TV does not know that an A/V
receiver is connected until you perform this procedure.
The sample setup shown in figure 14 illustrates three
typical scenarios for sending audio to an A/V receiver:
• Analog Stereo Audio. Audio from sources with only
analog stereo output (such as a VCR) can be sent
either directly to the A/V receiver or to the TV first and
then on to the A/V receiver.
Mitsubishi recommends you send audio to the TV first
as shown in the example. The TV can convert the
signal to digital audio and then send it to a digital A/V
receiver.
• Audio Available from TV only. Audio from ANT 1
and
ANT 2, memory cards, and IEEE 1394 devices
can only be sent to the A/V receiver from the TV’s
DIGITAL AUDIO OUT or analog AUDIO OUT
LEFT/RIGHT. In this setup, you tell NetCommand to
switch to the A/V receiver’s designated TV audio input
when using these devices.
• Digital Surround Sound. A device (e.g., DVD player,
cable box, satellite receiver) can send digital surround
sound such as Dolby Digital or DTS directly to the A/V
receiver, bypassing the TV entirely. A DVD player is
used in this example.
It is also possible for your setup to include two (or
more) devices with digital surround sound connected
directly to the A/V receiver. These devices might be a
DVD player plus a cable box or satellite receiver.