Printing or downloading test results, Connection for printing test results, Connection for downloading test results – Microtest TSB-67 - 568A Annex E User Manual
Page 33
Page 33
Press
Done (F2)
to exit the editing screen.
Printing or Downloading Test Results
To send test results directly from the Scanner to a printer or PC:
1.
Configure the Printer Port settings in the
PRINTER PORT SETUP
screen. To display this
screen on the
PentaScanner
or
PentaScanner Cable Admin
, press
Extended
Functions
key, then select
Printer Port
. To display this screen on the
PentaScanner+,
press the
Extended Functions
key, then select
User Preferences
, then
select Printer
Port
.
1.
Press the
Ò
or
Ñ
arrow key to highlight a setting to modify —
Baud rate
or
Handshaking
. The default settings for Baud rate and Handshaking are 9600 and
XON/XOFF. The settings for
Data Bits, Stop Bits
and
Parity
are fixed at 8, 1 and None
and cannot be changed. After highlighting the Baud rate or Handshaking setting, press
Change (F2)
to toggle through the available settings.
2.
Press
Printer (F3)
to display the
graphics printer screen. Press
Save (F1)
to store the new settings and exit or press
the
ESCAPE
key to exit without saving.
3.
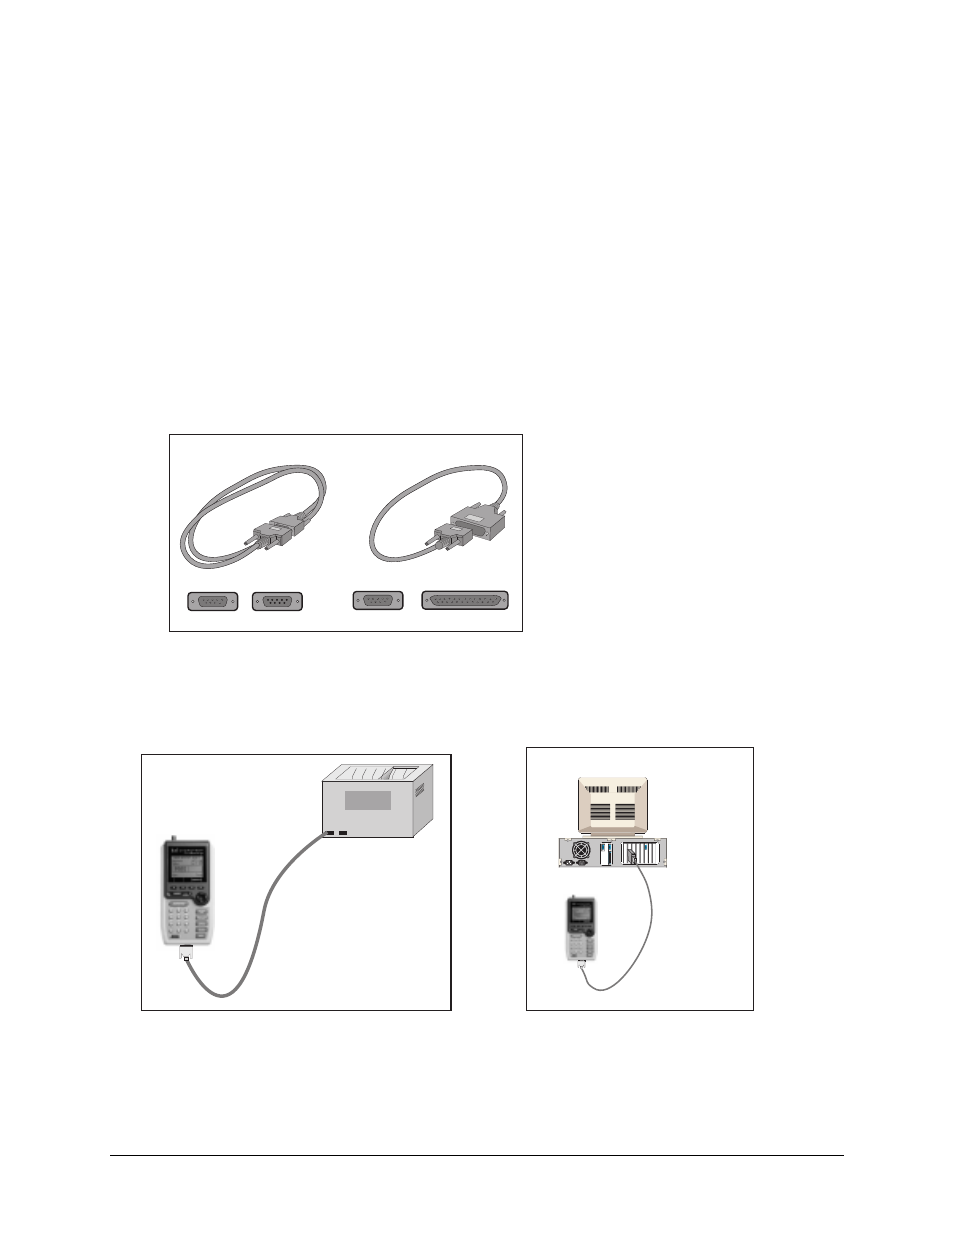
Choose the appropriate serial
communications cable. A DB-9 to DB-9
serial cable is included in the kit, or you
can use a DB-9 to DB-25 cable. Note:
The cable must be wired as in Appendix
C: Pin-outs
.
1.
Attach the DB-9 end of the cable to the Scanner and the other end to the serial port on the
back of the printer or to COM 1 or COM 2 on the back of the PC:
Connection for Printing Test Results Connection for Downloading Test Results
Scanner
DB-9
Serial Cable
Serial Port
DB-9
Printer
(rear view)
COM 1 or COM 2
DB-9 to DB-25 or
DB-9 to DB-9
Serial Cable
Scanner
IBM-compatible PC
1.
Use the
PRINT OPTIONS
screen to set the criteria to determine which Autotests to print.
To display the
PRINT OPTIONS
screen, press the
Extended Functions
key, then select
Memory
, then press
Print (F3).
2.
To display the
PRINT FORMAT
screen, press
Print (F3)
from the
AUTOTEST RESULTS
screen, or press
Print (F3)
from the
PRINT OPTIONS
screen. Press
Change (F2)
from the
DB-9 to DB-9 Cable DB-9 to DB-25 Cable
Male Female
Male Female