Chapter 2 connections, Connecting the player, Step 1 - connect video – GoVideo DVP1100 User Manual
Page 11: 1 composite video, 2 s-video, 3 component video, 2 - connections, Connections, Chapter 2
7
Connections
G
e
tting
Sta
rted
Se
tup
Basic
Ope
rations
Ad
vanc
e
d
Fe
atures
He
lp
Chapter 2
Connections
:: Connecting the Player
Follow these steps to connect the DVD player to your TV and audio system. It is recommended that you turn off power on all com-
ponents while you are connecting the player.
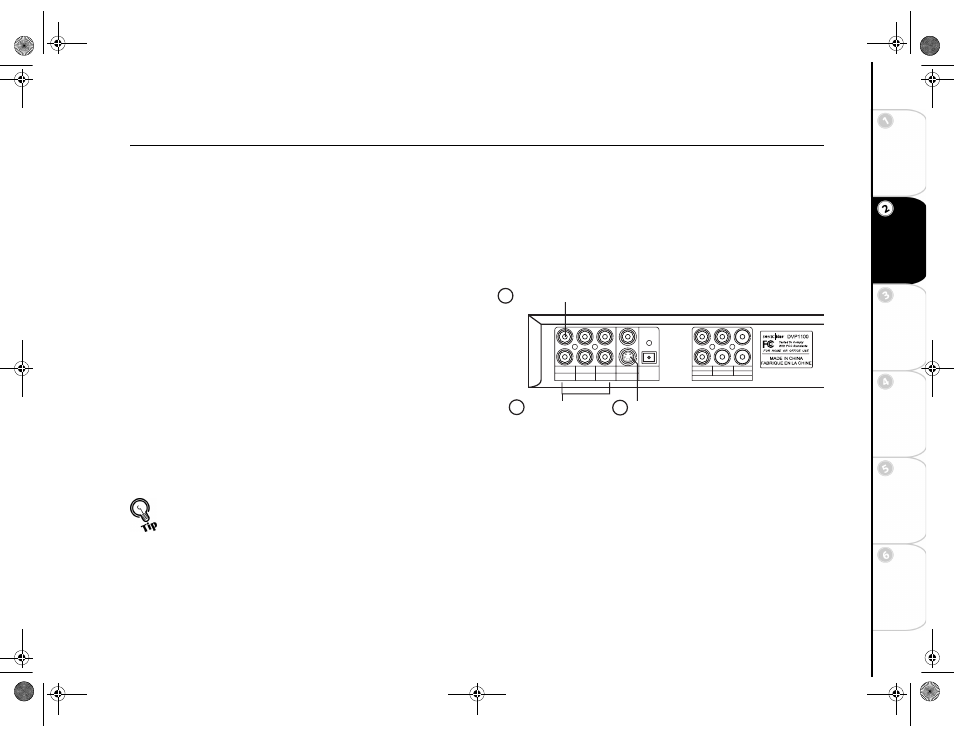
Step 1 - Connect Video
Choose one of three video connection methods:
1 Composite Video
Connect the supplied video cable from
the Video jack on the back panel of the DVD player to the
video input on your TV.
2 S-Video
For improved video quality, connect an S-Video
cable (not included) from the S-Video jack on the back panel
of the player to the S-Video input on your TV. With this con-
nection, Video Setup should be set to S-Video in the menu sys-
tem; please refer to page 12.
3 Component Video
For best video quality, connect Com-
ponent Video cables (not included) from the Y, Pb and Pr jacks
on the back panel of the player to the corresonding inputs on
your TV. With this connection, Video Setup should be set to
Component in the menu system; please refer to page 12.
• For superior resolution and picture quality when using the
Component Video output, set the player to Progressive Scan
mode by pressing the PS/IS button twice. To return to standard
Interlaced Scan mode, press the PS/IS button once.
• The Composite Video output is always available regardless of
the Video Output setting.
FRONT(L) FRONT(R) SUB W.
SUR.(L)
5.1 CHANNEL
SUR.(R) CENTER
VIDEO
R
L
COAXIAL
OPTICAL
DIGITAL
AUDIO
Y
Pb
Pr
S-VIDEO
Component
Video
S-Video
Composite Video
1
3
2
UG.book Page 7 Thursday, January 9, 2003 10:05 AM