Garrett, Pm cards – GarrettCom 8000X User Manual
Page 39
Magnum 8000X Mixed-Media Fiber Hubs Installation and User Guide (05/ 02)
32
www GarrettCom com
.
.
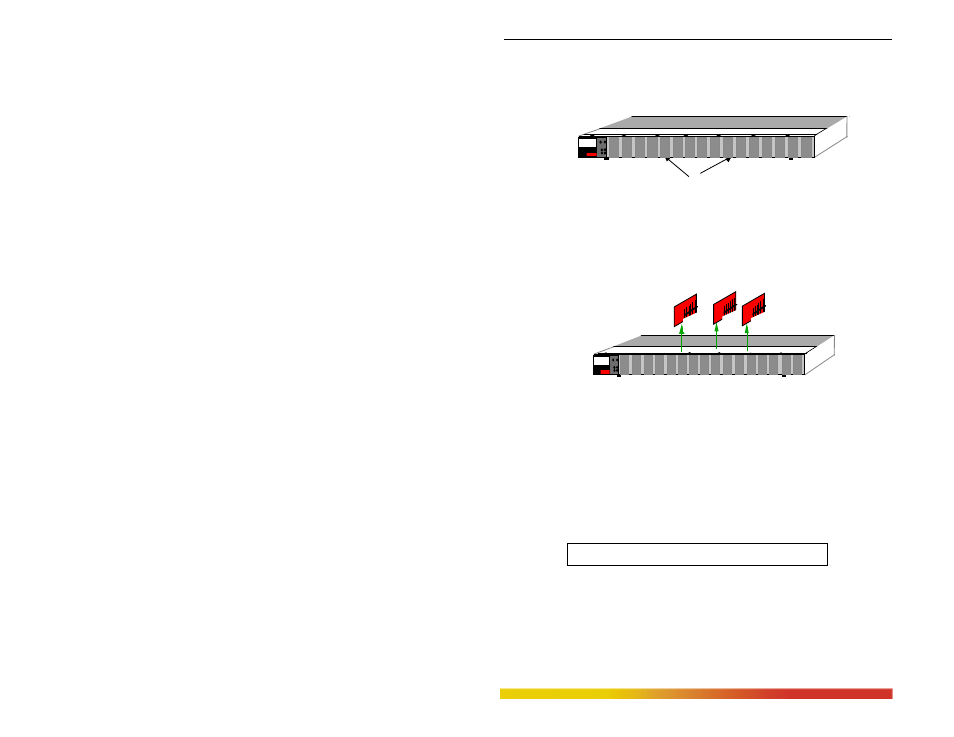
On the bottom-front of the unit there is one retaining screws for each PM card
and face plate slot. These screws are used to secure a PM card in position (see
Figure 3.9.3a). Remove the front screws of the PM to be removed.
Figure 3.9.3a: Front View - Face Plate & PM Retaining Screws
Step 3.
Remove PM Card
Gently pull the PM card up and out of the connector socket (see Figure
3.9.3b).
Figure 3.9.3b: Removing a PM Card
If the slot from which the PM card has been removed is to remain unused, be
sure to install a PM face plate cover in it. If another PM card is replacing the
one that has been removed, follow the steps as described for installing an PM
card discussed in Section 3.9.1.
3.10
Preparation for Installing and Removing SPMs
Step 1.
Remove Chassis Top Cover
Caution: Be sure the power cord is unplugged.
The 8000X chassis is connected with 20 screws on the top cover. There are
several screws located on top front and back of the unit, and four screws each
on the top left and right sides. Remove these 20 screws from the top edges.
Once these are removed, the top cover is easily lifted off the chassis base.
BOTTOM-Front PM
Retaining Screws
10100
PWR
BRD
ACT
COL
Magnum 8000X
Mixed Media Hub
GARRETT
1
10100
PWR
BRD
ACT
COL
Magnum 8000X
Mixed Media Hub
GARRETT
1
PM CARDS