Install backsplash accessory, Warning, Avertissement – GE Monogram ZDP48N6D User Manual
Page 15: Installation, Install 9” or 12” high backsplash, Install 22” high backsplash
15
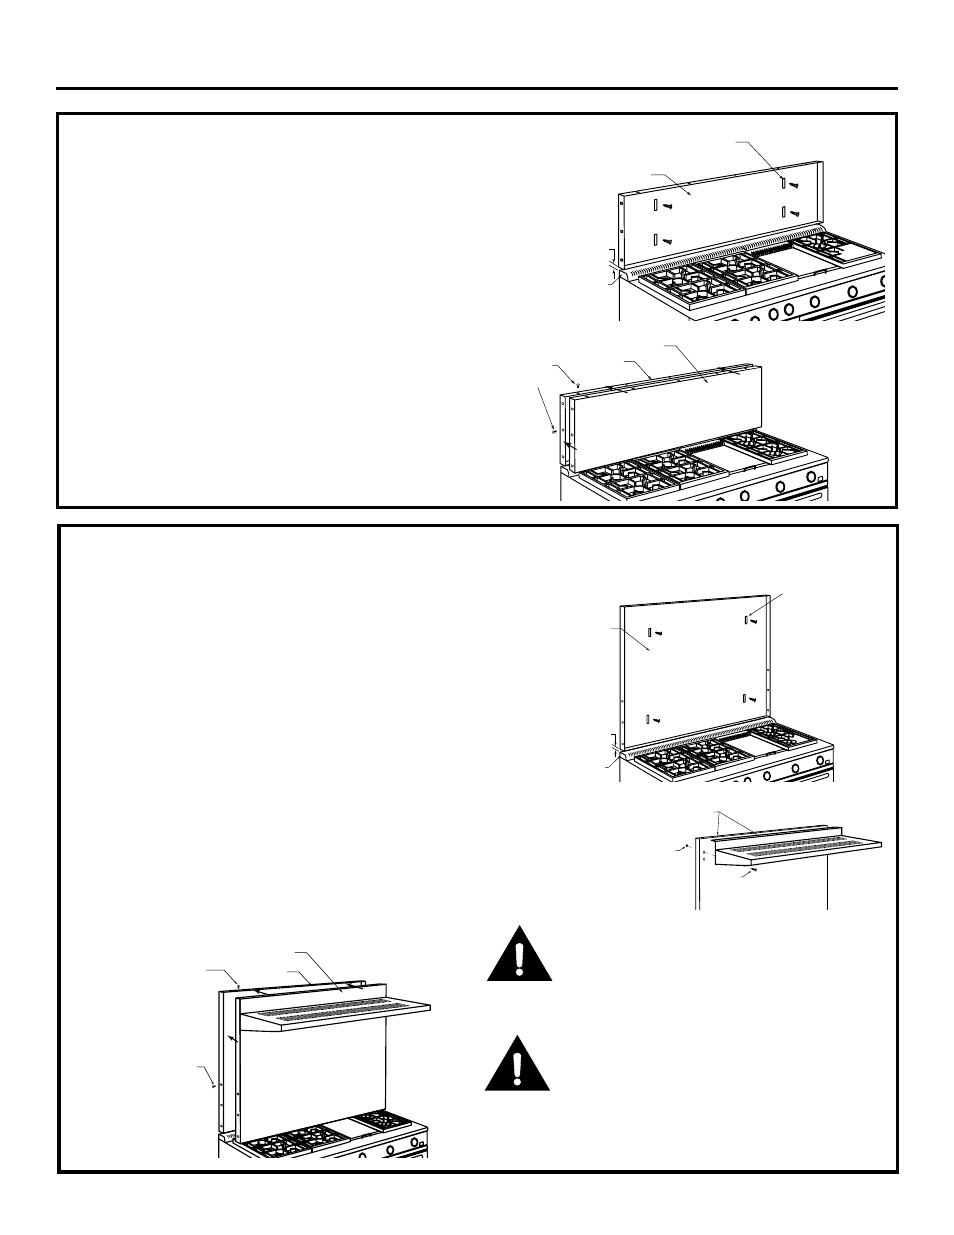
INSTALL 9” or 12” HIGH BACKSPLASH
• Install and level the range or cooktop according to the
installation instructions.
• Remove the backsplash packaging. Select the back, wall
mount panel with mounting screw slots.
• Mark a horizontal line on the wall, 1/8" above the
range/cooktop backguard.
• Use wood screws or fasteners (not supplied) to secure
the back section to the wall. Slide the panel up or down
to provide the 1/8" gap between the top of the
range/cooktop and the bottom of the backsplash.
This 1/8" gap allows the appearance or front section
to overlap the mounted rear panel.
• Secure the appearance panel to the mounted back
section with the # 8 self-tapping screws provided. Install
3 screws on each side and 5 across the top.
INSTALL 22” HIGH BACKSPLASH
• Install and level the range or cooktop according to the
installation instructions.
• Remove the backsplash packaging. Select the back, wall
mount panel with mounting screw slots.
• Mark a horizontal line on the wall, 1/8" above the
range/cooktop backguard.
• Use wood screws or fasteners (not supplied) to secure
the back section to the wall. Slide the panel up or down
to provide the 1/8" gap between the top of the
range/cooktop and the bottom of the backsplash.
This 1/8" gap allows the appearance or front section
to overlap the mounted rear panel.
• Attach the shelf to the front section of the backsplash
using screws and nuts supplied.
• Secure the appearance panel to the mounted back
section with the # 8 self-tapping screws provided. Install
3 screws on each side and 5 across the top.
1/8"
Backguard
Slots for Vertical
Adjustment
Back section
WARNING:
The back section must be securely fastened to
the wall. Failure to do so could cause damage or
personal injury. Maximum shelf weight capability
is 10 lbs.
AVERTISSEMENT :
La section arrière doit être fixée solidement
sur le mur. Le défaut de procéder ainsi peut
causer des dommages matériels ou des lésions
corporelles. La capacité de charge maximale
de l’étagère est de 4,5 kg (10 lbs ).
Supplied
#8 Screws
Front section
Back
section
1/8"
Backguard
Slots for
Vertical
Adjustment
Back
section
Holes
Screw
Nut
Front section
Back
section
Supplied
#8 Screws
Supplied
#8 Screws
Installation