Step 2, install mounting brackets, Step 3, install the hood, Install mounting brackets – GE Monogram ZV755 User Manual
Page 15: Install the hood
15
Installation Instructions
INSTALLATION – RECIRCULATING
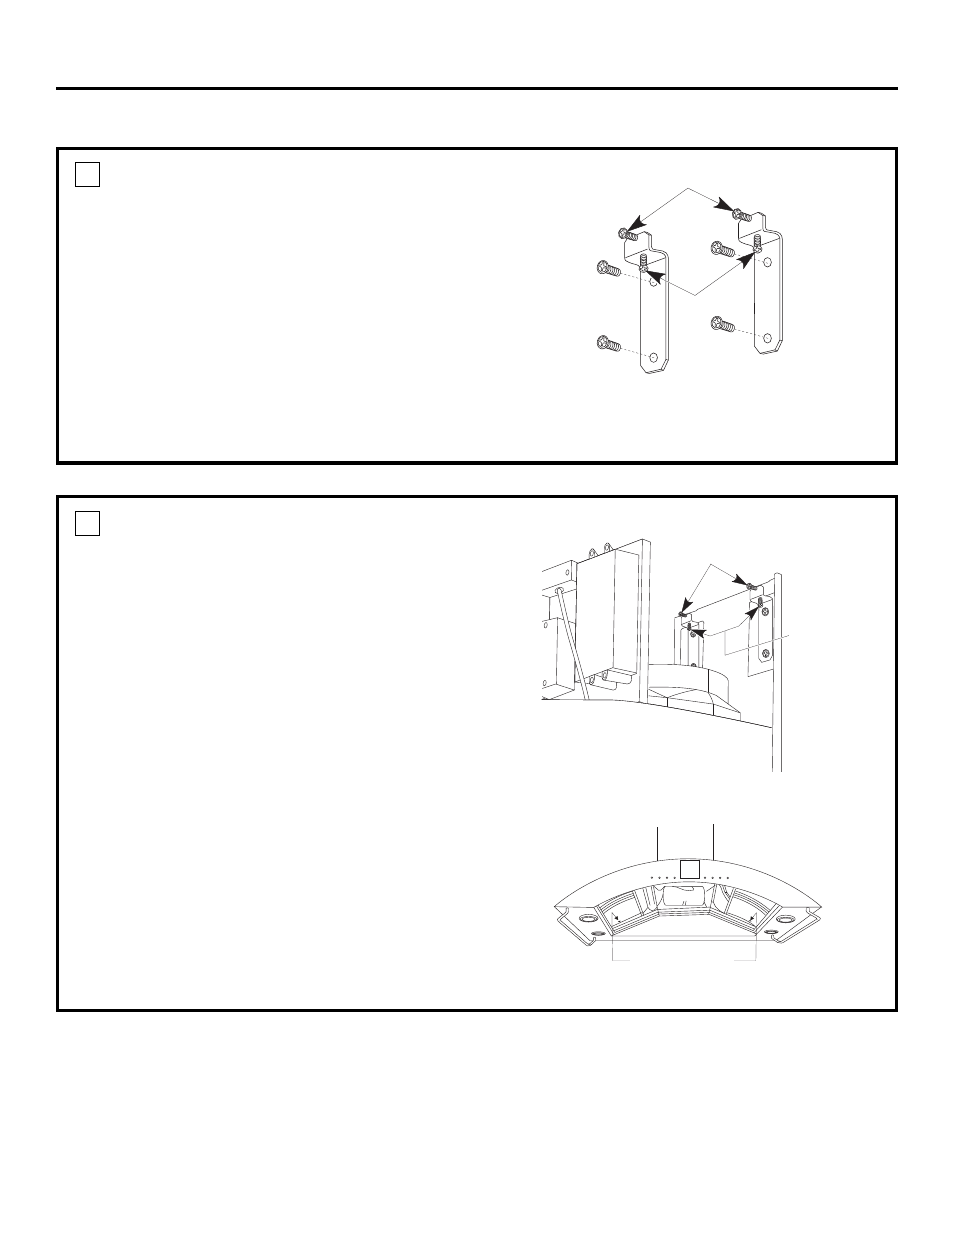
INSTALL MOUNTING BRACKETS
The vent hood must be secured to rear support framing
or a wall stud.
• With the template taped in place, use a punch to mark all
mounting screw locations.
• Drill 1/8″ pilot holes at the 6 punched locations.
• Remove the template.
• Enlarge holes that did not enter studs to 3/8″ and tap
anchors for wall fasteners into the holes.
– Drive screws into the fasteners to allow anchors to
expand against the wall material. Remove the screws
for final installation.
• Secure the mounting brackets to the wall studs with
wood screws provided.
2
NOTE: Screws “A” and “B” are preassembled onto the
brackets. Do not remove these screws.
INSTALL THE HOOD
Place the hood on the brackets and slide left to right to align
with rectangular slots at the top.
• Adjust the installation height by tightening or loosening
the screws “A” at the bottom of the brackets.
• Align the hood lower mounting holes with pilot holes in the
wall.
• Using two large washers (supplied), install wood screws or
wall-fastener screws, loosely, into lower mounting holes.
Do not tighten.
• Level the hood by tightening or loosening the screws “A”
located on the bottom mounting brackets.
• Tighten the lower mounting screws.
• Tighten screws “B” located at the top of the mounting
bracket against the hood to adjust position. Do not
overtighten screws.
3
Screws “B” to adjust
hood against wall
Level and height
adjustment
screws “A”
Lower mounting
screws
Screws “B”
Screws “A”