Service, Caution – Graco Inc. 237-695 User Manual
Page 10
10
308-236
Service
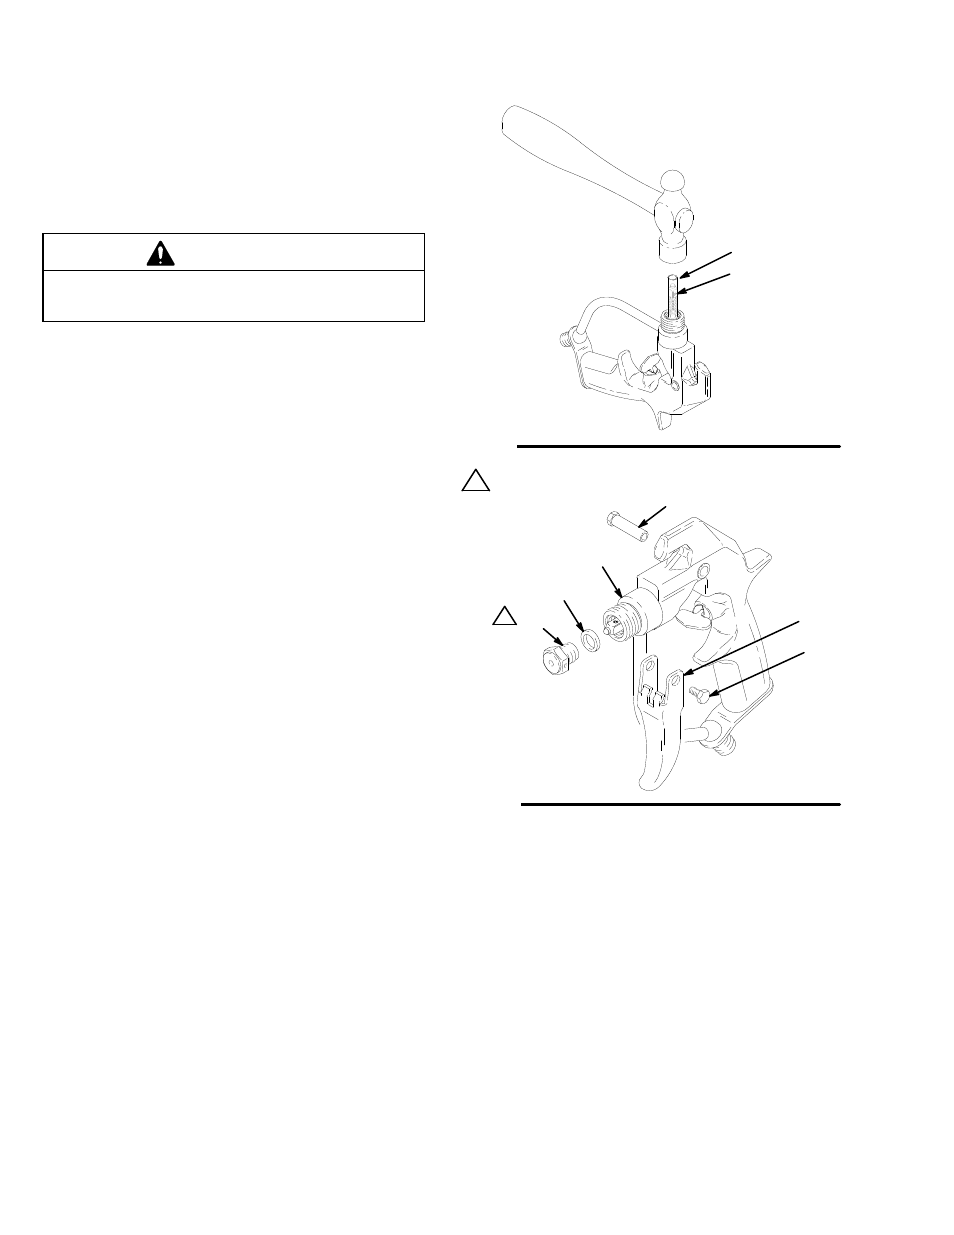
7.
Slide the rear of the needle (2c*) into the front of
the gun. Slide the tool (B), provided with the repair
kit, into the gun, around the needle. Lightly tap the
tool with a hammer or lightly press the tool against
a flat surface to seat the needle. See Fig. 9.
Remove the tool.
CAUTION
Tapping or pressing the tool too hard may jam the
tool and damage the needle.
8.
Grease the end of the needle.
9.
Grease the diffuser/seat threads. Place the new
gasket (2b*) on the diffuser/seat (2a*) and screw
the assembly into the fluid housing (6). Torque to
20–25 ft-lb (27–34 N.m). See Fig. 10.
10. Install the trigger (8), pivot pin (10) and screw (12).
See Fig. 10.
NOTE: No needle or trigger adjustment is needed.
Fig. 9
2c
02354
B
Fig. 10
8
2a*
2b*
12
10
Lubricate, then torque
to 20–25 ft–lb (27–34 N.m)
1
1
02352
6