Igure, Onfiguration – Freedom9 4020 User Manual
Page 58
51
2. Click “Reconfigure Disks”.
3. When the confirmation message appears, click “OK”.
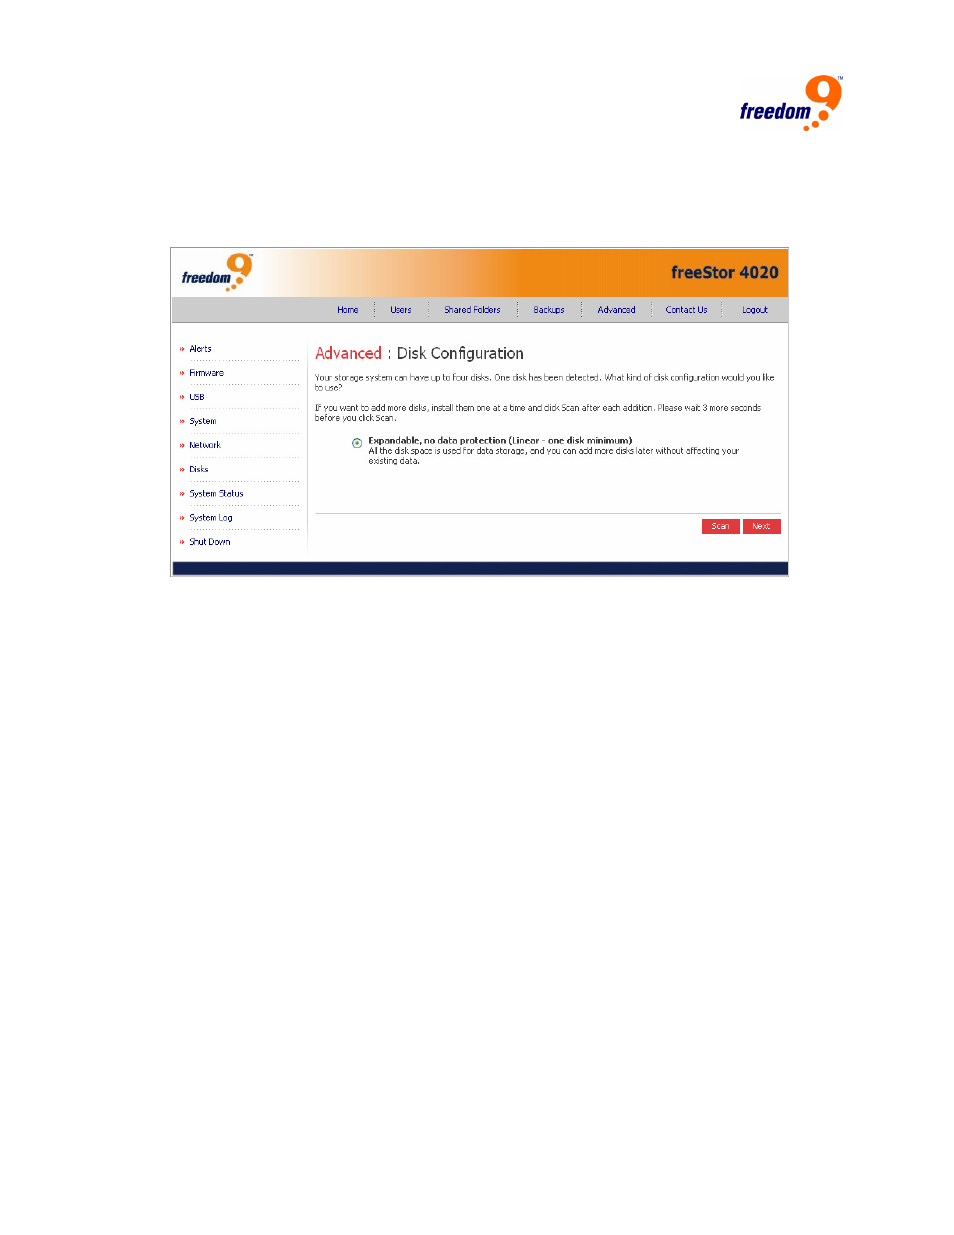
4. The Disk Configuration page (Figure 3-30) appears. (The options that appear on this page
vary, depending on the number of hard disks that are currently installed in the system.)
Figure 3-30: Disk Configuration Page
5. If you want to add or remove hard disks, do so one at a time and click “Scan” after each
action.
6. To accept the default disk configuration (which will provide the best level of data protection
available for the number of hard disks currently installed), click “Next”. By default, a linear
disk configuration is used for a single hard disk, RAID 1 is used for two hard disks, and
RAID 5 is used for three or four hard disks.
7. If you want to change the disk configuration, select the desired RAID level and then click
“Next”.
8. The Disk Space Distribution page (Figure 3-31) appears: