4 testing digital noise suppression – Frye FONIX 7000 User Manual
Page 167
Real-Ear Measurements
159
2. Select the Digital Speech signal source with [F5].
3. Press [MENU] to enter the local menu.
4. Select Bias Tone under Source using [∨, ∧].
5. Use [<, >] to select the level of the bias signal. Choose from 40-90 dB SPL
in 5 dB steps.
6. Press [EXIT] to return to the measurement screen. The Digital Speech signal
will now include the pure-tone bias signal.
7. Press [START] to start the measurement.
8. Use [<, >] to change the frequency of the bias signal. Notice how the aid
reacts when the bias frequency is changed. Some hearing aids don’t react at
all to the bias while other aids react dramatically. See Figure 6.5.3.
9. Press [STOP] when done with testing. Go back into the menu to turn the
bias signal OFF again.
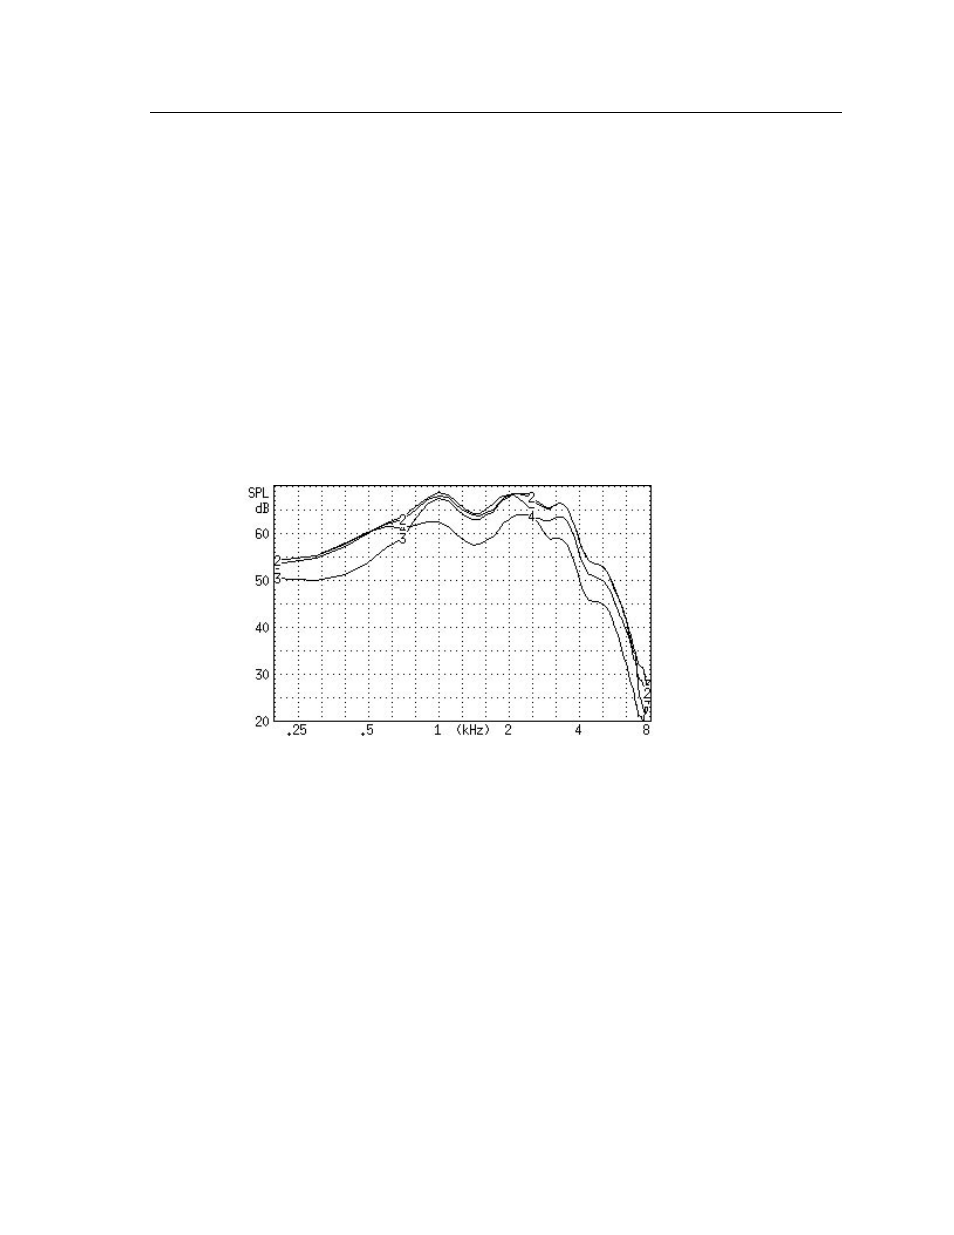
Figure 6.5.3—Using the bias signal in real-ear measurements. CRV 2–5 were measured using
bias signal frequencies of no bias, 500 Hz, 2000 Hz, and 4000 Hz respectively
6.5.4 Testing digital noise suppression
The comparison of the frequency response using the Composite signal and the
Digital Speech signal can be used to see how much the aid lowers its gain when
subjected to a noisy signal. This is a test of the noise suppression technology on
the hearing aid.
1. Enter the Real-ear Insertion Gain or Real-ear SPL screen, set up the patient
for real-ear measurements, and level the sound field speaker.
2. Use [F2] to select REAR 2. (Press [F2]. Use [∨, ∧] to select REAR 2. Press [>]
to complete the selection and close the menu.)
3. Use [F5] to select Digital Speech.
4. Use [∨, ∧] to set the source amplitude to 65 dB SPL.