4 changing power specifications, 5 adjustment, Caution – Furuno FMD-8010 User Manual
Page 45
3 – 7
3) Unplug connectors on the POWER Board
and remove the board.
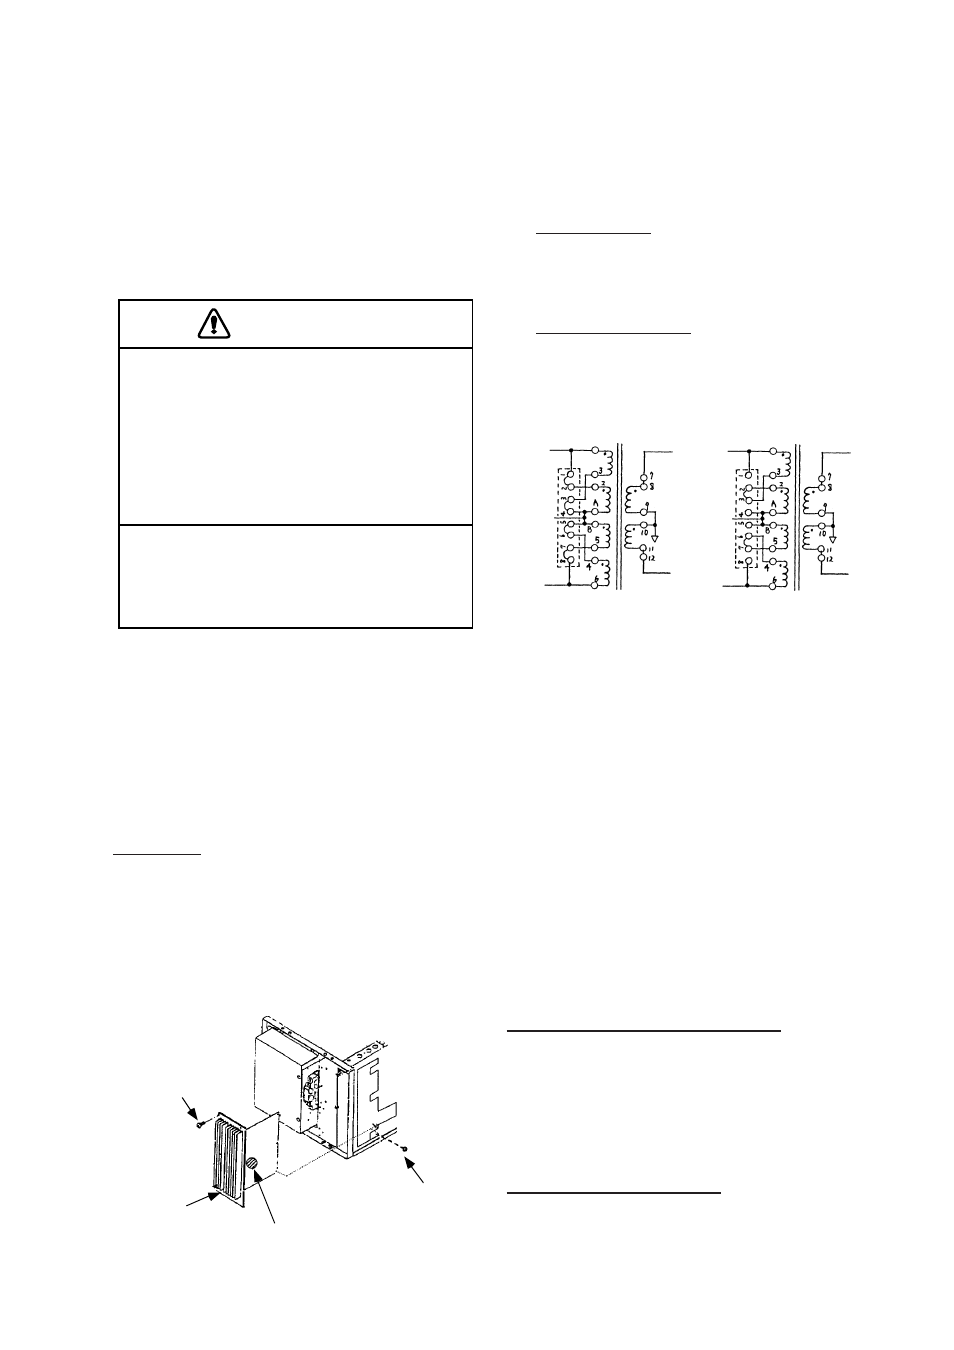
4) Attach jumper wires as shown in below.
Jumper JP1 is on underside of the trans-
former.
12V DC spec.
Attach jumper wires between 1-2, 3-
4, 5-6, and 7-8.
24V/32V DC spec.
Attach jumper wires between 2-3 and
6-7.
Figure 3-11 Location of
jumper JP1 on transformer
5) Change fuse as follows.
12V DC spec.: 20A
24V/32V DC spec.: 10A
6) Reassemble the power section.
3.5 Adjustment
Working with the INSTALL menus
Displaying the INSTALL menus
Press the [MENU] key about two seconds to
display the INITIAL menu. Select INSTALL
on the INITIAL2 menu and press the [EN-
TER] key.
Selecting items on menus
1) Operate the VRM or EBL control to select
menu.
3.4 Changing Power
specifications
This remote display can be powered by 12V,
24V or 32V power. Power specification can
be changed from 12V to 24V/32V and vice
versa by attaching jumper wire JP1 and chang-
ing the power fuse F1351.
Input voltage rating (at terminal
board in display unit)
12V DC: 10.2 to 15V DC
24V/32V DC: 20.4 to 41.6V DC
Procedure
1) Remove the display cover.
2) Remove rear panel of display unit by un-
fastening five screws. Unfasten three
screws securing the POWER Board.
Figure 3-10 Display unit, rear view
Power
section
M4 x 10
(5 pcs.)
JP1
M3 x 3
(3 pcs.)
CAUTION
Confirm that the power supply is compa-
tible with the voltage rating of the equip-
ment.
Connection to a wrong power supply can
cause fire or equipment damage. Voltage
rating appears on the label at the rear of the
equipment.
Use the proper fuse.
Use of a wrong fuse can cause fire or equip-
ment damage.
TI-9228 TI-9228
JP1
JP1
12V spec. 24V/32V spec.