2 wiring – Furuno FMD-8010 User Manual
Page 40
3 – 2
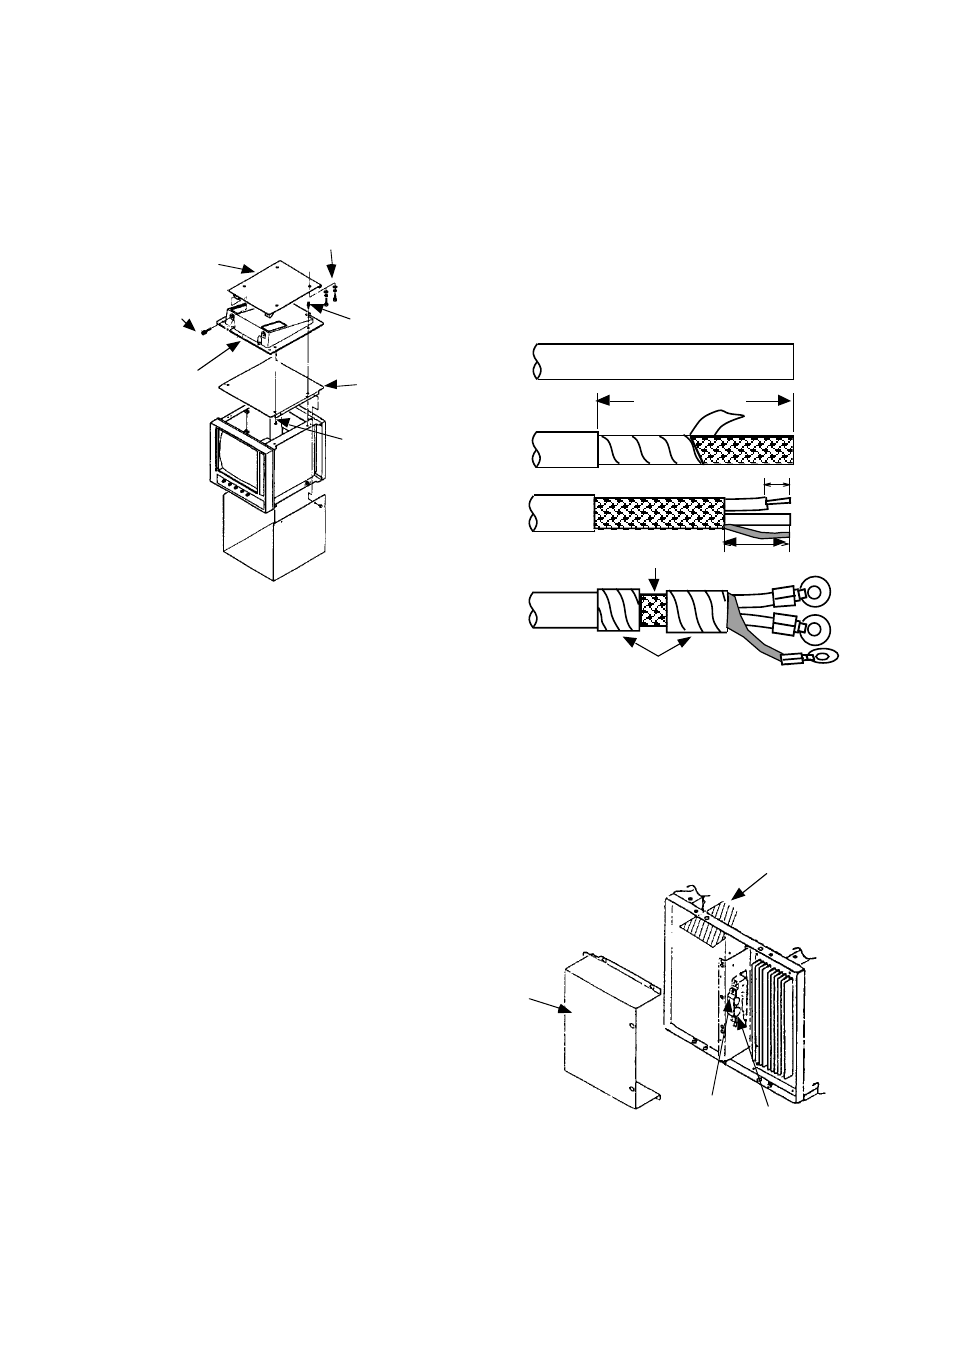
Fabricating the power cable CVV-S
8 x 2C (optional supply)
1) Remove the vinyl sheath by 40 mm.
2) Unravel the braided shield to expose the
cores.
3) Remove insulation of cores by about 10
mm.
4) Fix crimp-on lugs to the cores and braided
shield.
Figure 3-3 How to fabricate the power
cable (CVV-S 8 x 2C)
Laying cables inside the display
unit
Figure 3-4 Display unit, rear
view, cover removed
Overhead mounting
1) Referring to Figure 3-2, change the loca-
tion of the fixing plate, mounting base, bot-
tom plate and cover to mount the unit on
the overhead.
Figure 3-2 Display unit overhead mounting
3.2 Wiring
At least two cables are terminated at the dis-
play unit: the signal cable and the power cable.
The signal cable, which is available in lengths
of 5 meters, 10 meters or 15 meters, comes
prefitted with a connector for connection to
the display unit.
Proper grounding of cables cannot be stressed
enough; be sure to ground the shield of cables
by the cable clamp.
ø9 coach screws
or M10 bolts
Hex screw
Bottom
plate
M3 x 6 screw
(4 pcs.)
Mounting
base
M8 x 40 bolt
(2 pcs.)
Fixing
plate
25 mm
Clamp here
Taping
10mm
(a)
(b)
(c)
(d)
CVV-S 8X2C
Approx. 60 mm
Cover
SPU Board
Cable
clamp
Cable
clamping
plate