Parts list supplied with the mount, Installation guide – Pelco IME3ICM-E In-Ceiling Mount for Sarix Enhanced 3 Series Cameras User Manual
Page 16
16
C6644M (2/20)
PENDANT INSTALLATION WITH IME3PM-E (NOT SUPPLIED) AND WMVE-SW (NOT
SUPPLIED)
PARTS LIST SUPPLIED WITH THE MOUNT
INSTALLATION GUIDE
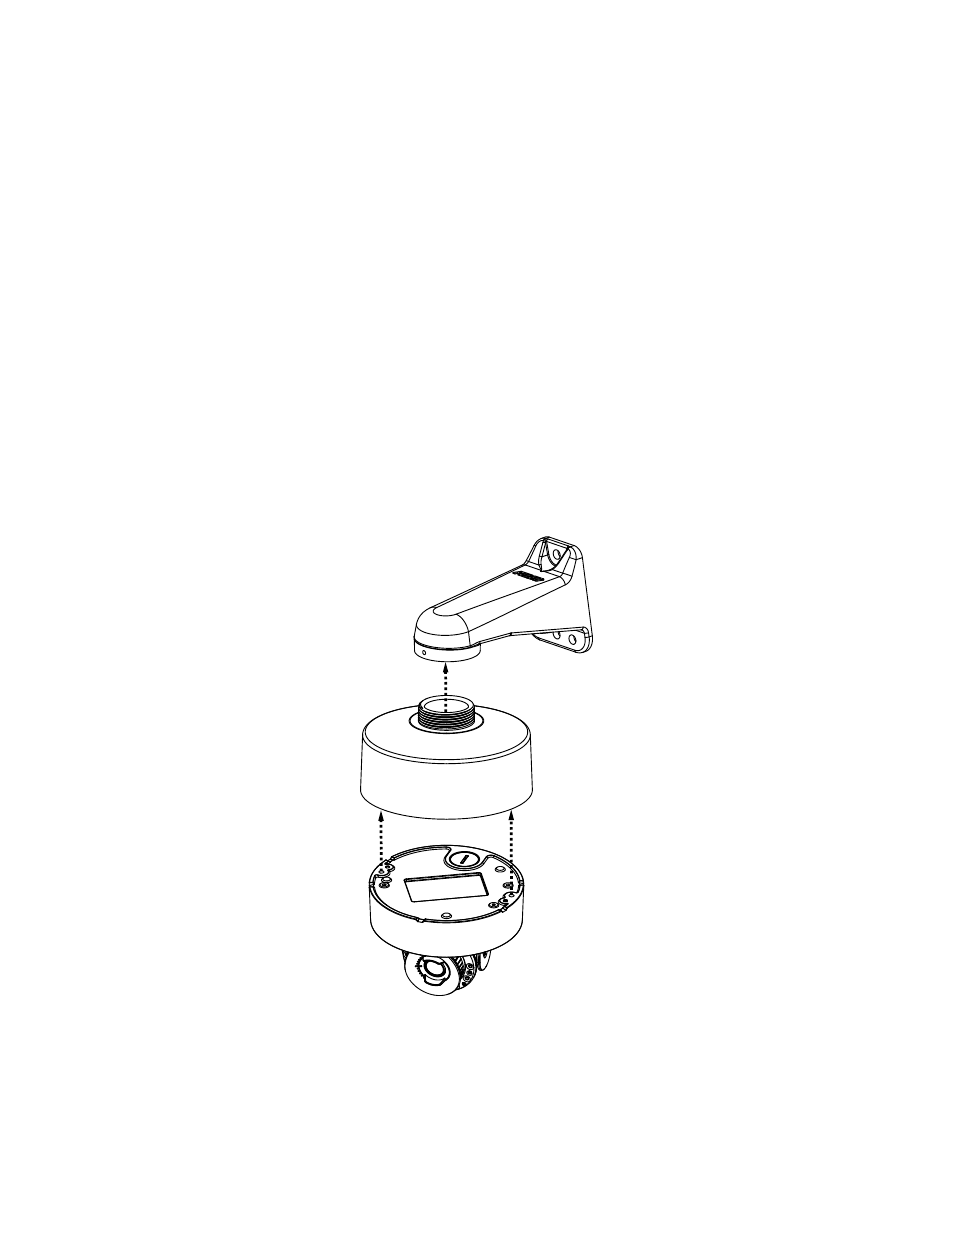
The pendant cap can be installed to 1-1/2” NPT pipe or a 1-1/2” NPT wall mount arm like the WMVE-SW (not supplied). Cabling should be pulled
through the pipe or wall mount arm prior to attaching the pendant cap to it.
10. Apply grease or Teflon tape to the pendant threads.
CAUTION:
Threads may be sharp. Wear protective gloves when applying Teflon tape or grease.
11. Pull the wiring through the hole on the top of the pendant cap.
12. Screw on the pendant cap to the pipe or WMVE-SW wall mount (refer to WMVE-SW installation manual on pelco.com for installing the
wall mount arm).
13. Feed the cables into the camera backbox. The supplied grommet must be used to maintain ingress protection. Refer to the Conduit Plug
Section for feeding the cables through the grommet and into the backbox.
14. Place the camera back box into the pendant cap. Attach the backbox to the pendant cap with the two M4x20mm screws (supplied).
Figure 8.
Dome Arm and Pendant
15. Refer to Connecting the Cables, Positioning the Camera, and Completing the Camera Installation sections before proceeding.
Qty Description
1
Pendant cap
2
M4 x 20 mm Phillips screws