Installation, Installing the camera, Preparing the camera for installation – Pelco IME3ICM-E In-Ceiling Mount for Sarix Enhanced 3 Series Cameras User Manual
Page 13
13
C6644M (2/20)
Installation
INSTALLING THE CAMERA
You can install the Sarix IME Series dome cameras to a solid surface (wall or ceiling) out of the box. Additionally, the following installation
methods can be used with the compatible Pelco mounts (not supplied):
•
Installation on a wall or a fixed ceiling. Refer to Surface Mount: Installation to a wall/ceiling or to an outlet box with IME3EBAP-E (not
supplied).
•
Installation in a suspended ceiling or a fixed ceiling. Refer to In-Ceiling Installation: with IME3ICM-E (not supplied).
•
Installation using a pendant mount. Refer to Pendant Installation: With WMVE-SW (not supplied) and IME3PM-E (not supplied).
NOTE:
The IME3EBAP-E will attach the dome camera to a single gang, double gang, or 4” square outlet box.
PREPARING THE CAMERA FOR INSTALLATION
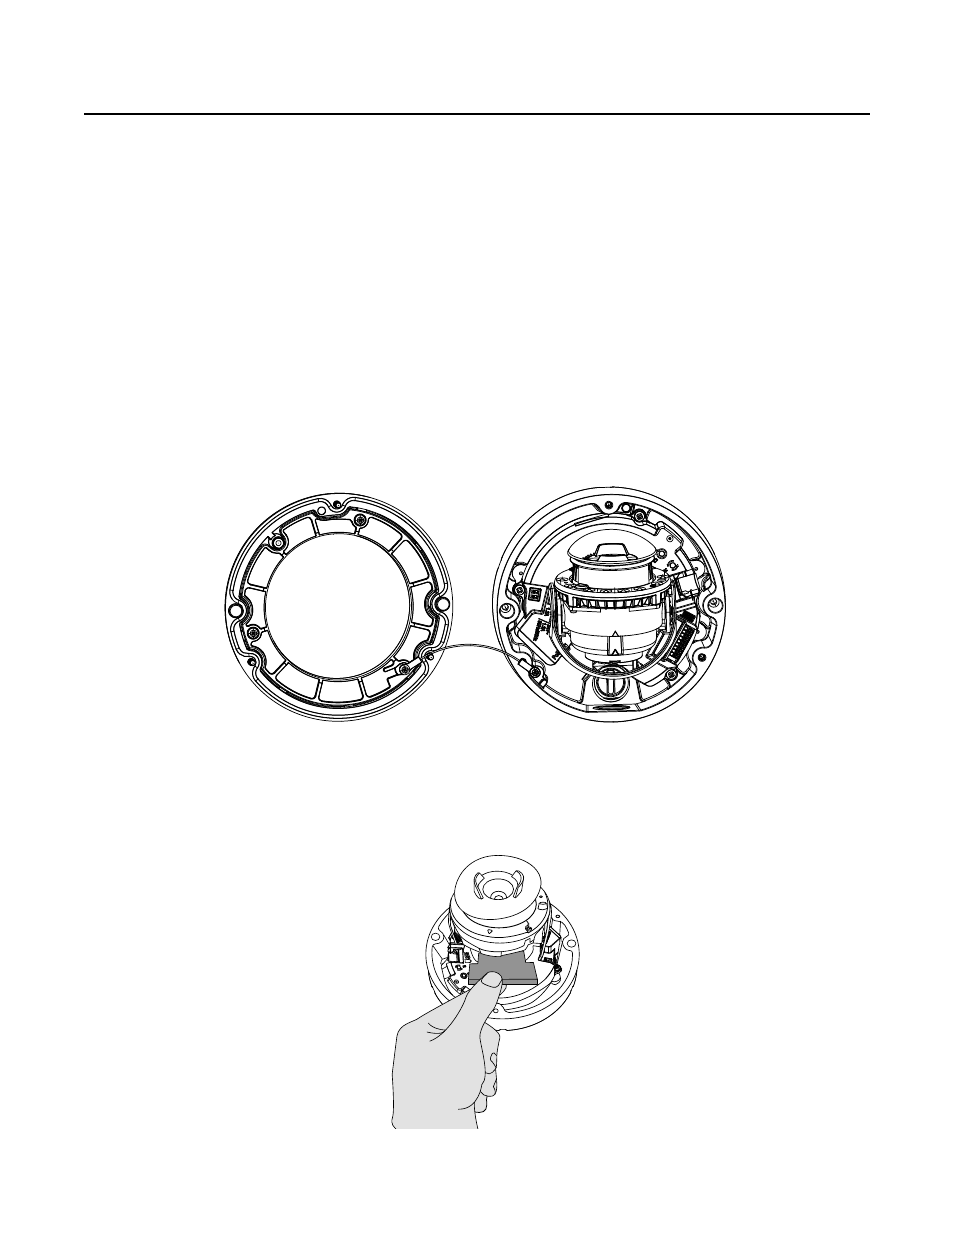
1.
On a bench, loosen the three screws on the Lower Dome with the T20 security L-Key (supplied).
2.
Gently separate the Lower Dome from the backbox. (Optional) Remove the Lower Dome from the backbox by unscrewing the safety lanyard
from the backbox. Set aside for later: Completing the Camera Installation.
NOTE:
Leave the protective film on the dome to protect it from scratches.
Figure 4.
Safety Lanyard
3.
(Optional) Remove the camera module from the backbox by loosening the three camera module screws. Set aside for later: Completing the
Camera Installation.
4.
Remove the foam insert from the camera module body. The foam insert is for protection during shipping and must be removed before use.
Figure 5.
Foam Insert