Spike installation – Wheatheart Self-Propelled Post Pounder Kit User Manual
Page 23
W
HEATHEART
- S
ELF
-P
ROPELLED
P
OST
P
OUNDER
K
IT
4. I
NSTALLATION
T
RAILER
P
OST
P
OUNDER
M
ODEL
4.4. S
PIKE
I
NSTALLATION
IM12 R3
23
1. Install the wheel arm mount over the tie-down handle on the hitch at 16-1/2”
from the front of the hitch. Note that the front 1/2” x 4-1/16” x 5-1/2” u-bolt is
inside the tie-down handle, as shown in STEP A in Figure 4.5. Make sure it is
square to the hitch and tighten with two 1/2” locknuts.
2. Install the right and left springs on the wheel arm mount as shown in STEP B
in Figure 4.5 and connect with hardware shown.
3. Install the wheel arm over the springs as shown in Step C in Figure 4.5 and
secure with a 3/4” x 6” bolt and 3/4” locknut. Make sure the wheel rotates
freely. If it hits the hitch, move the mount forward so the wheel will
clear.
4. Secure the assembly in the working position as shown in STEP D in Figure
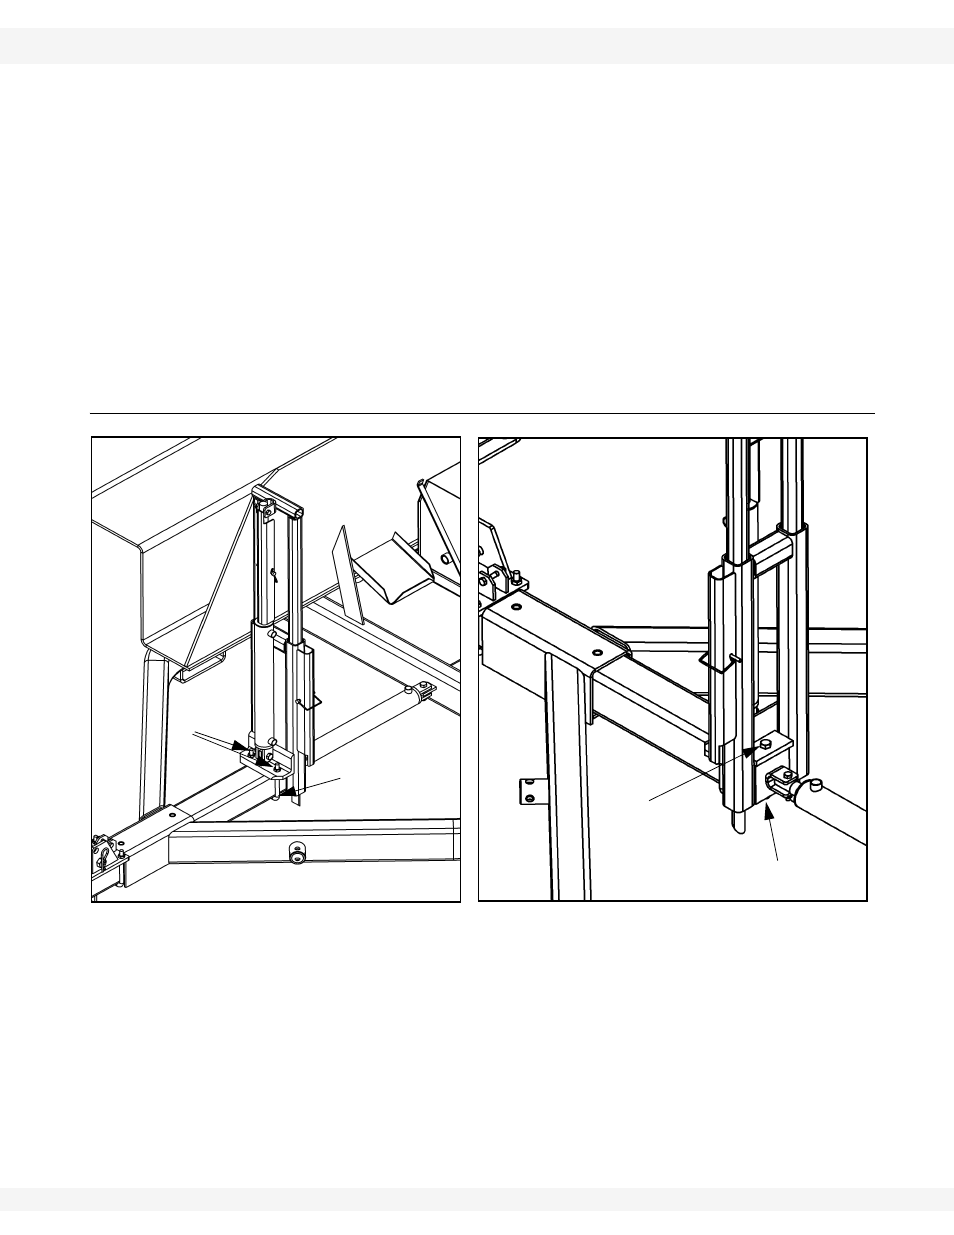
4.4. SPIKE INSTALLATION
Figure 4.6
1. Remove
the
bolt
from the hitch tube.
2. Place the spike on the hitch tube on the back
and line up the holes. Put the
1/2” x 5” bolt through the hole (Figure 4.6).
3. Insert 1/2” x 4” x 5” u-bolt in the front holes and tighten the 1/2” nuts.
1/2” X 5” BOLT
1/2” LOCKNUT
1/2”x1”x5”
U-BOLT
1/2”
LOCKNUT