Operation – INCRA Build-It STS Mortiser User Manual
Page 6
INCRA Build-It STS Mortiser Manual
Page 5
Operation
Set Length of Slot
To set the length of your slot, raise the cutter through
the slotted hole in the throat plate panel and slide
the faceplate assembly up to (but not touching)
the cutter. Before tightening the faceplate assembly
clamping knobs, make sure that it is pressed securely
against the T-Track fence. Slide a faceplate stop into
each end of the T-Track on the faceplate. In setting
the stops, you will always use the 8” mark on the faceplate
scale to represent the “center” of your slot length. To
set up for a 2” long slot, set
the outfeed faceplate stop
to 7” and the infeed stop
to 9”. In other words, the
distance between the two
stops is equal to your slot
length,
Fig. 18.
Fig.18
Setting Slot Length
For typical slot mortising there are four steps to locating a slot on your work piece.
Step 1
Fig.17
Slot Length
Fig.16
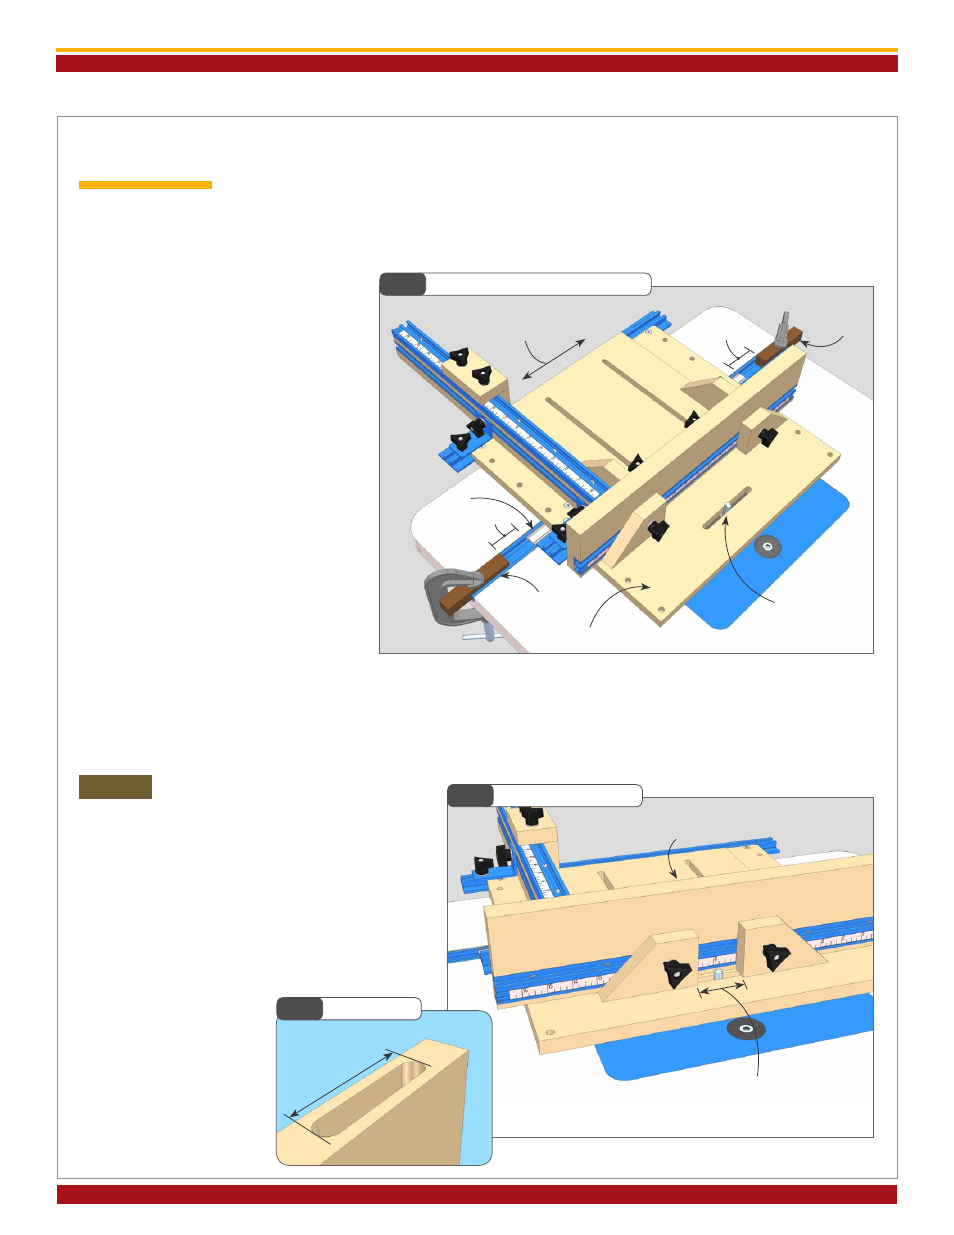
Cut Slot Through Throat Plate
Slide STS Jig between two stop
blocks as you slowly raise cutter
2”
2”
Miter Slider
3
/
8
” straight bit
Build-It “throat plate”
outfeed
stop block
infeed
stop block
For your first mortise, you’ll cut a slot about 4” long through the “throat plate” Build-It Panel that overlaps the cutter at
your router table. Since most loose tenon applications in
3
/
4
” stock work well with a
3
/
8
” tenon, we’ll cut the slot with
a
3
/
8
” straight bit. (The longer the cutter
length, the deeper you’ll be able to cut your
slot mortises later on.) Install the cutter and
lower the bit below your tabletop. Place the
STS Mortiser on your router table and center
it on the length of your miter slot. Now
clamp a
3
/
4
” x
3
/
4
” x 3” block of wood into
the infeed and outfeed ends of the miter slot
2” from the ends of the Miter Slider,
Fig. 16.
Slide the right angle faceplate assembly and
T-Track fence away from the area directly
above the cutter and turn the router on.
Use your router lift crank handle to raise
the cutter
1
/
16
” per pass as you slide the jig
back and forth between the two stop blocks
clamped to the table.
CAUTION: ALWAYS START AND STOP ANY
SLOT CUTTING OPERATION WITH THE
JIG POSITIONED AGAINST THE OUTFEED
STOP BLOCK.
When you have cut through the throat plate, turn off the router. The throat plate provides support for your
work piece and zero clearance for tear out control. If you choose to cut mortises with a larger or smaller diameter cutter,
additional throat plates can be produced. Your new STS Mortiser is now ready to use.
set distance between stops equal
to desired slot length
(use 8” mark on scale as center)
slide faceplate to cutter and clamp in place