INCRA Build-It STS Mortiser User Manual
Page 4
INCRA Build-It STS Mortiser Manual
Page 3
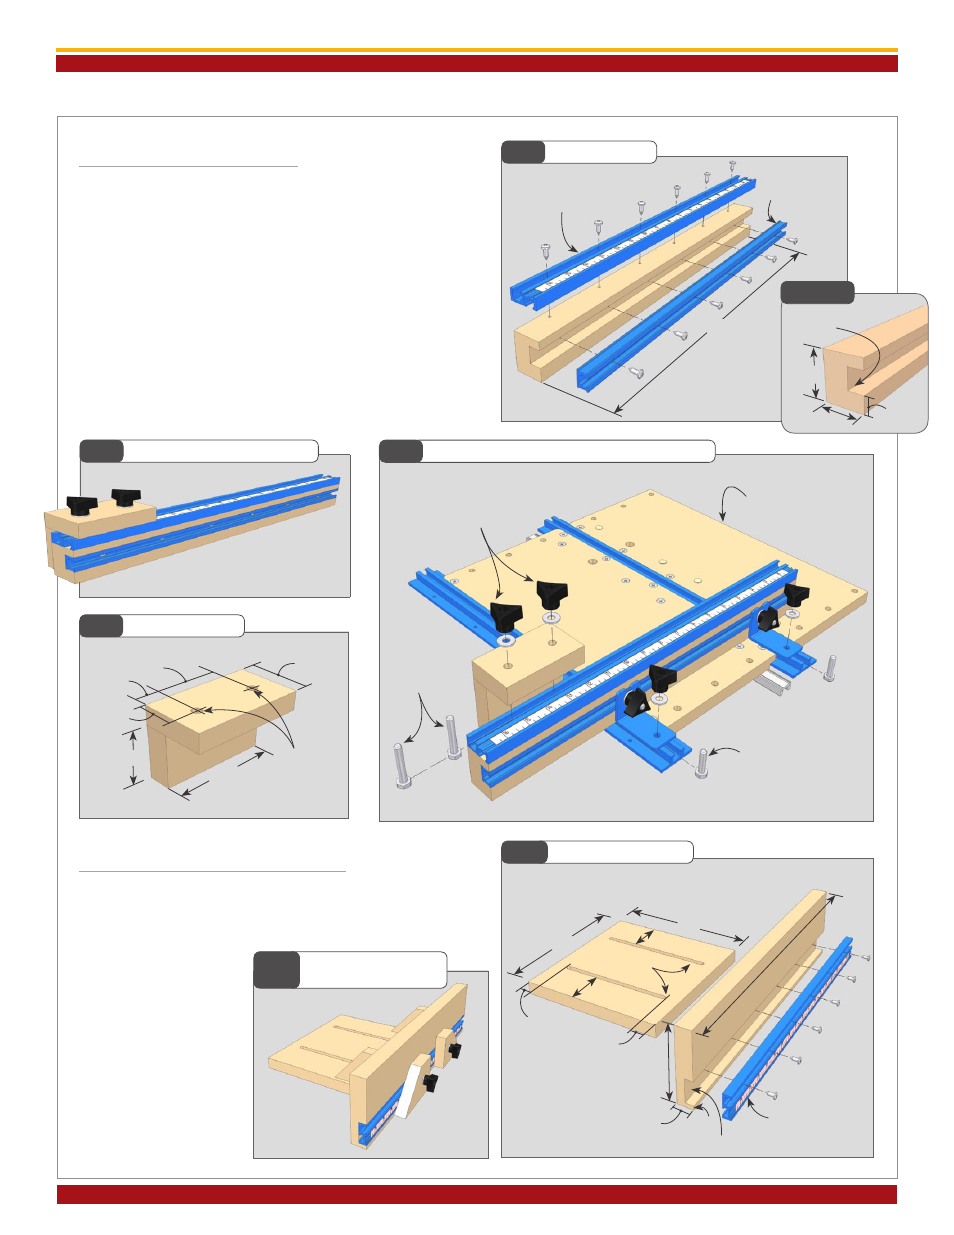
5. Starting with a 10” x 10” piece of
3
/
4
” plywood, cut
5
/
16
”
wide x 8” long slots through the material as shown in
Fig. 11.
3. Prepare a straight, flat piece of hardwood to the dimensions
shown in
Fig. 6 and Detail 6A. Cut the groove shown and
install the T-Track and T-Track Plus. Build the stop positioner
as shown in
Fig. 8 using
3
/
4
” hardwood.
4. Attach the stop positioner to the fence using
1
/
4
-20 x 1-
1
/
2
”
hex bolts with washers and clamping knobs, then attach the
fence to the Build-It Platform using (2) Build-It Brackets with
the included
1
/
4
-20 x 1” hex bolts, washers and clamping knobs.
Square the fence to the “cut” edge of the Built-It Platform
and tighten the clamping knobs,
Fig. 9.
Fence and Stop Positioner
Fig. 6
T-Track Fence
Detail 6A
Fig.8
Stop Positioner
Right Angle Faceplate Assembly
Fig.9
Add Fence and Stop to Build-It Platform
Fig.11
Faceplate and Base
Fig.10
Right Angle
Faceplate Assembly
On a 4” x 18” piece of
1” thick hardwood, cut
the groove as shown
and inlay an 18” T-Track
Plus.
Fasten with the #8 x
1
/
2
” pan head Phillips
screws.
18” T-Track Plus
18” T-Track
Regular
3
/
4
” wide x
1
/
2
” deep
groove
1
3
/
4
”
1
1
/
4
”
5
/
8
”
5
/
16
”
dia holes
2
1
/
16
”
3
/
4
”
2”
1
1
/
8
”
2
3
/
16
”
square fence to
this edge of platform
clamping knobs
1
/
4
”- 20 x 1
1
/
2
”
hex bolts
1
/
4
”-20 x 1”
hex bolts (4)
18” T-Track Plus
1
/
4
”
1
1
/
4
” wide x
1
/
2
” deep groove
10”
10”
2
1
/
2
”
2
1
/
2
”
1”
1”
5
/
16
” wide
slots
1”
4”
Fig.7
Fence and Stop Positioner
18”
3
1
/
2
”
18”