Heat & Glo Fireplace SL-550TV-IPI-E User Manual
Page 35
Heat & Glo • SL-550 / 750 / 950TV-IPI-E • 2119-900 Rev. J • 12/09
35
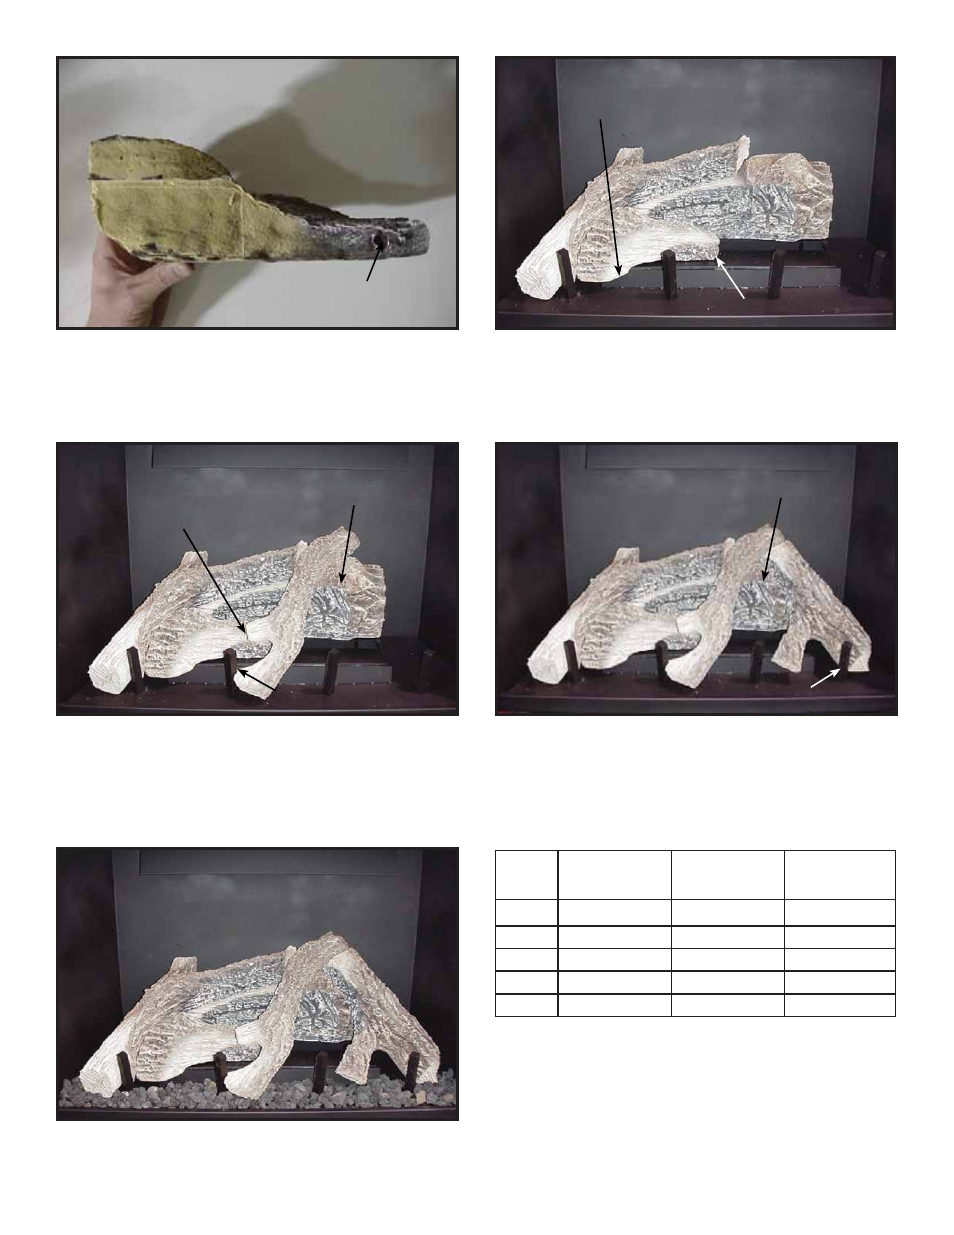
Figure 7
Figure 7
Log #3: Locate the pin hole on the underside of log #3.
Mate the pin hole with the shoulder screw located on the
burner top. Push the left end of log # 3 toward the back of
the fi rebox until it touches the lava rock retainer.
3
3
Mate shoulder screw with pin hole
Mate shoulder screw with pin hole
3
3
Figure 6
Figure 6
PIN HOLE
PIN HOLE
Figure 8
Figure 8
Bump
Bump
Log #4: Locate the notch at the end of log # 4. Mate the
notch with the tine as shown above. The top end of log #4
should rest between the end of log #2, and the bump located
on log #1. Swing the knot on log # 4 towards log #3.
4
4
Swing knot towards log #3
Swing knot towards log #3
Mate notch with grate tine
Mate notch with grate tine
Figure 9
Figure 9
Log #5: Locate the notch at the end of log # 5. Mate the
notch with the far right grate tine. The top end of log # 5
should rest on the right side of the “bump” as shown above.
You may need to move log #4 slightly.
5
5
Bump
Bump
Mate notch with grate tine
Mate notch with grate tine
Lava Rock
Lava Rock
Figure 10
Figure 10
Step #6: Apply the supplied lava rock as shown above.
Take care to ensure that no lava rock is placed past the line
indicated in Figure 1.
SL-550TR-E
SL-550TV-E
SL-750TR-E
SL-750TV-E
SL-950TR-E
SL-950TV-E
Log 1
SRV2115-701
SRV2118-701
SRV2121-701
Log 2
SRV2115-702
SRV2118-702
SRV2121-702
Log 3
SRV2115-703
SRV2118-703
SRV2118-703
Log 4
SRV2115-704
SRV2118-704
SRV2121-704
Log 5
SRV2115-705
SRV2118-705
SRV2121-705