Audio setup screen, Figure 3-39, Port setup window – Honeywell HRXD9 User Manual
Page 64: Figure 3-40
Configuration
64
Figure 3-39
Port Setup Window
9.
Configure the port’s setting based on the PTZ camera manufacturer’s instructions.
10. You can save your Camera changes by highlighting Save and pressing
.
Selecting Cancel exits the screen without saving the changes.
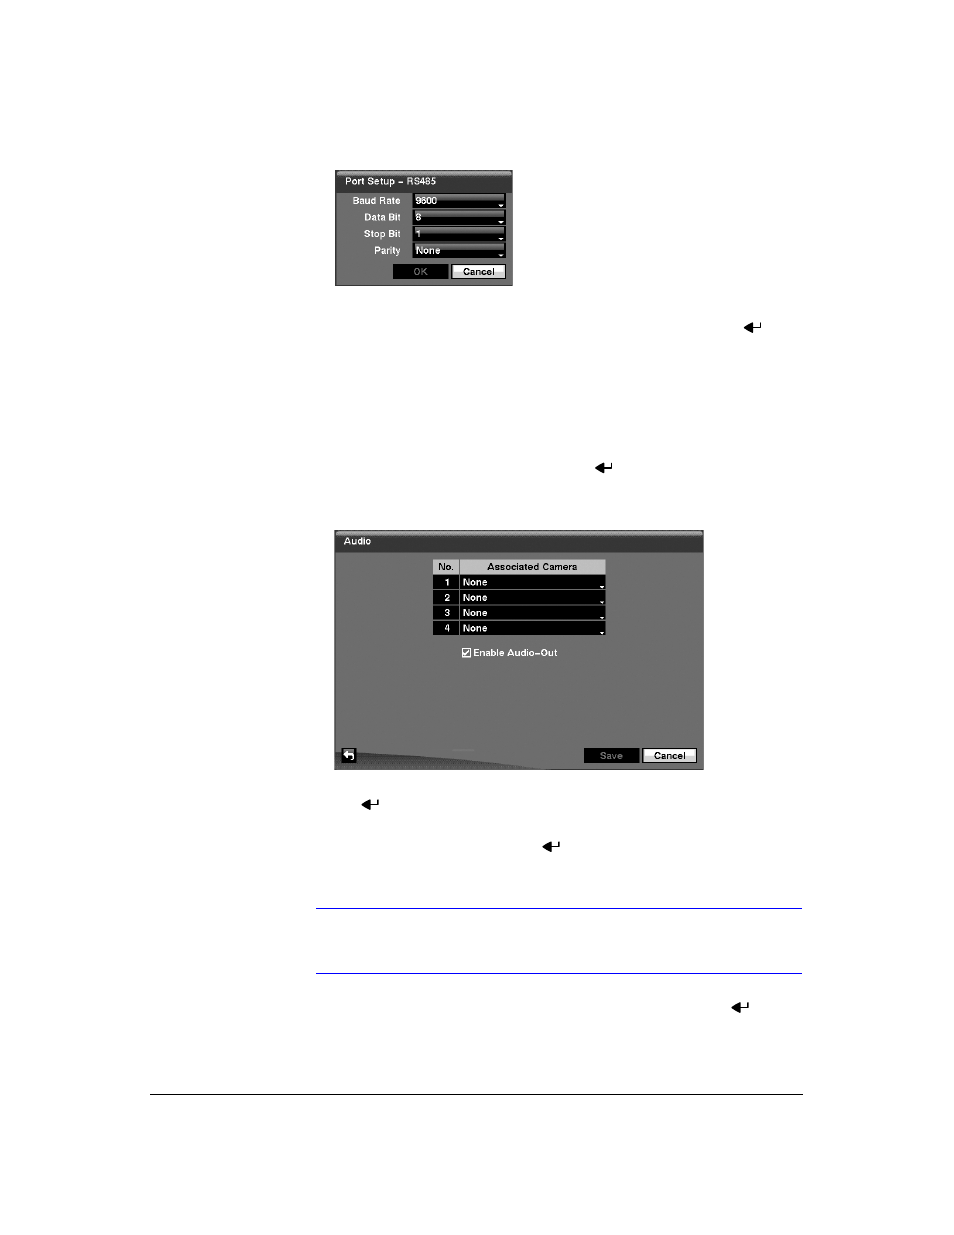
Audio Setup Screen
1.
Highlight Audio in the Devices menu and press
. The Audio setup screen
) appears.
Figure 3-40
Audio Setup Screen
2.
The DVR can record up to four audio inputs. Highlight the box beside the input
and press
. A list of cameras appears, and you can select which camera you
want associated with that audio input.
3.
Highlight Enable Audio-Out and press
. This toggles between enabling and
disabling audio out.
Note
The DVR will NOT record audio when the recording speed is set
to less than 1 ips.
4.
You can save your Audio changes by highlighting Save and pressing
.
Selecting Cancel exits the screen without saving the changes.