J. glass panel assembly, Removing/replacing glass assembly – Hearth and Home Technologies IDV4833ILH User Manual
Page 47
Heatilator • ICON DV-IDV Series • 4042-575 • Rev K • 11/08
47
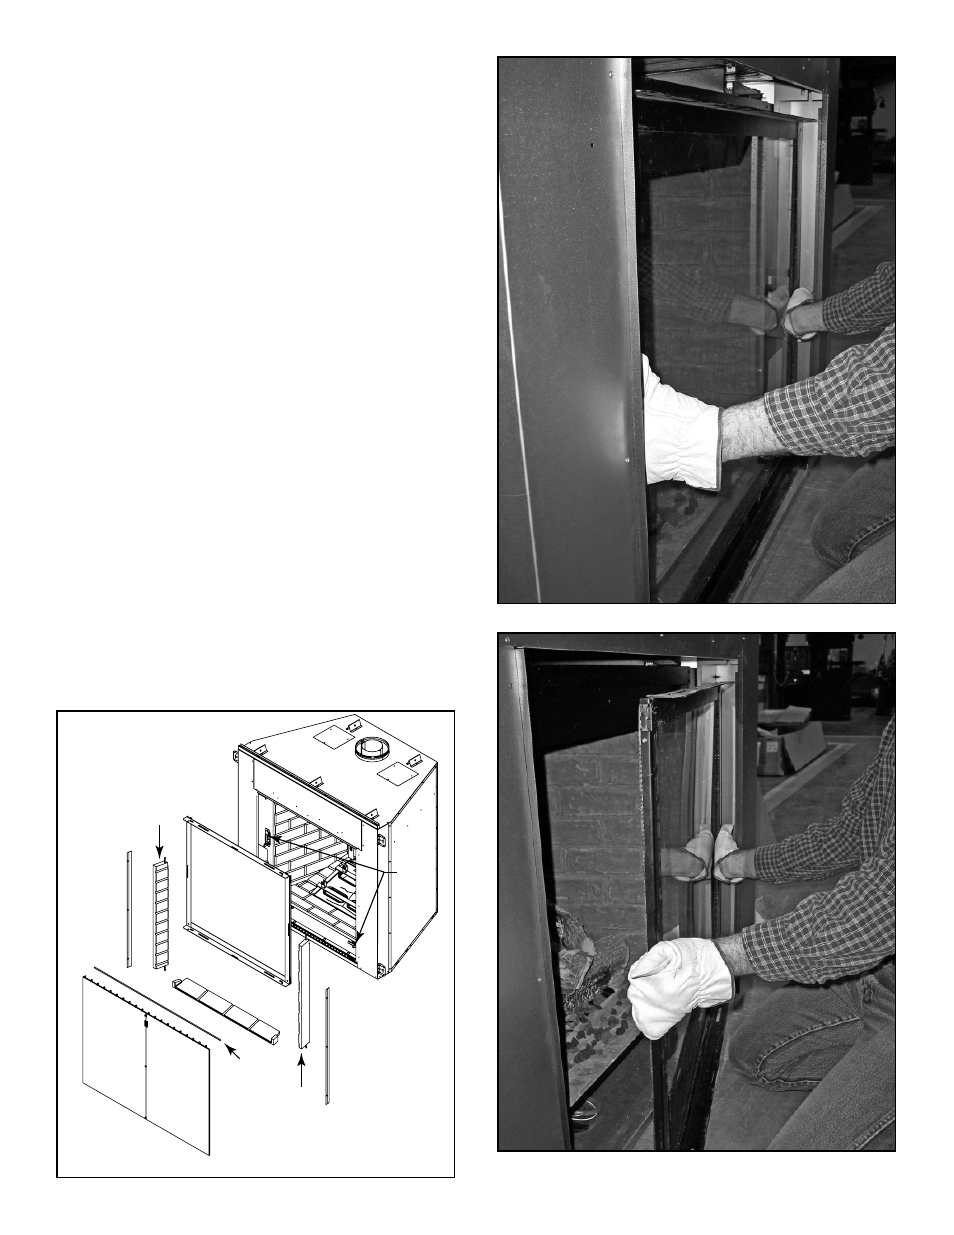
Figure 12.9 Lift Glass Frame Assembly Forward
Figure 12.10 Remove Left Side of Glass Frame First
Decorative
Screen Front
Glass Frame
Assembly
Glass
Latches
Right
Refractory
Panel
Left
Refractory
Panel
Front Hearth
Refractory
Left
Refractory
Shield
Right
Refractory
Shield
Screen
Rod
Figure 12.8 Glass Panel Assembly Removal/Replacement
J. Glass Panel Assembly
Removing/Replacing Glass Assembly
WARNING! Risk of Asphyxiation! Handle fi xed glass
assembly with care. Inspect the gasket to ensure it is
undamaged and inspect the glass for cracks, chips or
scratches.
• DO NOT strike, slam or scratch glass.
• DO NOT operate fi replace with glass removed, cracked,
broken or scratched.
• Replace as a complete assembly.
• Remove three outer refractory pieces as per instructions
in Section 12.L.
• Remove the lower decorative front face by removing the
four screws attaching the face. See Figure 12.16.
• Remove the left and right refractory shields by removing
the three screws holding each shield. See Figure
12.15.
• Remove the decorative fi rescreen mesh. Release the
screen rod from the center screen support. Remove the
right side of the screen rod from the horseshoe-shaped
cradle. Rotate the screen rod down on the right side
until there is enough clearance to remove the screen
completely. See Figures 12.11-12.14.
• Release glass latches (six in IDV4833, ten in IDV6247).
Lift glass frame assembly forward past the glass latches.
See Figure 12.9. Slide the glass to the right (into the
cavity on the right).
• Completely remove the left side of the glass from the
opening before sliding the entire glass panel from the
unit. See Figure 12.10.
• Reverse steps above to replace the glass assembly.