HP V4200 User Manual
Page 129
Removal and Replacement Procedures
Maintenance and Service Guide
5–23
✎
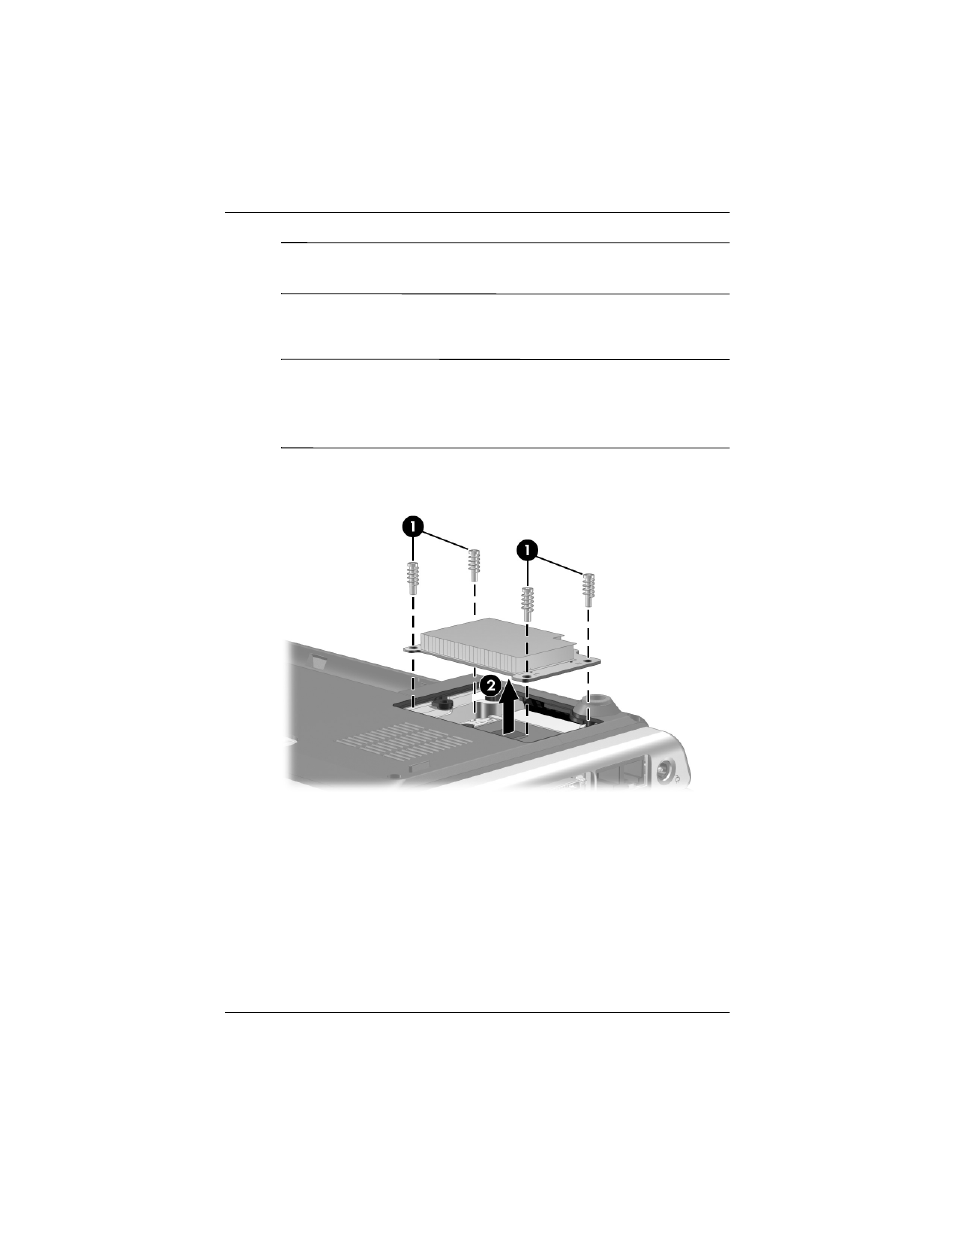
The following screws should be removed and installed in the
1, 2, 3, 4 sequence stamped on the heat sink.
5. Remove the 4 Phillips PM2.0×12.0 spring-loaded shoulder
screws 1 that secure the heat sink to the computer.
✎
Due to the adhesive quality of the thermal paste located
between the heat sink and processor, it may be necessary to
move the heat sink from side to side to detach the heat sink
from the processor.
6. Remove the heat sink 2.
Removing the Heat Sink
See also other documents in the category HP Notebooks:
- EliteBook 8440p (169 pages)
- ZT1100 (58 pages)
- XZ100 (104 pages)
- 110 (104 pages)
- ze2000 (213 pages)
- OmniBook 2000 Notebook PC (70 pages)
- XE3 (116 pages)
- 1103 (101 pages)
- ze4200 (126 pages)
- TC1 100 (17 pages)
- 15 (101 pages)
- XB4000 (43 pages)
- ze2300 (239 pages)
- Laptop Docking Station (70 pages)
- VXI E1432A (222 pages)
- V6115TU (22 pages)
- 210 (67 pages)
- zt3000 (186 pages)
- XB3000 (79 pages)
- xe310 (12 pages)
- COMPAQ TC4400 (219 pages)
- 367055-002 (26 pages)
- Compaq Tablet PC TC1 100 (23 pages)
- 463777-001 (42 pages)
- zx5000 (272 pages)
- VC133 (38 pages)
- USB Media Docking Station VY847AA#ABA (1 page)
- ze4100 (5 pages)
- 2000 (118 pages)
- ZE4900 (182 pages)
- Compaq Tablet PC TC1100HP (22 pages)
- EliteBook 6930p Notebook PC (35 pages)
- Chromebook 11 G2 (23 pages)
- EliteBook 2570p Notebook PC (107 pages)
- EliteBook 2570p Notebook PC (106 pages)
- EliteBook Folio 9470M-Notebook-PC (33 pages)
- ProBook 6470b Notebook-PC (113 pages)
- ProBook 6470b Notebook-PC (126 pages)
- EliteBook 2540p Notebook PC (177 pages)
- EliteBook 2540p Notebook PC (23 pages)
- EliteBook 2540p Notebook PC (175 pages)
- EliteBook 2540p Notebook PC (173 pages)
- ProBook 6460B Notebook-PC (45 pages)
- mt41 Mobile Thin Client (90 pages)