Healthrider HREL2005.0 User Manual
Page 5
5
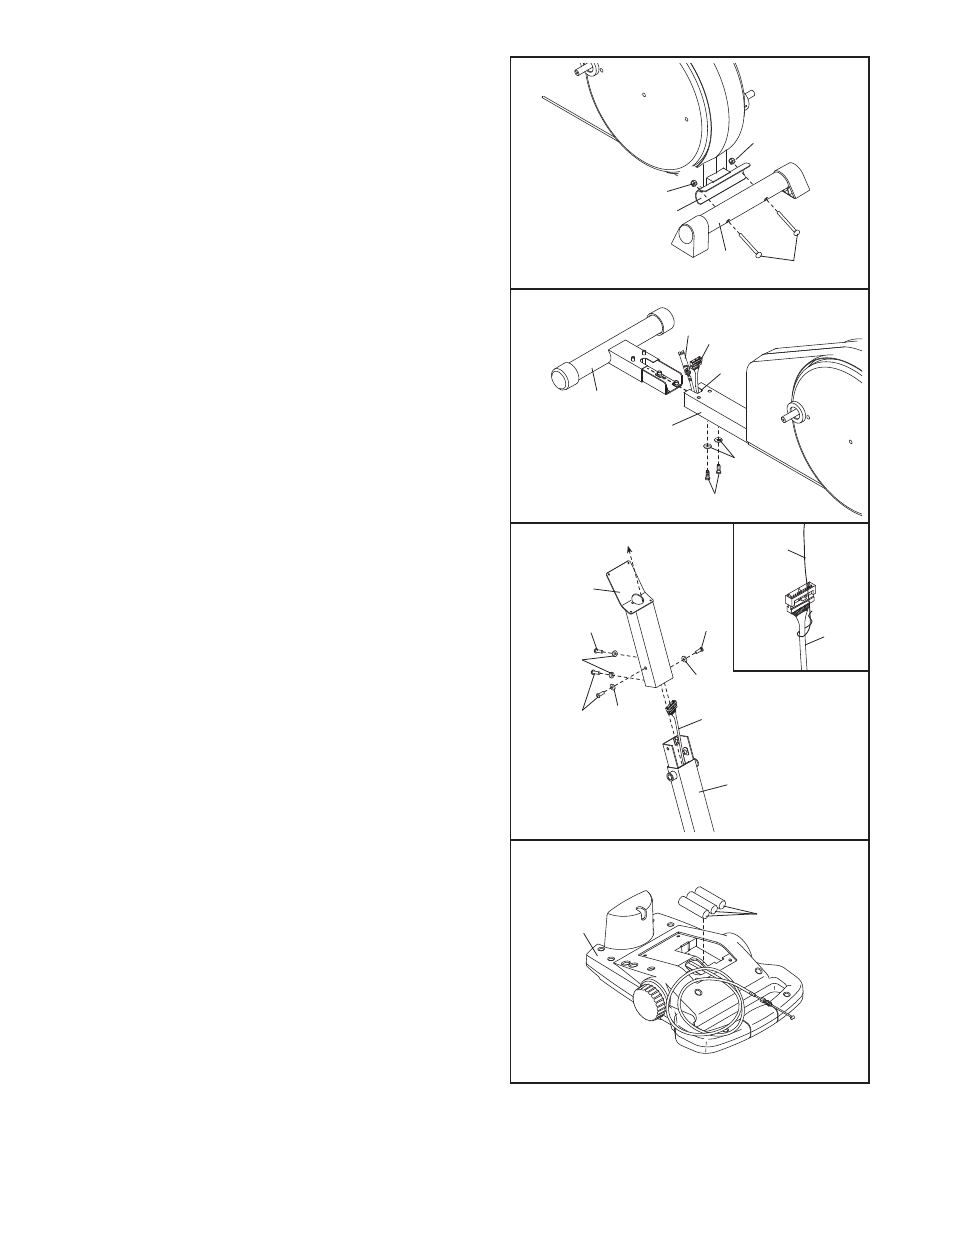
1. Attach the Rear Stabilizer (4) to the Frame (1) with
two M10 x 75mm Carriage Bolts (34) and two M10
Nylon Locknuts (29).
2. Hold the Lower Cable (15) and the Lower Wire
Harness (65) in the indicated slot in the Frame (1),
and insert the Front Stabilizer (3) into the Frame. Make
sure that the Front Stabilizer is oriented as
shown. Be careful to avoid pinching the Lower
Cable and the Lower Wire Harness. Carefully tip
the elliptical exerciser onto one side, and attach the
Front Stabilizer with two M10 x 25mm Button Screws
(21) and two M10 Split Washers (67). Do not tighten
the Button Screws yet.
2
34
4
1
29
29
21
3
15
67
Slot
1
65
3. Hold the Console Bracket (26) near the Upright (2),
and locate the wire extending from the bottom of the
Console Bracket. Carefully pull the upper end of the
Upper Wire Harness (55) to remove any slack, and tie
the wire around the Upper Wire Harness, as shown in
the inset drawing. Carefully pull the wire up through
the Console Bracket until the Upper Wire Harness is
extending from the top of the Console Bracket. Then,
untie the wire and discard it.
Insert the Console Bracket (26) into the Upright (2).
Be careful to avoid pinching the Upper Wire
Harness (55). Attach the Console Bracket with four
M8 x 25mm Button Screws (51) and four M8 Split
Washers (49).
26
55
2
49
49
49
51
51
51
55
Wire
3
5
Batteries
4
4. The Console (5) requires three “AA” batteries (not
included); alkaline batteries are recommended. Insert
three batteries into the Console; make sure that the
batteries are oriented as shown by the diagram
inside of the Console.
1