Hearth and Home Technologies Direct Vent Gas Appliance CD4842MR User Manual
Page 56
Heatilator • Caliber Mesh CD Series-SIT Valve • 4040-849 Rev J • 06/08
56
L. Install Trim
• Install optional trim/surround kits using the instructions
included with the accessory.
• Use non-combustible materials to cover the gap between
the sheet rock and the appliance (if desired).
• Do not obstruct or modify the air inlet/outlet latch
covers.
• Allow space to lower and remove bottom latch cover.
Bottom Latch Cover
(Lower Floor Cover underneath)
Firescreen
Firescreen Rod
Hood
Top Latch Cover
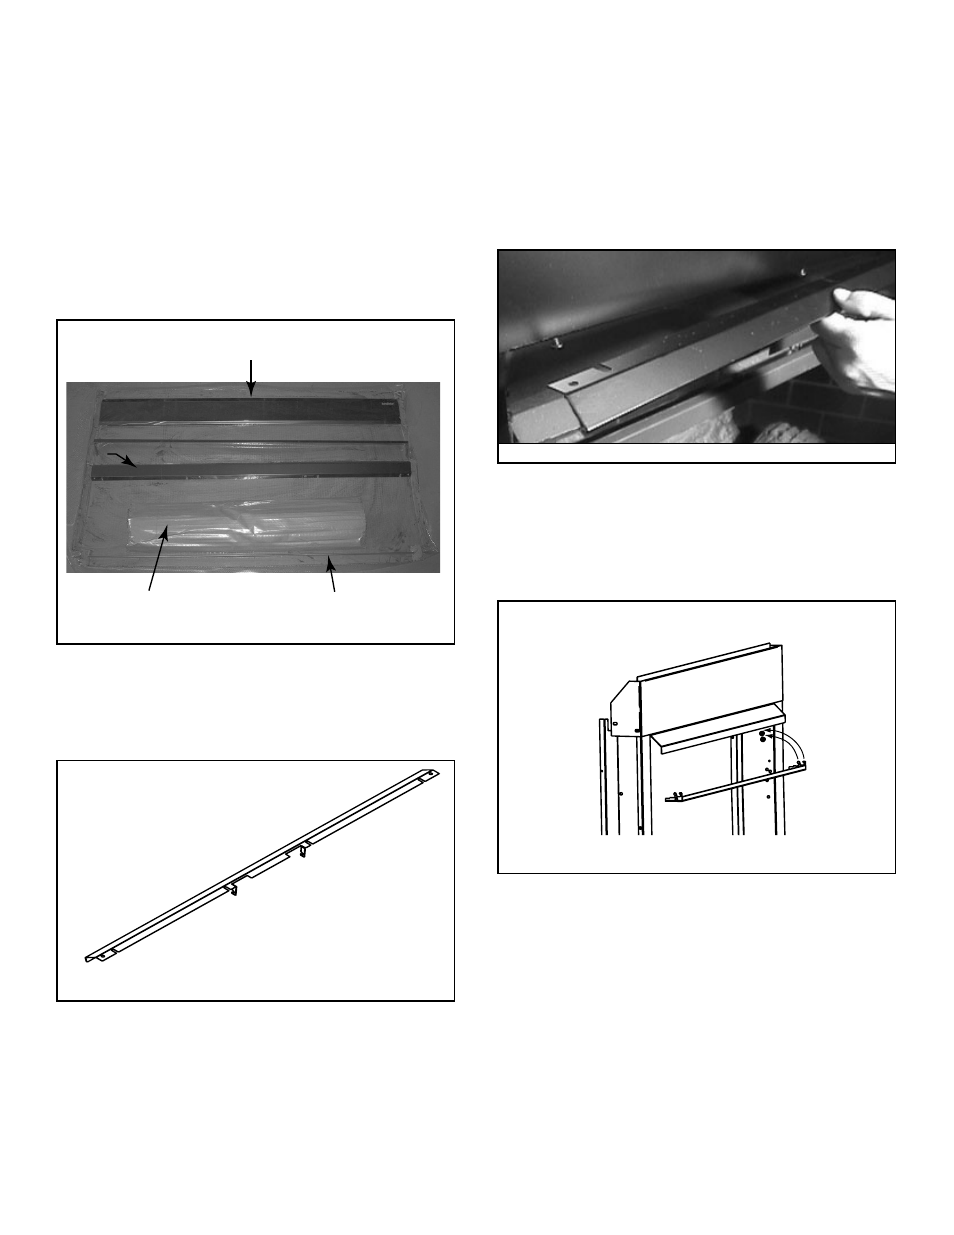
M. Install Clean Face Components
• Carefully remove components from skin pack. See
Figure 14.6 for identifi cation of components.
Install Hood
• Bend screen rod tabs down at a 90-deg. angle. See
Figure 14.7.
Figure 14.7 Screen Rod Tab
Figure 14.6 Clean Face Components/Skin Pack
Figure 14.8 Installing the Hood
• Install above the glass panel.
• Hood must be attached or a fi re hazard may result.
• Locate the four screws (for 4236) or fi ve screws (for
4842) just inside the upper section of the appliance.
• Loosen the screws, but do NOT remove.
• Position hood and slide notches over screw heads,
ensuring hood also slips into the clips.
• See Figure 14.8.
• Tighten the screws to hold hood fi rmly in place.
Install Top Latch Cover
• Insert top latch cover over existing shoulder screws.
See Figure 14.9.
• Push down until the tabs lock in place.
Figure 14.9 Installing Top Latch Cover
Install Floor Cover
• Install
fl oor cover. See Figure 14.10. Floor cover must
be installed with brake fl ange UP and going towards
components with notched end to the left of the unit.
Do not place cover on top of any components. Move
components back if necessary.
• When using the RCTS-MLT-HTL Remote for SIT Valve,
the hand tab bend must be bent down for clearance of
the solenoid.