9 warning, Burner “on” lights, Install burner grates – Thermador Masterpiece Series Gas Cooktop Use and Care Guide User Manual
Page 12: Thermador extralow, Xlo) star™ burners (sgsx and sgsxp models only)
12
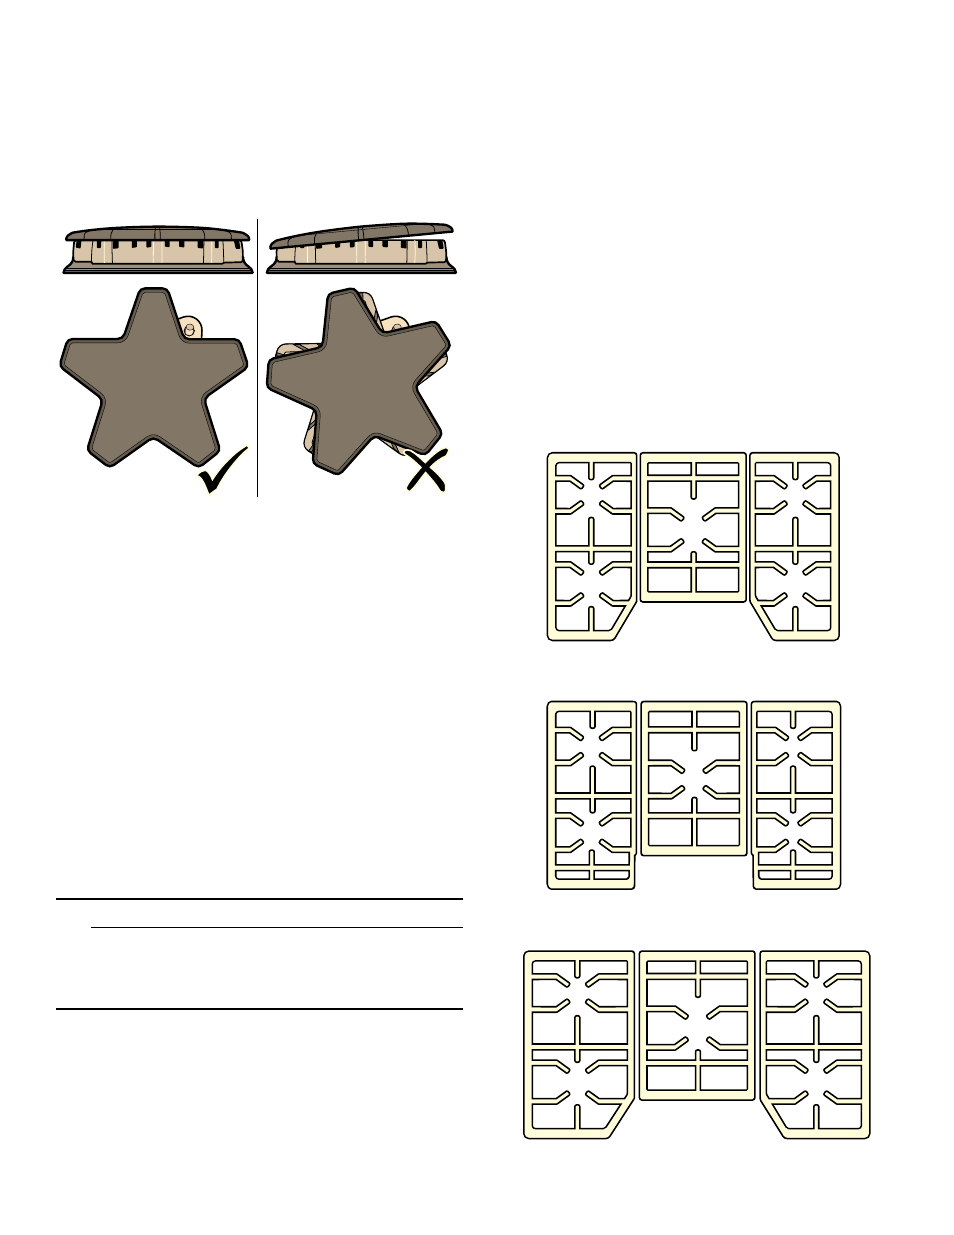
Checking Burner Cap Placement
▯
Check to make sure that there is no gap between the
burner cap and burner base. See illustration below for
correct and incorrect placements of the burner cap.
▯
You may gently try to move the burner cap from side
to side to check if it is properly placed. If properly
placed, the cap will click from side to side as the
prongs hit the groove ridge.
Thermador ExtraLow
®
(XLO) STAR™
Burners (SGSX and SGSXP models only)
The center and left front burners are enhanced with the
ExtraLow
®
(XLO
®
) feature. XLO allows the reduction of
heat even further than the Low setting in order to simmer,
poach, melt or hold cooked food without scorching or
burning.
The XLO feature has the following properties:
▯
The XLO feature will cycle the burner flame ON and
OFF when the control knob is set within one of the five
XLO settings (the time the flame is ON depends on the
knob setting).
▯
Igniters will spark during the re-ignition of the XLO
burners. There will be a slight clicking noise when this
occurs (approximately every 60 seconds).
▯
For SGSXP models only, the left side of the light ring
will turn off and the right side of the light ring will
illuminate in blue when activating the XLO setting.
9
WARNING
Do not clean or touch any of the burners when one
or both ExtraLow
®
burners are in use. When the
ExtraLow
®
burner automatically reignites, the igniter
at the burner will spark.
Burner “ON” Lights
For SGS and SGSX models:
There is an “ON” light on this cooktop. When illuminated,
it indicates at least one burner is in use.
For SGSP models:
An “ON” light corresponds with the knob for each burner
(a total of five lights). When illuminated, it indicates that
the corresponding burner is in use.
For SGSXP models:
A light ring around each knob will illuminate to indicate
that the corresponding burner is in use.
Install Burner Grates
Properly position and install each burner grate according
to each individual model as shown in the illustrations
below.
30” SGS
30” SGSP
36” SGSX