Correcting image shape with point correction – Epson Pro L30002UNL 30,000-Lumen HDR Pixel-Shift DCI 4K Laser 3LCD Large Venue Projector (White) User Manual
Page 151
151
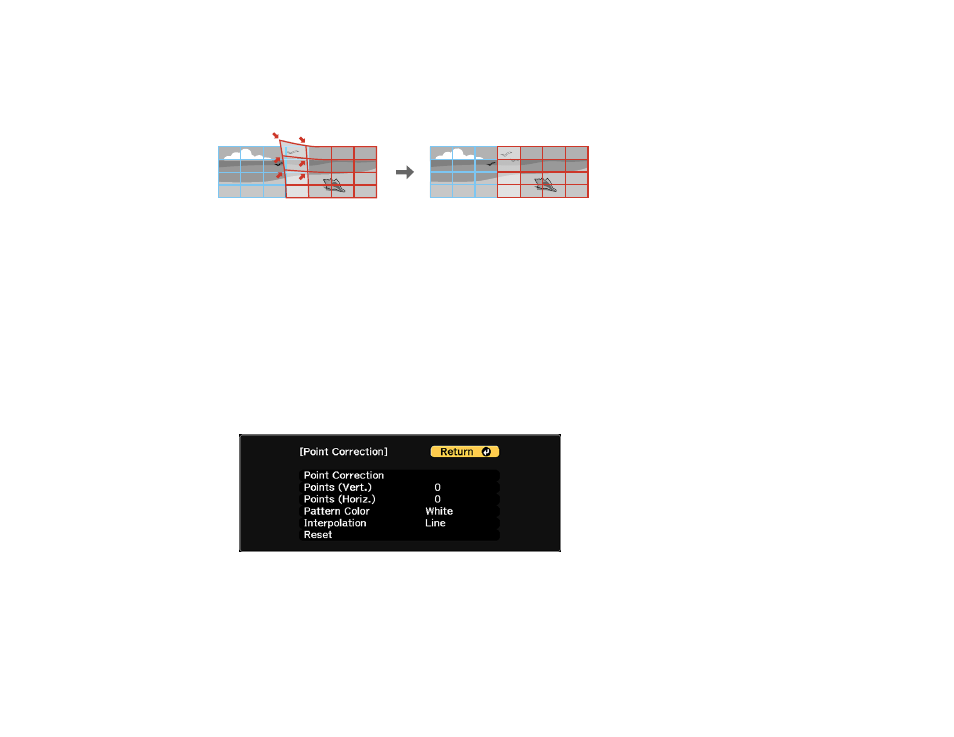
Correcting Image Shape with Point Correction
You can use the projector's Point Correction feature to fine-tune the image shape using points on a grid.
This is useful for adjusting overlapping areas in multiple projected images that do not line up correctly.
Note:
You can move the points on the grid between 0.5 to 600 pixels in any direction. Coordinates for
pixels that extend beyond the edge of the projected screen are displayed as negative numbers.
1.
Turn on the projector and display an image.
2.
Press the
Geometry
button on the projector control panel or remote control.
3.
Select the
Point Correction
setting and press
Enter
.
Note:
If you see a confirmation message, press
Enter
.
4.
Select the
Point Correction
setting again and press
Enter
.
You see this screen:
5.
Select the following settings:
• To set the number of vertical or horizontal grid lines, select the
Points (Vert.)
or
Points (Horiz.)
setting and select a value.