Installation procedure, Preparing the projector – Epson Lighting Track Mount for LightScene EV-105 (Black) User Manual
Page 8
Installation Procedure
7
Preparing the Projector
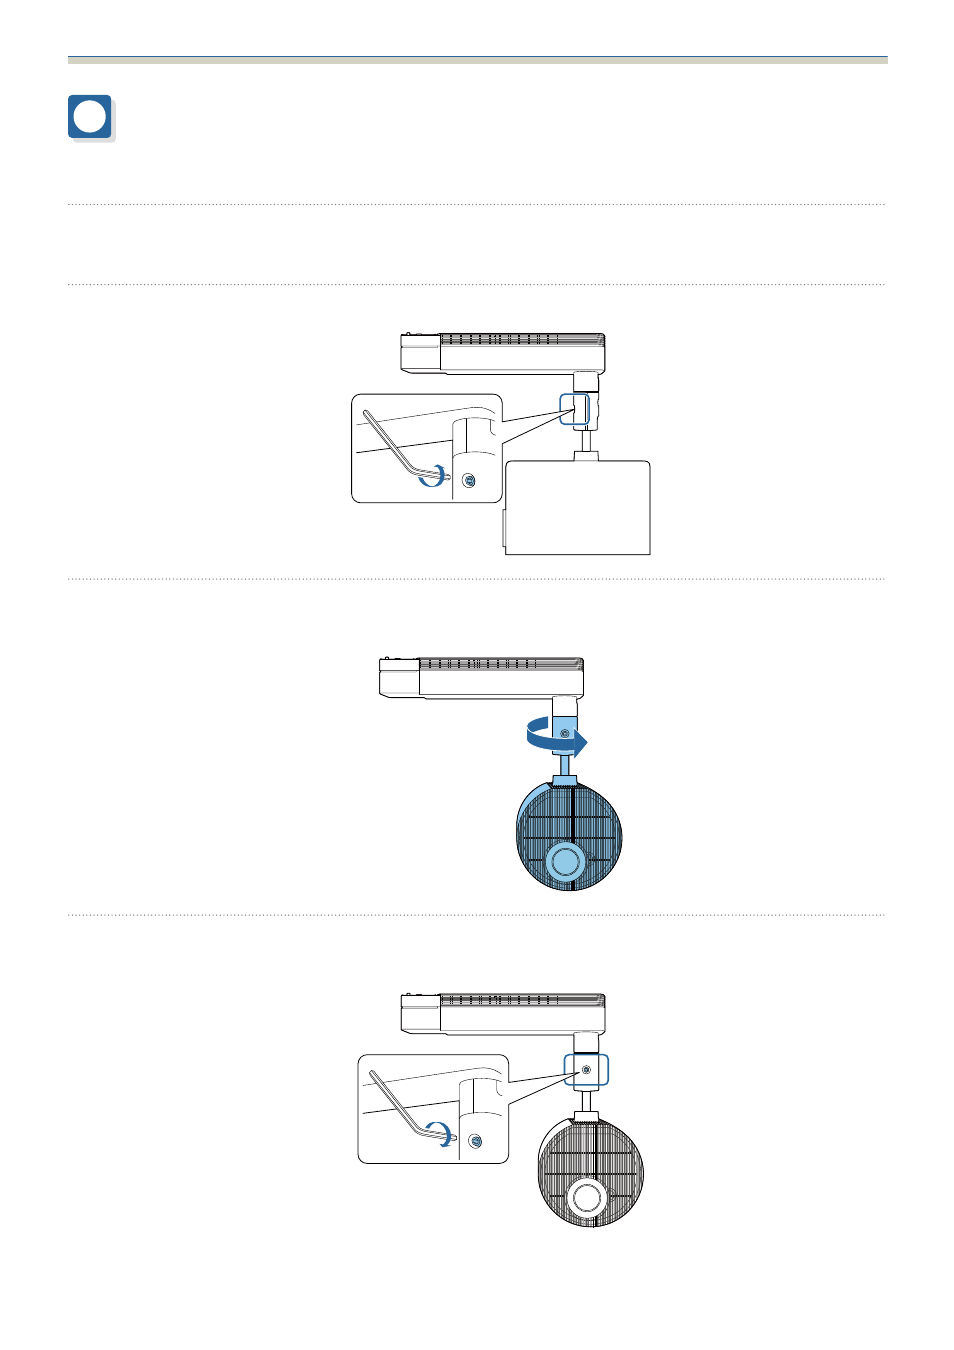
Adjust the orientation of the projector to make installing easier.
a
Place the projector on a flat surface on a soft cloth.
b
Loosen the screw for the ball joint with a hexagonal wrench supplied with the projector.
c
Change the projector's orientation.
You can change the orientation of the projector as shown below.
d
Tighten the screw for the ball joint with a hexagonal wrench to secure it in place.
Make sure you tighten the screw completely so that the ball joint does not move during installation.
See also other documents in the category Epson Projectors:
- 70c (2 pages)
- MOVIEMATE 72 (70 pages)
- 71c (86 pages)
- 6110I (16 pages)
- 53c (108 pages)
- 480i (259 pages)
- LS47P1 (138 pages)
- EH-TW2800 (64 pages)
- EB-1725 (116 pages)
- EB 1735W (116 pages)
- 21L (21 pages)
- Livingstation HDTV LCD Projection Television LS57P2 (6 pages)
- EB-W10 (2 pages)
- 76C (111 pages)
- 9100i (122 pages)
- Cinema 200+ (80 pages)
- EB-84 (121 pages)
- ELPMBATA (11 pages)
- POWERLITE 1810P (2 pages)
- ANSI LUMENS 2000 (2 pages)
- ELP-3300 (110 pages)
- 7000 (2 pages)
- ELP-800UG (120 pages)
- EB G5200WNL (6 pages)
- 7250 (2 pages)
- 735C (2 pages)
- ELPMBC01 (6 pages)
- 81p (116 pages)
- Z8455WUNL (256 pages)
- ELP-3000 (103 pages)
- ELPLP29 (75 pages)
- 8100i (120 pages)
- 62c/82c (113 pages)
- 2500 Lumens (10 pages)
- 1080 (76 pages)
- 5300 (5 pages)
- DREAMIO EMP-TW700 (60 pages)
- 8500 UB (4 pages)
- DREAMIO EH-TW4400 (66 pages)
- POWERLITE HOME 10+ CPD-1790-4R2 (44 pages)
- BrightLink 450Wi (186 pages)
- 505c (141 pages)
- 810p (120 pages)
- EB-G5350 (131 pages)
- ELPMBPJF (10 pages)