2) assembling the overall unit, Installing the clamp (1), Installing the clamp (2) – Roland VH-14D V-Drum Digital Hi-Hat with Advanced Multisensor Triggering User Manual
Page 5: Installing the cymbals onto the hi-hat stand
Installing the Cymbals onto the Hi-Hat Stand
5
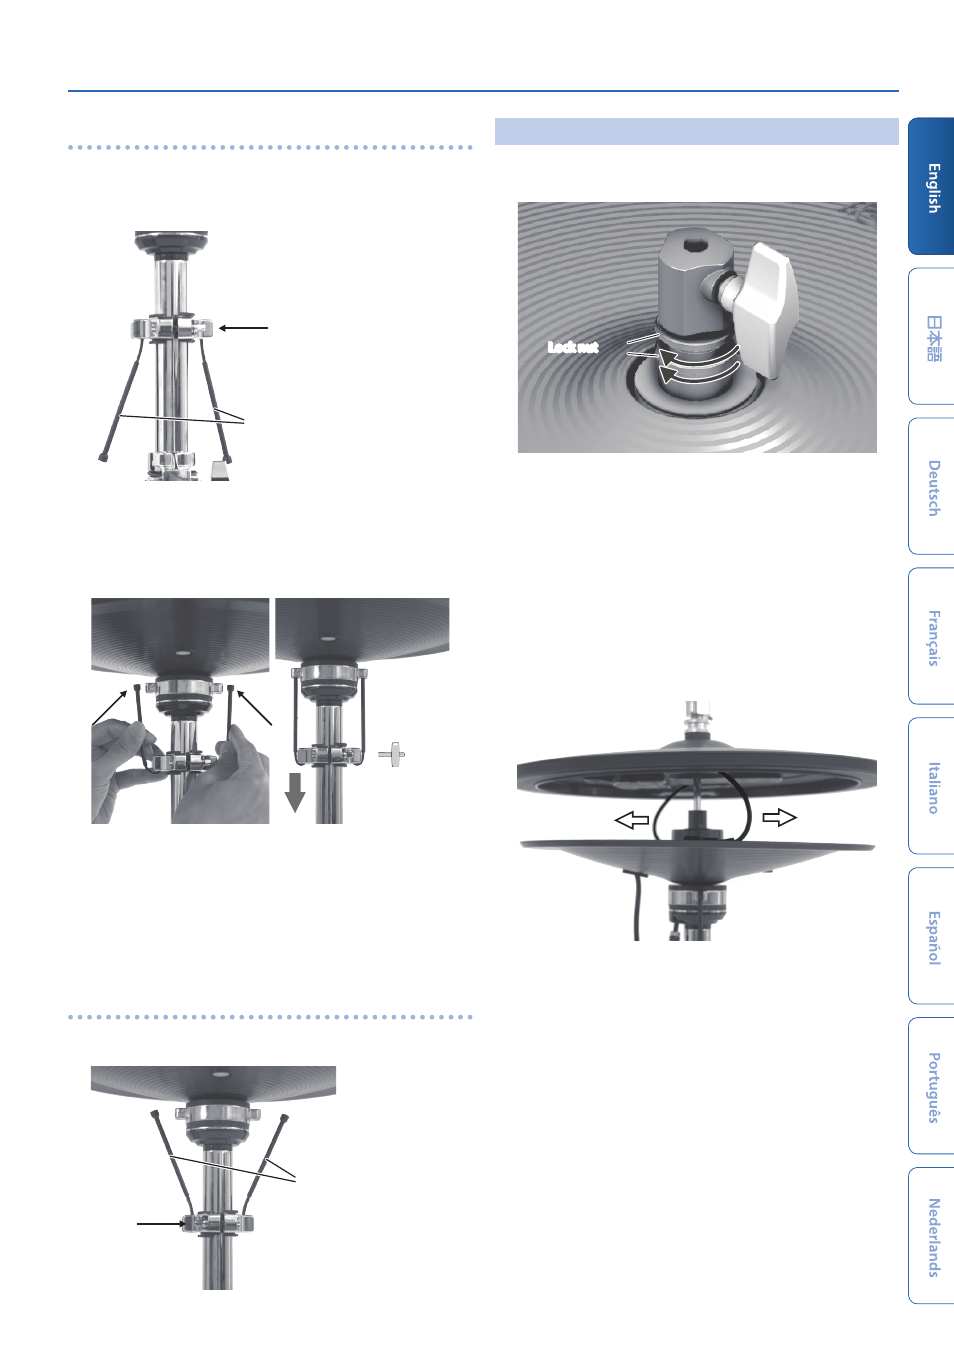
Installing the clamp (1)
6.
Attach the clamp and holder to the pipe on the
upper part of the hi-hat stand, then slightly tighten
the assembly with the drum key.
Slightly tighten
Holder faces down
7.
Pass the ends of the clamp through the grooves in
the metal portion of the bottom cymbal, then while
strongly pulling the clamp downward, secure it with
the drum key.
Pull down and
tighten
* Not pulling strongly enough on the clamp can make the bottom
cymbal unstable, causing it to shake or turn, and prevent proper
functioning.
* After extended use of the hi-hat stand, the stand’s felt (or rubber)
pad on which the bottom cymbal rests becomes compressed,
which may cause the bottom cymbal to become unstable. If this
occurs, loosen the clamp bolt and perform Step 7 again.
Installing the clamp (2)
If the clamp holder does not reach the hi-hat groove, attach the holder
facing upwards instead, as shown in the illustration.
Slightly tighten
Holder faces up
(2) Assembling the Overall Unit
1.
Firmly tighten the two lock nuts on the top cymbal.
Lock nut
* If the lock nuts are too loose, the hi-hat may not operate correctly.
2.
Place the top cymbal on the hi-hat stand with the
cymbal rod passing through the top cymbal hole.
At this point, position the “Roland” logo on the farther side, as
viewed from the performer.
3.
Connect the link cables A/B on the top cymbal to the
link jacks A/B of the bottom cymbal.
4.
Pull the bend of the cable softly with your fingers.
View from the side
Cable in front
Cable in back
* Don’t pull the link cables too hard when assembling this product.
* Make sure that both the top cymbal and bottom cymbal can be
closed smoothly.