Caution – Enterasys Networks X-Pedition 2000 User Manual
Page 43
Enterasys Xpedition 2000 Getting Started Guide
27
Installing the Hardware
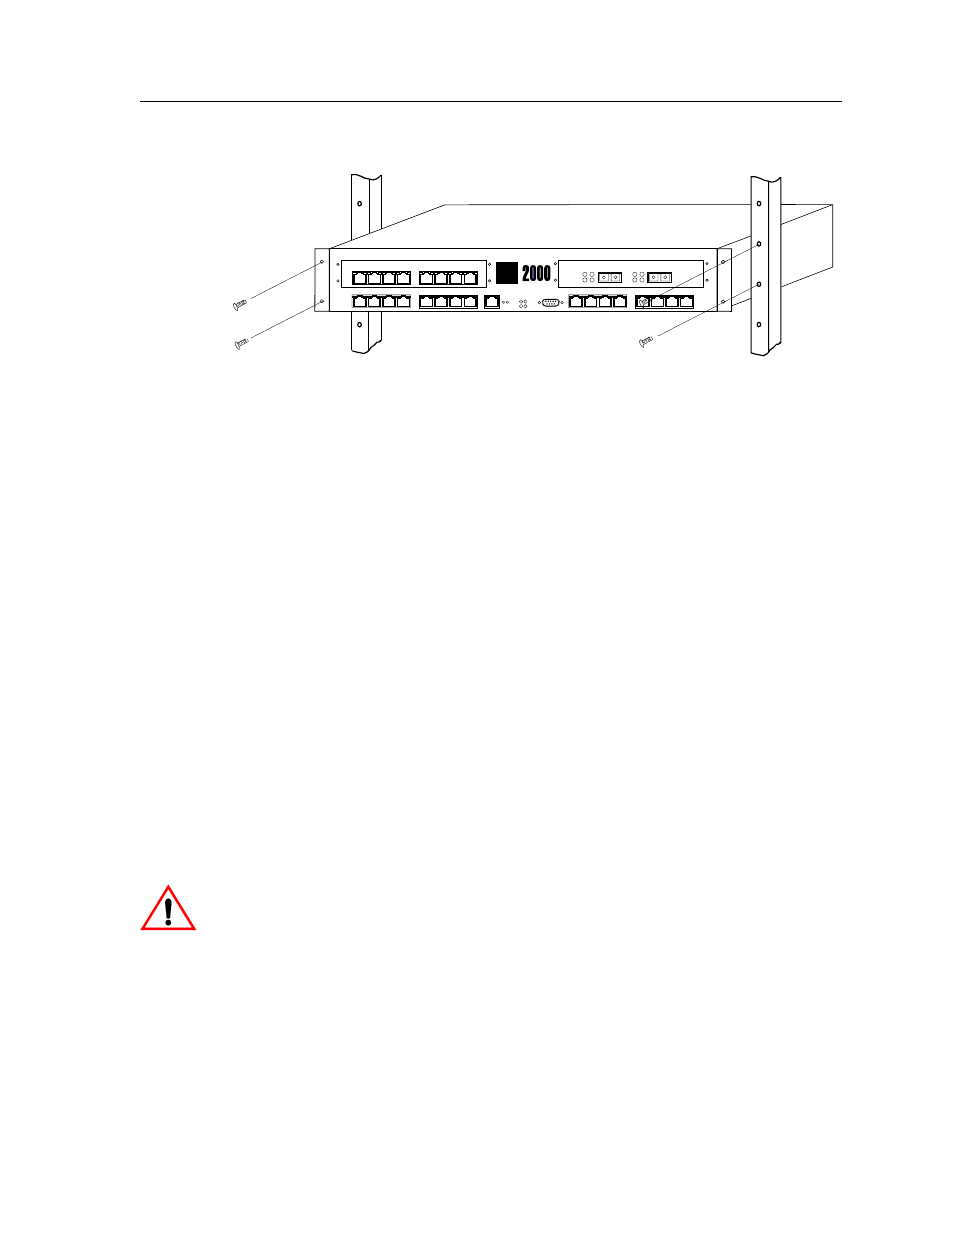
Figure 9. Installing the XP-2000 chassis in an equipment rack
To install the XP-2000 in an equipment rack:
1.
If your XP-2000 is not already equipped with rack-mounting brackets, take the following
steps. Otherwise skip to
a.
Align one of the mounting brackets over the corresponding holes in the side of the XP-
2000. The mounting bracket is correctly positioned when the side with two open mounting
holes is flush with the front of the XP-2000.
b.
Use the phillips-head screwdriver and the supplied phillips-head screws to attach the
mounting bracket to both the side and bottom of the chassis. (There are four holes for each
rack mounting bracket—the one on the side of the chassis that you exposed in
, and
three holes in the bottom of the chassis.)
Note:
Be sure to use the phillips-head screws supplied by Enterasys. If you use screws
that are longer than the ones included with your shipment, there is a danger of
damaging the XP-2000‘s internal components.
c.
Attach the other mounting bracket.
2.
Along with an assistant, lift the XP-2000 into place in the mounting rack.
3.
While your assistant holds the chassis in place, use the phillips-head screwdriver and four
phillips-head screws to attach the mounting brackets to the mounting rack.
Caution
: Make sure the screws are tight before your assistant releases the chassis. If you
accidentally leave the screws loose, the chassis can slip and fall, possibly becoming damaged.
2
1
8
7
6
5
4
3
2
1
8
7
6
5
4
3
2
1
1000BASE-SX
8
7
6
5
4
3
2
1
10/100BASE-TX
1
3
2
4
CONSOLE
10/100 MGMT
OK
ERR
DIAG
HBT
RST
G2M-HTXA2-08
G2M-GSXA1-02
10/100BASE-TX
10/100BASE-TX
Tx
Rx
AN
Link
Tx
Rx
AN
Link
SYS
Enterasys Networks