2 time and date, 3 user account, 2 time and date 6.1.3 user account – PLANET NVR-420 User Manual
Page 47
*Once you have the DDNS function successfully up and running, please DO NOT
forget to configure port forwarding for the NVR web port (default 80) and the streaming
port (default 9877) in the router/gateway for remote viewing. You can then type in
http://yourddnsdomain in the browser to access the NVR remotely for
live view.
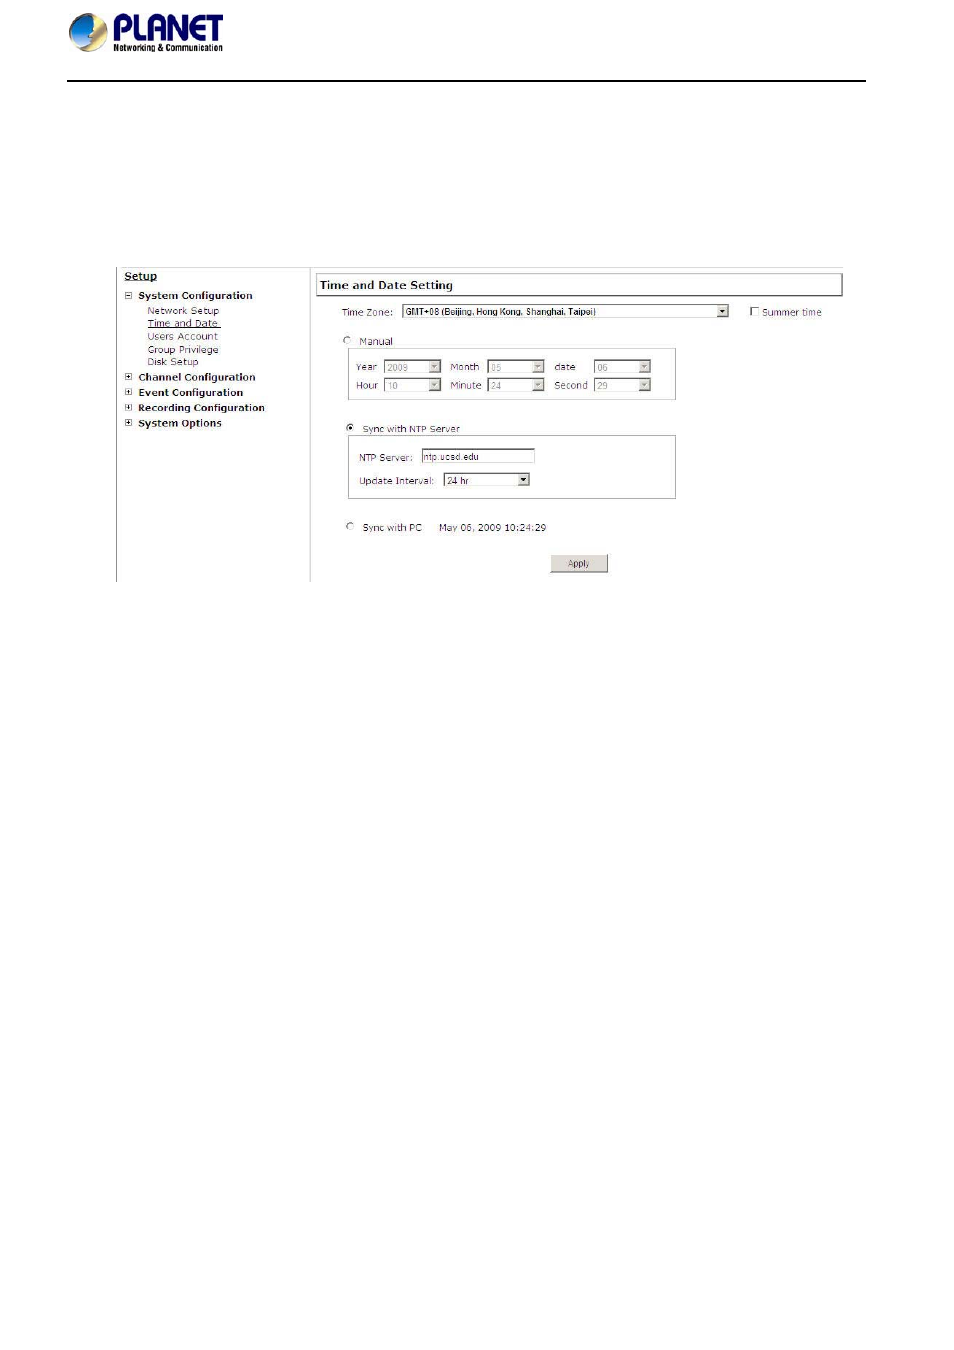
6.1.2 Time and Date
Set the time and date by selecting the time zone according to your location. It is
imperative that you set the recorder’s time correctly to avoid the following errors:
Incorrect display time for playback videos.
Inconsistent display time of event logs and when they actually occur.
After selecting the time zone, choose an option below to set the recorder time.
Manual - Use the drop-down list and configure the time manually.
Sync with NTP server - enter the host name or IP address of a valid NTP
server and set how often the recorder should synchronize the time with the
recorder by using the “Update interval” drop-down menu.
Sync with PC - Check this option to synchronize the recorder time with the
PC that you are currently using to access the recorder.
6.1.3 User Account
The recorder can be accessed by multiple users simultaneously. You can add,
remove, and edit users by using options provided on this page to keep user
information organized. Each recorder comes with a built-in “admin” account with
password “admin”. It’s highly recommended to change the password upon your
initial login.
47
4-CH H.264 Network Video Recorder with HDMI
User’s Manual of NVR-420