Setting items, Settings menu – Epson R-D1s User Manual
Page 8
8
3.
Select the desired setting using the jog dial, then press the
(ENTER) button. The selected setting is displayed.
If you select
(Basic Setup), select the desired setting using the
jog dial and press the
(ENTER) button again.
4.
Change the value or select the item using the jog dial, then press
the
(ENTER) button.
Setting Items
You can change the following camera settings through the Settings
menu.
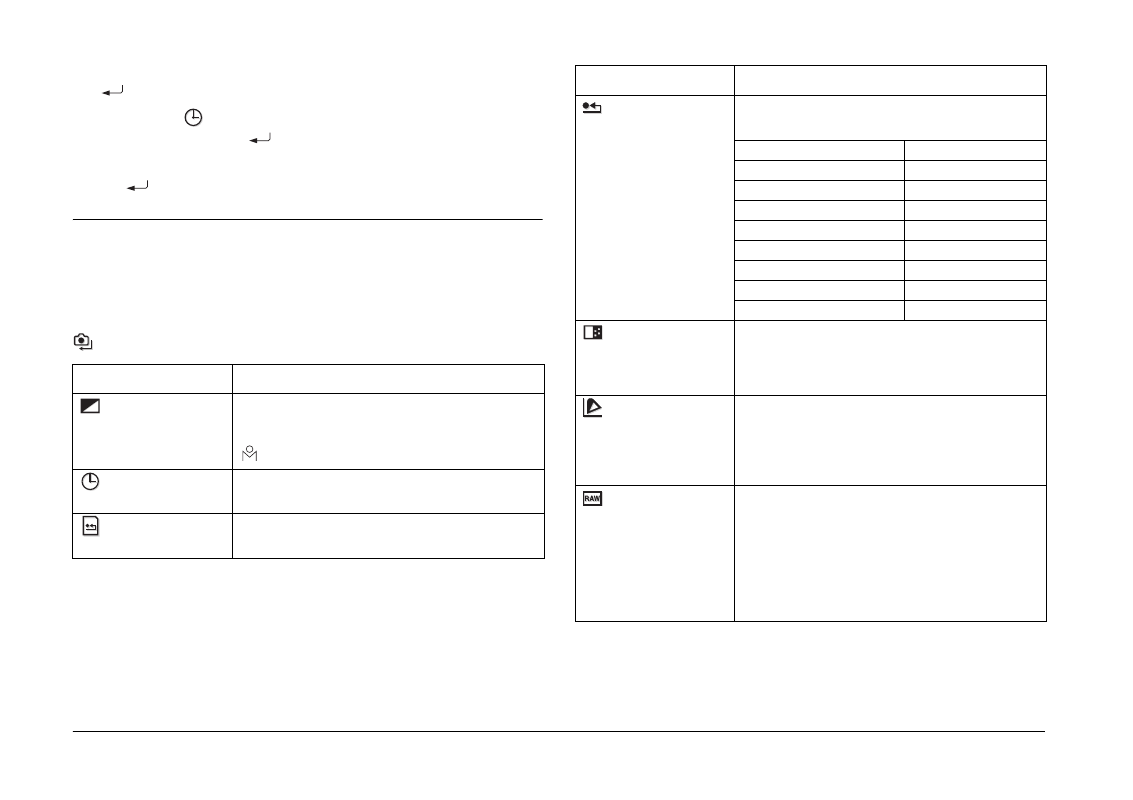
Settings Menu
Setting
Description
(Color Setting)
Selects whether to save images in Color or
Monochrome. For Monochrome, you can
select the Monochrome Filter by pressing the
(MENU) button.
(Basic Setup)
Displays the Basic Setup menu. See “Basic Setup
Menu” on the next page.
(Format SD Card)
Formats the memory card. You can select
Quick Format or Full Format.
(Initialize Settings)
Resets the current settings (except date and
time) to their default settings as shown below.
Setting
Default Value
Color
Color
Film
Standard
Date
YYYY/MM/DD
Power Save Timer
5min
Sequential Numbering
On
LCD Brightness
5/8
Language
English
USER Button
Delete
(Long Exp Noise
Reduction)
Reduces noise that appears on an image taken
with a long exposure. The shooting time may
become longer depending on shooting
conditions.
(Color Space)
Selects the color space from sRGB or Adobe
RGB. Adobe RGB is a wider color space than
sRGB and encompasses the colors that can be
printed with CMYK inks. Select Adobe RGB if you
have a printer that supports it.
(RAW Setting)
Sets the image format recorded when shooting
in RAW mode. You can select RAW format only,
or both RAW and JPEG (high resolution) format
in a single file. RAW+JPEG provides the
convenience of viewing the JPEG image on
most computers while retaining the RAW data
for postprocessing, at an increase in image size
and memory card access time.
Setting
Description