Sealey GSS150819SL User Manual
Page 11
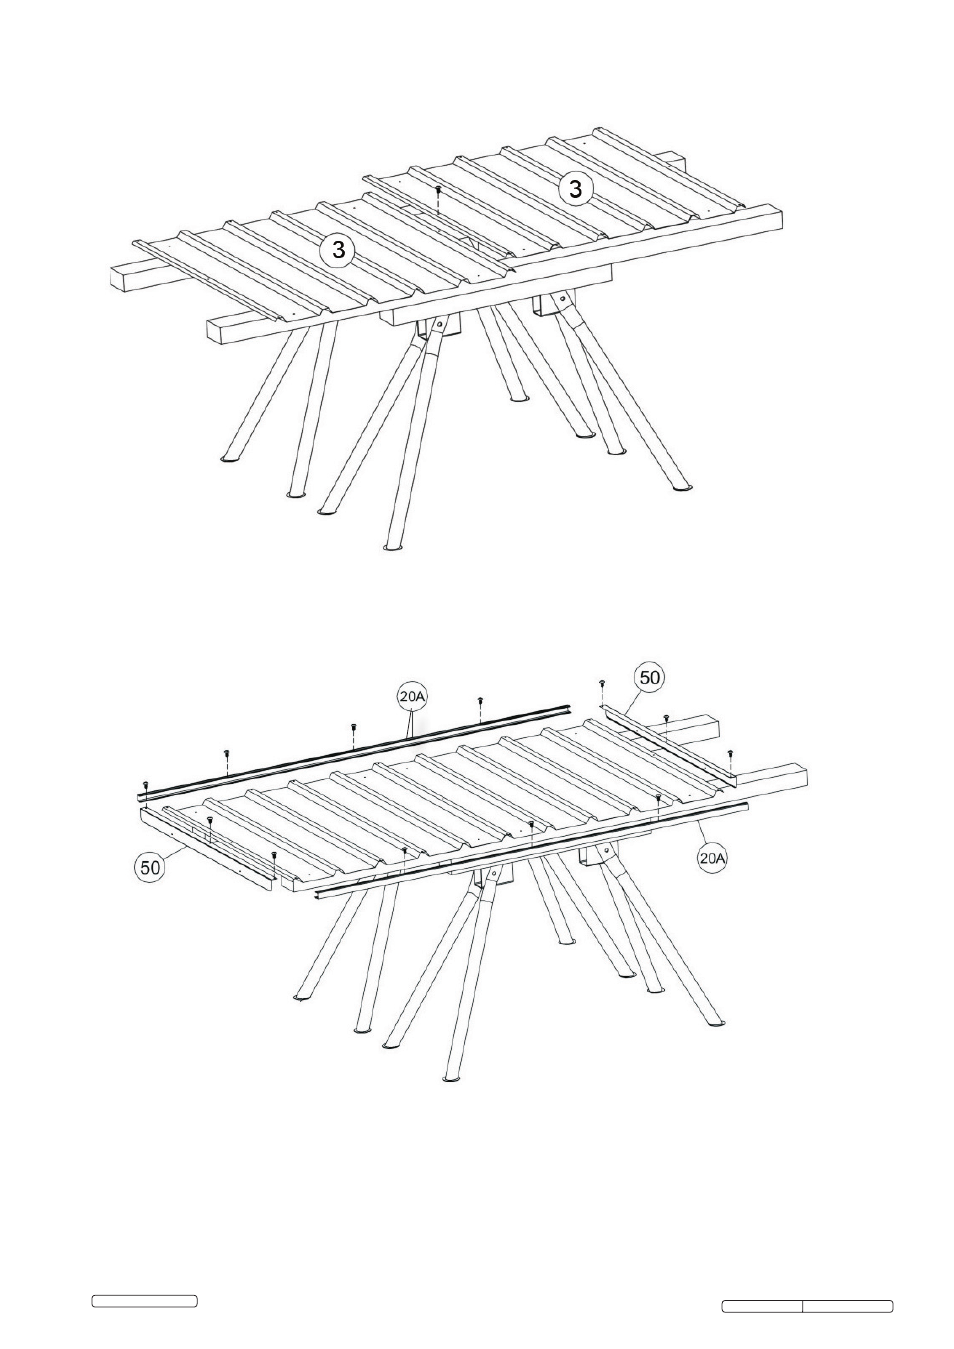
7.4.1 Place both panels item 3 on your work table and join them together with the 10mm long self tapping screws.
See the pre-punched holes.
7.4
ASSEMbLE THE ROOF PANEL
GSS150819SL Issue: 1 - 30/08/12
7.4.2 Fit top and bottom channels item 20A to panels by firstly sliding and finally tapping into place as previously
explained in 7.1.3. Note that the smaller flange on the channels should always be adjacent to the outside face
of the panel. The outside face is the top face in both diagrams.
© Jack Sealey Limited
Original Language Version
See also other documents in the category Sealey Equipment:
- SA0615 (7 pages)
- SAC2203B (8 pages)
- SAC2203B (6 pages)
- SAC2203B (6 pages)
- SSC12710D (14 pages)
- SAC0610E (4 pages)
- SAC10030 (4 pages)
- SSC11003 (9 pages)
- SAc3503B (6 pages)
- SSQC2409 (4 pages)
- SSQC2409 (4 pages)
- SSQC2409 (5 pages)
- SA1565 (5 pages)
- SA5055 (4 pages)
- SAC3203B3PH (6 pages)
- SAC72775BLN (6 pages)
- SAC55075B (5 pages)
- SAC03290 (3 pages)
- SAC05020 (4 pages)
- SAC106B (3 pages)
- SAC2203BLN (6 pages)
- ADB3000 (2 pages)
- SAC89025VLN (6 pages)
- CBOX2212V (1 page)
- PW2000 (5 pages)
- PW1712 (3 pages)
- PW4000 (4 pages)
- PW2500 (5 pages)
- PW5000 (5 pages)
- PWM1300 (7 pages)
- PWM2500SP (6 pages)
- LC300ST (2 pages)
- LC800ST (2 pages)
- LS1050V (4 pages)
- LS575VH (3 pages)
- LS520H (3 pages)
- LS450H (2 pages)
- LSH180V (2 pages)
- TP16 (1 page)
- TR3000 (2 pages)
- TP17 (2 pages)
- AK460DX (3 pages)
- AK466D (2 pages)
- TP69 (2 pages)
- TP6906 (3 pages)