Kichler 16012 User Manual
Page 2
Date Issued: 7/13/12
IS-16012-US
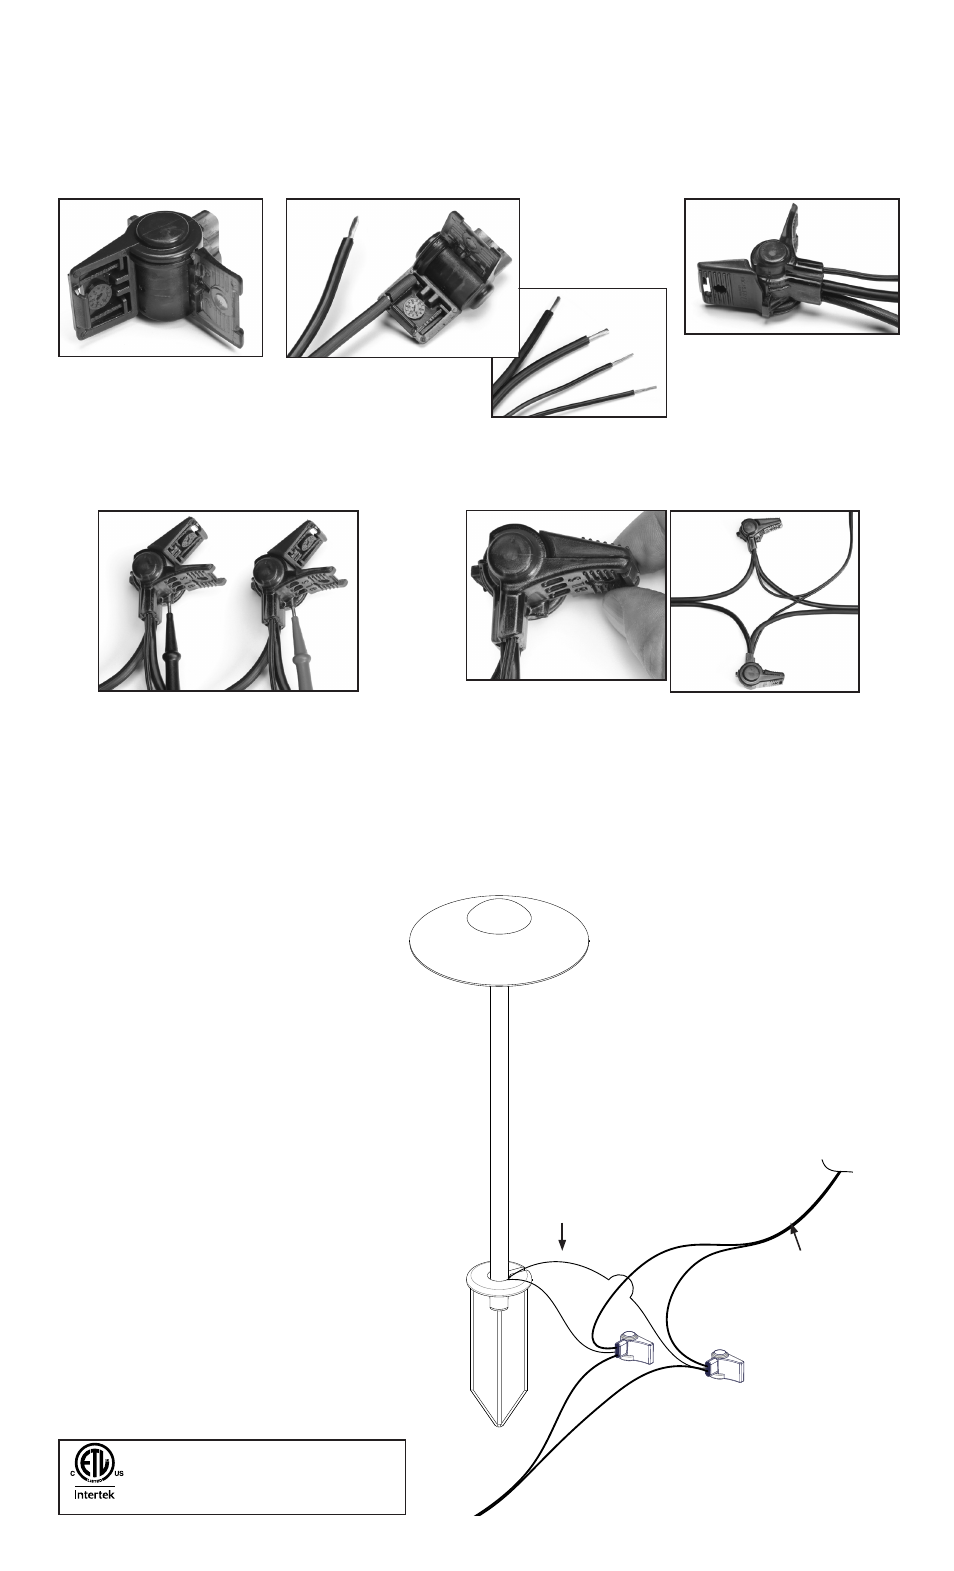
STEP 1
• Turn power off.
• Rotate wings fully apart.
PASO 1
• Desconecte la fuente de alimentación.
• Gire las aletas hasta separarlas
por completo.
KICHLER
®
PRO SERIES WIRE CONNECTOR INSTALLATION INSTRUCTIONS
Always use caution. Turn off power. Use on electrical circuits of 15 volts or less.
Installation should always comply with local and national electrical codes
INSTRUCCIONES DE INSTALACIÓN DEL conector de hilo (o alambre) Kichler
®
Pro Series
Recuerde tener precaución. Desconecte la fuente de alimentación. Utilice en circuitos eléctricos de 15 voltios o menos.
La instalación debe ajustarse siempre a los códigos eléctricos locales y nacionales
STEP 2
Using the strip guide molded into
the connector for reference, strip
the wire to 11/16”.
PASO 2
Utilice la banda guía moldeada en
el conector como referencia para
pelar el hilo a 11/16".
STEP 3
Insert wires into connector.
Connector must be open.
• #12 in large holes
• #18 in small holes
PASO 3
Inserte los hilos en el conector.
El conector debe estar abierto.
• #12 en orificios grandes
• #18 en orificios pequeños
STEP 4
(Optional if testing voltage at fixture)
Turn power back on. With connector still open
halfway, push voltmeter probe into connector
probe port. Push probe all the way in and re-
peat on other connector.
PASO 4
(Opcional si se realizan pruebas de tensión
en el artefacto) Vuelva a conectar la alimen-
tación. Con el conector aún parcialmente
abierto, empuje la sonda del voltímetro en el
interior del orificio de la sonda del conector.
Empuje la sonda hasta el fondo y repita el
procedimiento con el otro conector.
STEP 5
Hold wires in place while squeezing wings to-
gether until the connector snaps shut. Use pliers
if necessary to close. Repeat on other connector.
PASO 5
Sujete los hilos en su lugar mientras ajusta las ale-
tas para volver a unirlas hasta que el conector se
cierre. Si es necesario, utilice pinzas para cerrarlo.
Repita el procedimiento con el otro conector.
600 Volts Max, 105°C Max, Do Not Reuse, CU
To Be Sold Only With Installation Instructions
Flamability V-2, Rain Tight, Water Tight, Direct Bury
4005435
Listed #4005435, Conforms to ANSI/UL Std. 486D
FIXTURE INSTALLATION
ARTEFACTO DE INSTALACIÓN
TO NEXT FIXTURE IN RUN
AL SIGUIENTE ARTEFACTO EN FUNCIONAMIENTO
TO TRANSFORMER
AL TRANSFORMADOR
#18-2 CABLE
#12-2 CABLE