Kichler 15875 User Manual
Fig. 2, Fig. 1
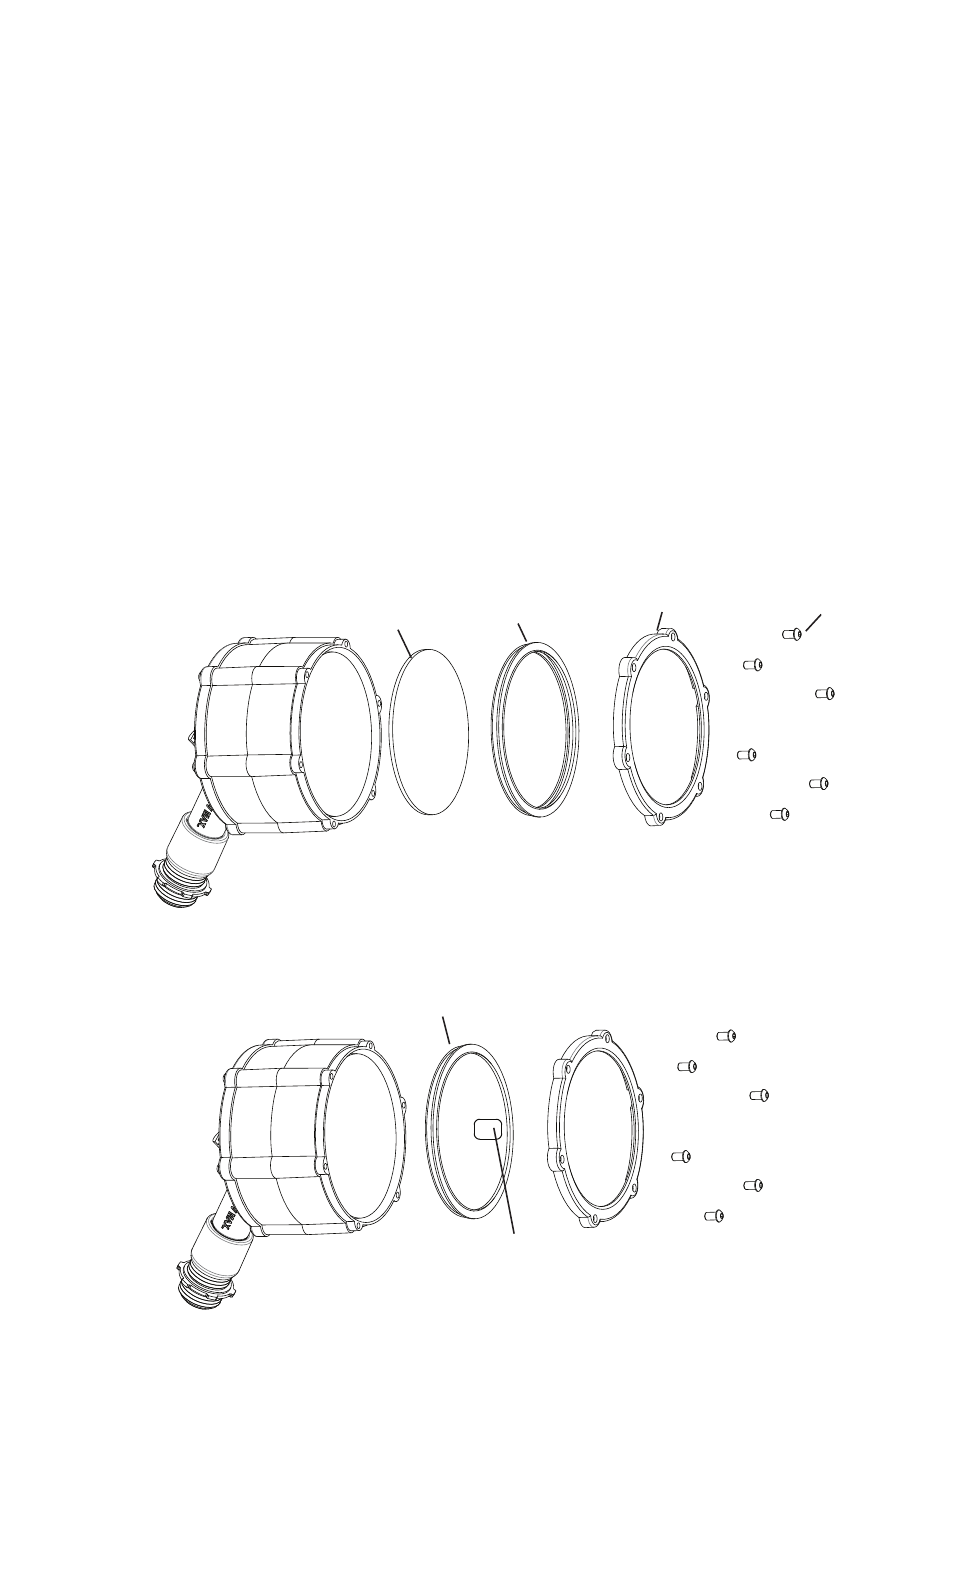
FIG. 2
LED Lens Replacement Steps
For 15875AMB, 15876AMB, 15885GRN, 15886GRN,
15895FRO, 15896FRO
1. Remove outer screws and fixture ring with a 5/64" (2 mm) hex bit
or provided Allen key. (See Fig 1).
2. Remove clear lens and rubber gasket from fixture and discard.
(See Fig 1).
3. Place new colored or frosted lens in fixture in the same orientation
as the clear lens originally was.
• On Green and Amber lenses the side with the small piece
of removable tape should be facing up to ensure the coated
side of the lens is facing down. For the Frosted lenses
the smooth side should be facing up with the etched side
seated down in the fixture. (See Fig 2).
4. Make sure gasketed lens is seated properly and flush in the fixture.
5. Place ring back over fixture and fasten down with the original
screws. Tighten screws in a star pattern to ensure even pressure.
• Be careful not to over tighten the screws as stripping can
occur. If stripping does occur please replace the stripped
screw with one the replacement screws provided in the
parts bag.
6. Remove tape piece from Amber and Green lenses where applicable.
FIG. 1
LENS
LENTE
RUBBER GASKET
EMPAQUETADURA
DE CAUCHO
FIXTURE RING
ANILLO DEL
ARTEFACTO
SCREWS
TORNILLOS
NEW LENS
LENTE NUEVA
TAPE ON GREEN AND AMBER LENS ONLY
FACE UP
LA CINTA SÓLO EN LA LLENTE VERDE O ÁMBAR.
MIRANDO HACIA ARRIBA.
Date Issued: 6/10/11
IS-15875-US
PASOS para el cambio de la Lente del diodo luminiscente
Para 15875AMB, 15876AMB, 15885GRN, 15886GRN,
15895FRO, 15896FRO
1. Quite los tornillos externos y el anillo del artefacto con la broca
hexagonal de 5 / 64" (2 mm) o con la llave Allen que se provee.
(Vea la Fig. 1).
2. Quite la lente transparente y la empaquetadura de caucho del artefacto
y deséchelas. (Vea la Fig. 1).
3. Coloque la lente nueva de color o la escarchada en el artefacto
con la misma orientación en que estaba originalmente la lente
trasparente.
• En las lentes Verde y Ámbar, el lado con el pedazo pequeño
de cinta quita y pon debe estar mirando hacia arriba para
asegurarse de que el lado revestido de la lente esté
mirando hacia abajo. Para las lentes escarchadas, el lado
suave debe estar mirando hacia arriba, con el lado grabado
sentado en el artefacto. (Vea la Fig. 2).
4. Asegúrese de que la lente con empaquetadura esté sentada
correctamente y a ras en el artefacto.
5. Ponga de nuevo el anillo encima del artefacto y apriete con los
tornillos originales. Apriete los tornillos siguiendo el modelo de
estrella para asegurarse de que tenga una presión uniforme.
• Tenga cuidado en no apretar excesivamente los tornillos
ya que podrían dañarse los filetes de la rosca. Si se dañan
los filetes de la rosca, por favor cambie el tornillo dañado
con uno de los tornillos que se proveen en la bolsa de
piezas.
6. Quite el pedazo de cinta de las lentes Ámbar y Verde, cuando sea
aplicable.
For warranty information please visit: http://www.landscapelighting.com/portal/warranty_page
Para informacion de ka garantia por favor visite: www.landscapelighting.com/portal/warranty_page