2 outside enclosure overview, Figure 1 small enclosure—external features, Figure 2 large enclosure—internal features – Emerson Liqui-tect MC68HC16Z1 User Manual
Page 6: Outside enclosure overview, Small enclosure—external features, Figure 2, Large enclosure—internal features
Introduction
2
1.2
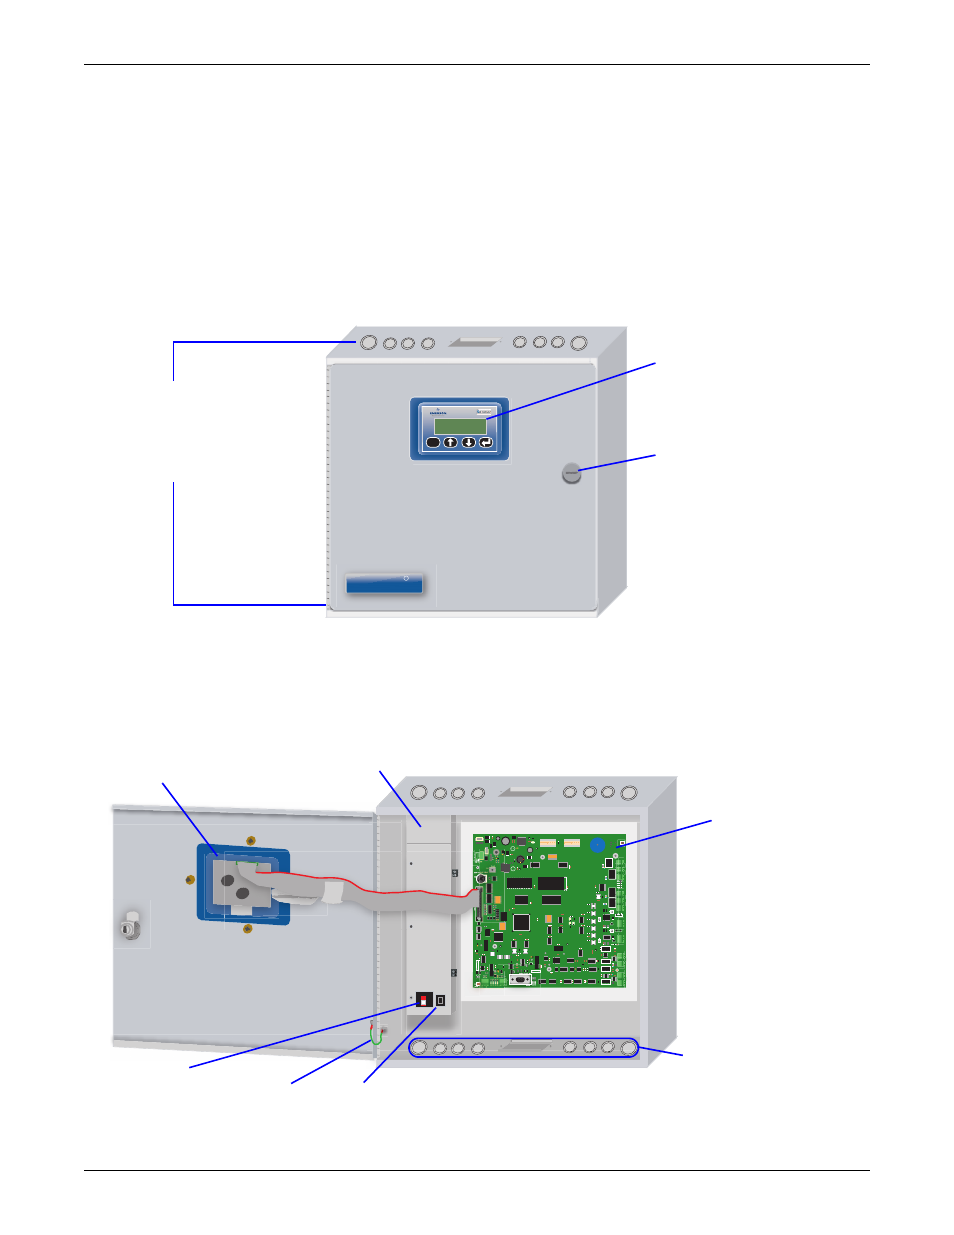
Outside Enclosure Overview
The enclosure for the Liqui-tect panel’s controller board comes in two sizes:
• The large enclosure is designed to accommodate the Transformer Module and future compo-
nents, in addition to the controller board.
• The small enclosure is built to hold the controller board only.
Both enclosures are 2-3/4" deep.
Both enclosures have a built-in liquid crystal display (LCD) and a key lock, as shown in the example
below. The metal enclosures accommodate secure conduit fittings and protect components against
external forces and debris.
Figure 1
Small enclosure—external features
The enclosure must be secured to a wall, either flush-mounted or recessed in the wall, as described in
2.0 - Installation. Knockouts and access slots on the top and bottom allow easy connection of wires
and cables (see 3.0 - Connections and Configuration) with either mounting type.
Figure 2
Large enclosure—internal features
LIQUI-TECT PANEL
05-SEP-02 14:04:13
V5.100.0
PRESS =STATUS/SETUP
ESC
Liqui-tect
Liqui-tect
Monitoring System
Monitoring System
R
LCD for configuration
and operation
Key lock
The enclosure
has knockouts
and access slots
on top and
bottom for
cables and wires.
ON
R16
R17
R18
R15
DS3
DS4
K1
K2
K4
K5
TX RX
1
SW2
SW1
R4
O N
2
3
4
5
6
7
8
1
O N
2
R1
R40
R44
DS7
DS8
R38
C26
C27
C40
C33
U15
U23
C32
U22
C46
U29
U24
U24
U16
DS1
Pwr On
3
4
5
6
7
8
Fault
LEDO
DS6
Reset
Back of LCD
Transformer
Module
Controller Board
Ground wire
for LCD
On/Off switch
for Transformer
Module
Knockouts and
access slots
(top and bottom)
Power
receptacle