ShoreLand'r CL2438TB-HYD User Manual
Page 6
Front Boat Stops:
Place the front stop weldment (Ref.#49) in the desired
position to stop your boat as it is being loaded on the
trailer. Secure it to the frame with a 1/2 square u-bolt
(Ref.#83) and secure with a 1/2 lock washer (Ref.#59)
and a 1/2 hex nut (Ref.#46). Repeat on the other stop.
(Note that the stops are to be used as a towing position
stop as well as a stop to be used when driving your
pontoon onto the trailer.)
Load Guides:
Measure the distance between the pontoons. Allow 1/2
clearance on each side between the pontoon tube and the
6
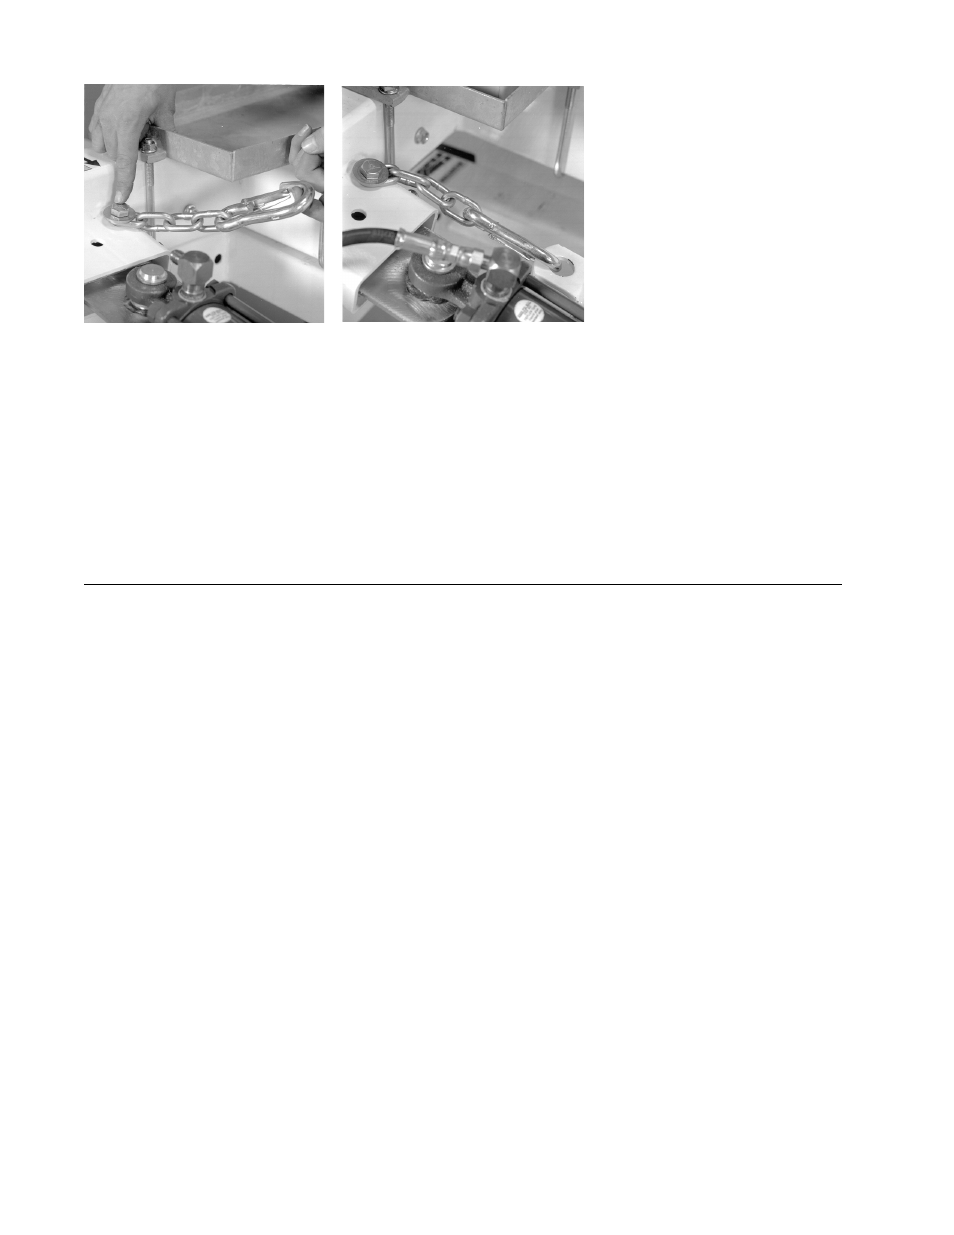
19. Place a safety chain (Ref.#94) onto
the front cap of the lift bracket on the
frame weldment (Ref.#30) over the
hole closet to the frame and insert a 1/
2 X 3 hex bolt (Ref.#12) into the last
link of the safety chain. NOTE: A 1/2
flat washer (Ref.#7) goes to the head
of the bolt. Secure this assembly
using a 1/2 flange lock nut (Ref.#9).
20. When towing, attach the safety chain
to the lift tube weldment (Ref.#54).
Continued from page 1
load guide you are about to install. Install the load guide as
follows: Slide out to the correct width determined at the
beginning of the installation. Note that there are several
holes in the bracket to accommodate the various widths of
adjustment. Select the one (1) that best matches your
determined width. Secure the load guide to the bracket
with a 3/8 X 4 hex bolt. Secure with a 3/8 flange lock nut.
Do not tighten at this time. Repeat this process on the load
guide directly across the frame. Double check the mea-
surement to make sure that you have the correct clearance
between the load guide and the pontoon tube. Insert the 3/
8 X 1 hex bolt and secure with a 3/8 flange lock nut.
Tighten bolts just installed. Repeat the above process for
the front load guides.