ShoreLand'r CL2438TB-HYD User Manual
Page 4
4
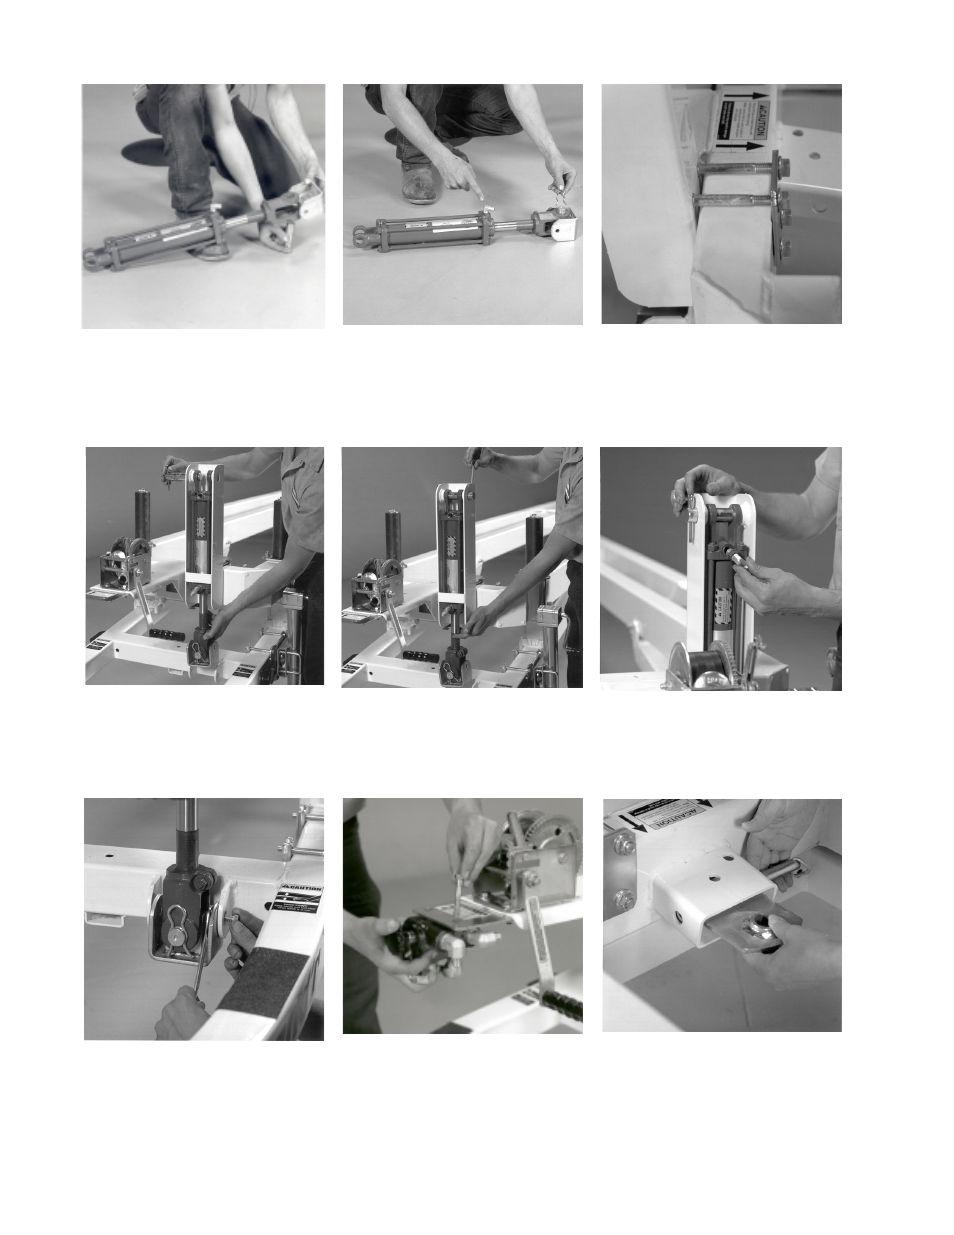
1. Mount the cylinder clevis bracket
(Ref.#60) to the leveling cylinder
(Ref.#81) using the cylinder pin as
shown.
2. Secure with the cylinder locking pin as
shown. Insert and secure one (1) 90°
elbow (Ref.#104) as shown.
3. Mount the cylinder mounting channel
(Ref.#34) to the front of the trailer using
four (4) 1/2 X 4 carriage bolts
(Ref.#72). Secure with the back plate
(Ref.#53) and four (4) 1/2 flange lock
nuts (Ref.#9).
4. Insert the leveling cylinder (Ref.#81) as
shown and secure with a 1 cylinder pin.
5. Secure the 1 cylinder pin with two (2)
5/16 cotter keys, also provided with the
cylinder, as shown.
6. Insert the 90° elbow (Ref.#104) into the
leveling cylinder (Ref.#81) as shown.
7. Secure the bottom of the leveling
cylinder (Ref.#81) with a 3/8 X 1 hex
bolt (Ref.#3), from the outside in as
shown. Tighten using a 3/8 flange lock
nut (Ref.#9). Secure the 1/4 X 13 link
chain (Ref.#95) in the lowest linkage to
the cylinder channel weldment block
(Ref.#60) using a 3/8 X 1-1/2 hex bolt
(Ref.#76) and 3/8 flat washer at the
head of the bolt. Secure with a 3/8
flange lock nut (Ref.#9).
8. Note: Before mounting the selector
valve - be sure all 90° elbow fittings
are inserted. Mount the selector valve
(Ref.#99) to the valve plate (Ref.#55)
using 3/8 X 2-1/4 hex bolt (Ref.#100)
and secure with two (2) 3/8 flange lock
nuts (Ref.#8).
9. Mount the cylinder pivot plate (Ref.#47)
to the frame using a 5/8 X 6-5/8 pin
(Ref.#1) as shown.
CL2438T B HYD installation of Hydraulic Pump Instructions