Diagram f – ShoreLand'r SLB150TAL User Manual
Page 11
Midwest Industries, Inc.
Ida Grove, IA 51445
800.859.3028
www.shorelandr.com
0004000
Page 11
09/15/2008
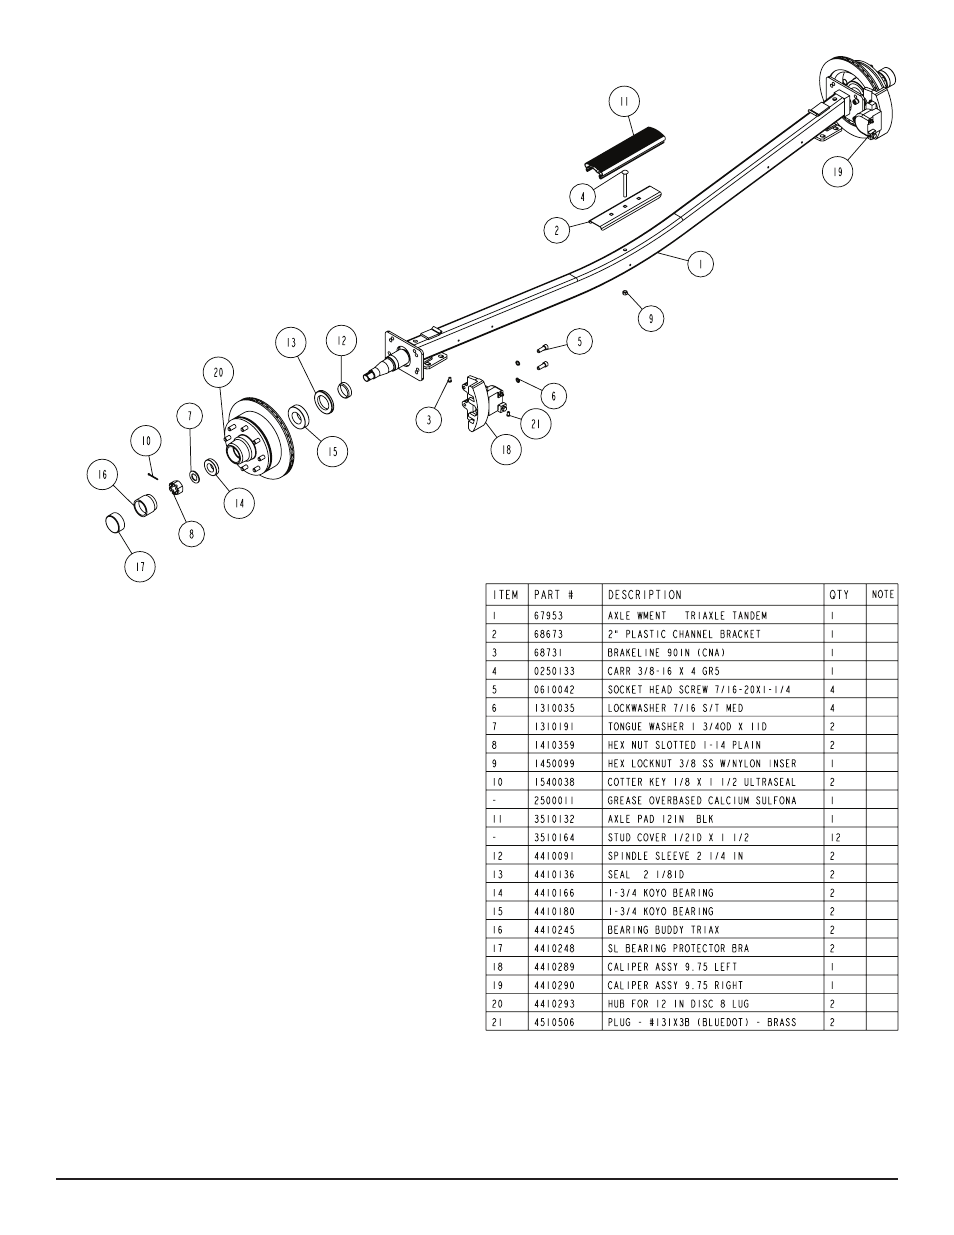
Diagram F
Rear Bunk:
Mount the bunk bracket weldment into the pivot base weldment
using a 5/8” X 4-1/2” stainless steel hex head bolt and secure with
a 5/8” stainless steel hex lock nut with nylon insert. Mount the bunk
assembly onto the bunk bracket weldment using two (2) 1/2” X
1-1/2” stainless steel hex bolts and secure with a two (2) 1/2” stain-
less steel hex lock nuts with nylon inserts. Repeat this procedure
on the opposite side of the trailer.
Wiring:
Run the wiring from the frame outlet to the bunk bracket weldment
and run throught the inside and exit out the end of the bunk bracket
weldment. The flex conduit located in the hardware box will be used
to cover the frame wire harness before it enters the bunk bracket
weldment. Install grommets over 3/8” flex conduit in wire holes on
bunk bracket weldment. Using wire ties secure the flex conduit to
the crossmember. Leave the wire until after the mounting of the
taillights on the bunk brackets tube.
Taillights:
Mount the left taillight to the taillight bracket on the bunk bracket
weldment. The license plate bracket will slide between the taillight
and the welded-on taillight bracket on the bunk bracket weldment.
Secure with one (1) 1/4” X 3/4” stainless steel carriage bolt and one
(1) 1/4” stainless steel hex nut. Plug wiring that was ran through
the bunk bracket weldment into the taillight wire plug. Repeat this
same procedure for the right taillight (does not include license plate
bracket).