2 mounting the remote control panel rsat2 – Grass Valley RSAT2 User Manual
Page 11
Remote Control Panel RSAT2
3. Installation and Startup
6
Operating Instructions - Rev. 1 / 11.2001
3.2
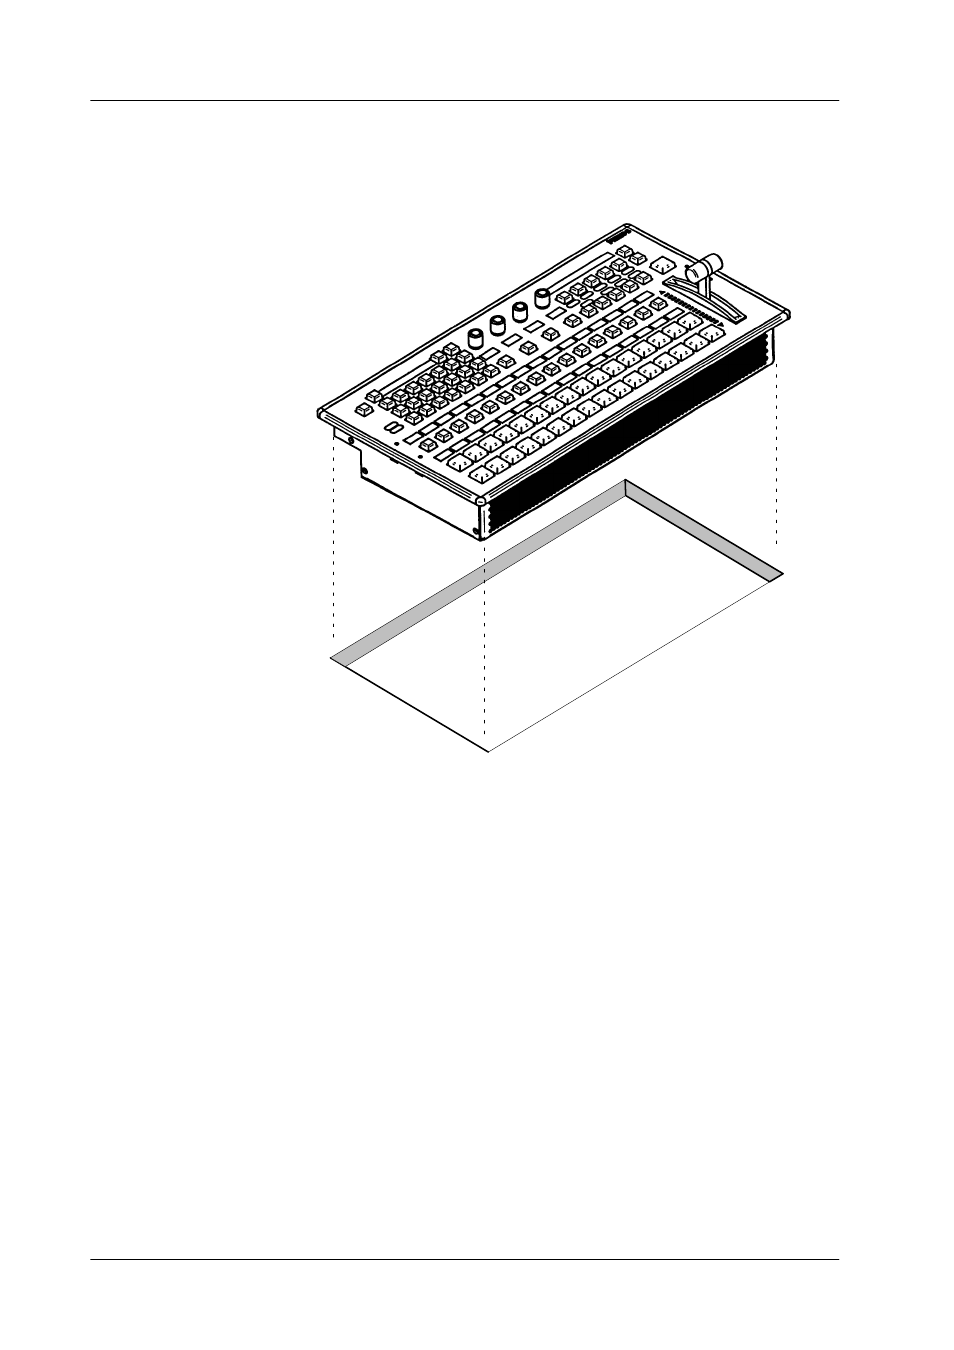
DESK MOUNTING
Cut-out dimensions: 441 x 217 mm
Fig. 2: Panel cut out
D
Unpack the RSAT2 panel and remove the panel module from the mounting box.
The locking mechanism can be removed by the two release tools delivered in
the accessory pack. Therefore the module can be removed very simply.
D
Disconnect the cables.
D
Cut-out the openings in the desk.
D
Put in the mounting box of the panel. For fastening, bores are provided in the
frame. The housing can be fastened with countersunk wood screws with a di-
ameter of 4 mm. The length of the screw depends on the plate thickness of the
desk. A set with mounting parts is included in the delivery of the panel.
D
Connect the cables into the corresponding plugs of the modules.
D
Put in the panel module in in the mounting box. By pressing, the modules enga-
ges independently. After mounting the panels please close all locking holes
witch the plastic caps delivered in the accessory pack.
D