Step 2: networking setup – Grass Valley Kaleido-X (7RU) Quick v.7.80 User Manual
Page 22
10
Setting Up Your Kaleido-X (7RU) Multiviewer
Networking Setup
Step 2: Networking Setup
For the Kaleido-X unit to join a TCP/IP network, it must be configured with an IP address, a
network mask, a gateway, and a system name. In addition, a client PC must be configured
to communicate with the Kaleido-X (see
on page 14). You must also
configure the Kaleido-RCP2 unit, and any Audio Bridge Terminal unit you may have
ordered.
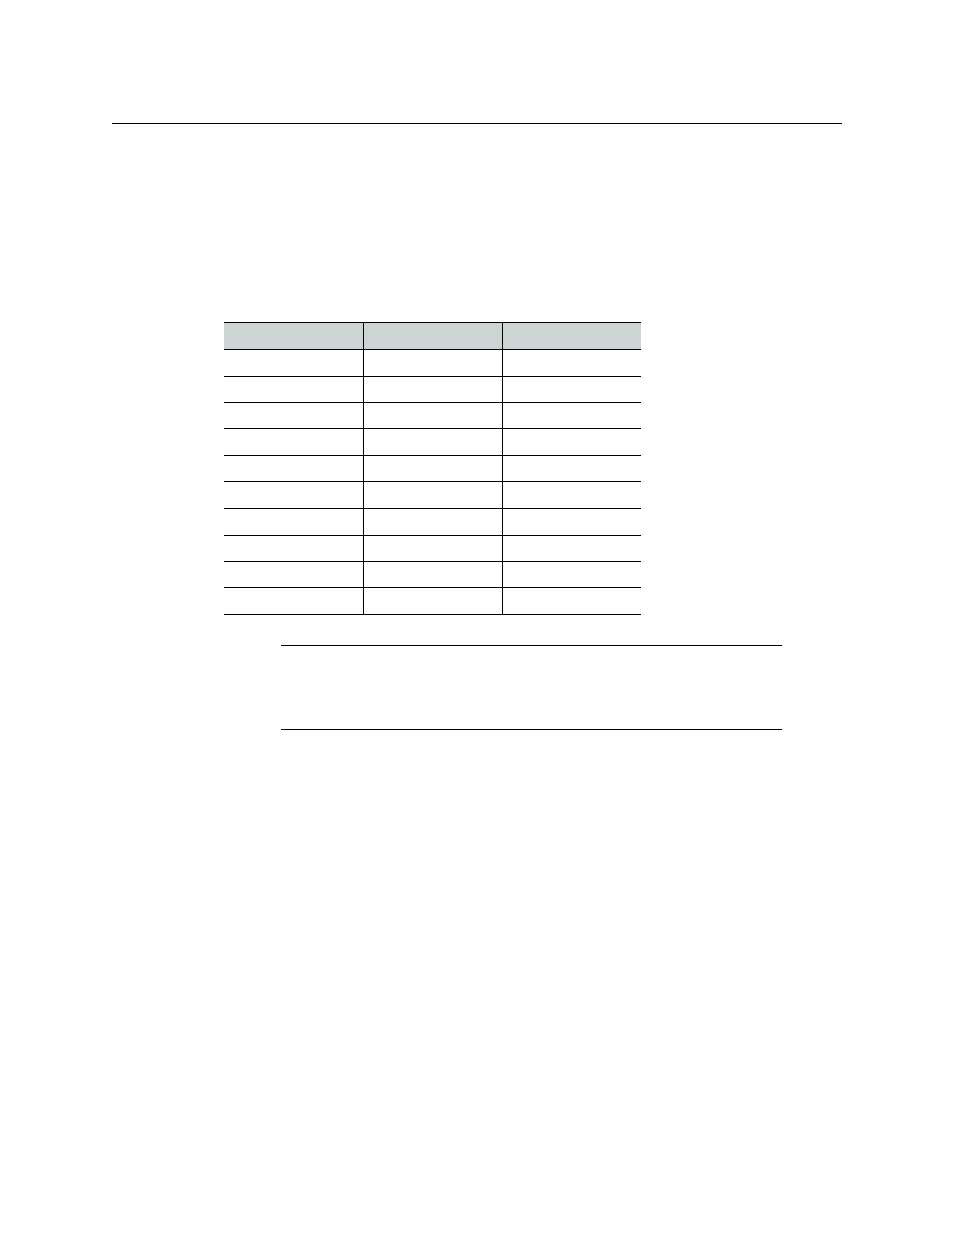
The Kaleido-X is shipped with the following default settings:
Changing the IP Address of a Kaleido-X from the Monitor Wall
The IP address, system name, and other parameters can be set via a control panel on the
monitor wall.
To change the IP address of the Kaleido-X from the monitor wall:
1 Connect a mouse to the USB connector of an output card.
2 Connect a USB keyboard to the USB connector of an output card.
3 Right-click anywhere on the monitor wall, point to Monitor wall (if you clicked a
monitor), and then click System configuration.
The System Configuration window appears.
4 Click the Ethernet tab.
5 Type the required Frame IP address, network mask, and gateway address in the
appropriate boxes.
6 Type the required addresses for all outputs.
7 Click OK.
8 When prompted to restart the system to apply your changes, click Yes.
Kaleido-X (7
RU)
Kaleido-X (14
RU)
Frame IP address
10.0.3.70
10.0.3.70
Network mask
255.255.0.0
255.255.0.0
Gateway
10.0.0.1
10.0.0.1
Output A
10.0.3.66
10.0.3.66
Output B
10.0.3.67
10.0.3.67
Output C
10.0.3.68
10.0.3.68
Output D/EXP
10.0.3.69
—
Output A (frame B)
—
10.0.3.61
Output B (frame B)
—
10.0.3.62
Output C (frame B)
—
10.0.3.63
Note:
If the IP address of the Kaleido-X has been changed (i.e. it no longer
corresponds to the as-shipped configuration), it is still possible to determine
the IP address. To determine the IP address of your Kaleido-X, see