Hard disk installation, Connect the devices – ACTi INR-310 User Manual
Page 5
Standalone NVR QIG 5
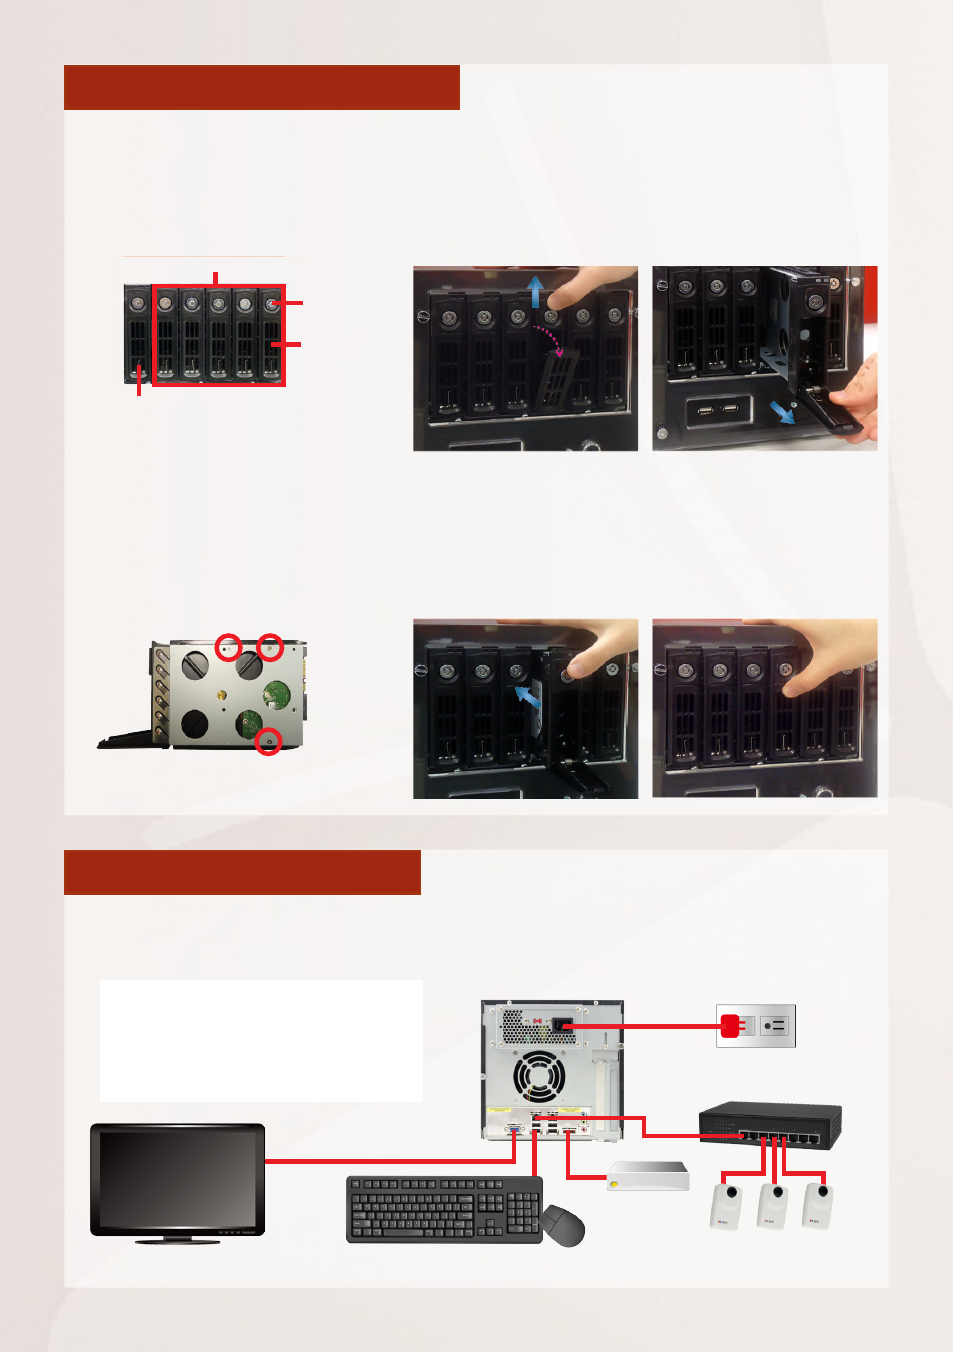
HARD DISK INSTALLATION
TURN OFF THIS UNIT before
you move the trays. Repeat the
following steps to install the
disks into Storage Disk bays.
Storage Disks
System Disk
(DO NOT REMOVE)
Key
Lock
Hinge
Tab
REMOVE THE TRAY
Step 1
Slide the lock tab up,
the hinge tab will pop
out by itself.
Step 2
Pull the hinge tab to 90
degress from the front,
and pull out the tray.
INSTALL THE TRAY
Step 4
Place your thumb on
the lock to push the
tray into position in the
chassis.
Step 5
Press the hinge tab until
it clicks into place.
MOUNT THE DISK
Step 3
Mount the disk by locking it
with supplied disk screws to
the bottom of the tray.
CONNECT THE DEVICES
The examle below displays a network consisting of only INR, network cameras
and required peripherals. Please remember to enable the DHCP service on your
router for INR to obtain an IP assress automatically.
Power Source
Switch
Cameras
eSATA
Storage
USB Devices
VGA Monitor
Note
To assign a static IP address to INR,
enter Windows and configure the
network settings in Network and
Sharing Center.