Step 6: connect to the network, Step 7: access the camera live view, Installation guide – ACTi Outdoor Mini PTZ Dome on Dropped Ceiling User Manual
Page 16
Installation Guide
2.
Remove the plastic covering the dome cover. Final installation will look like the illustration
below.
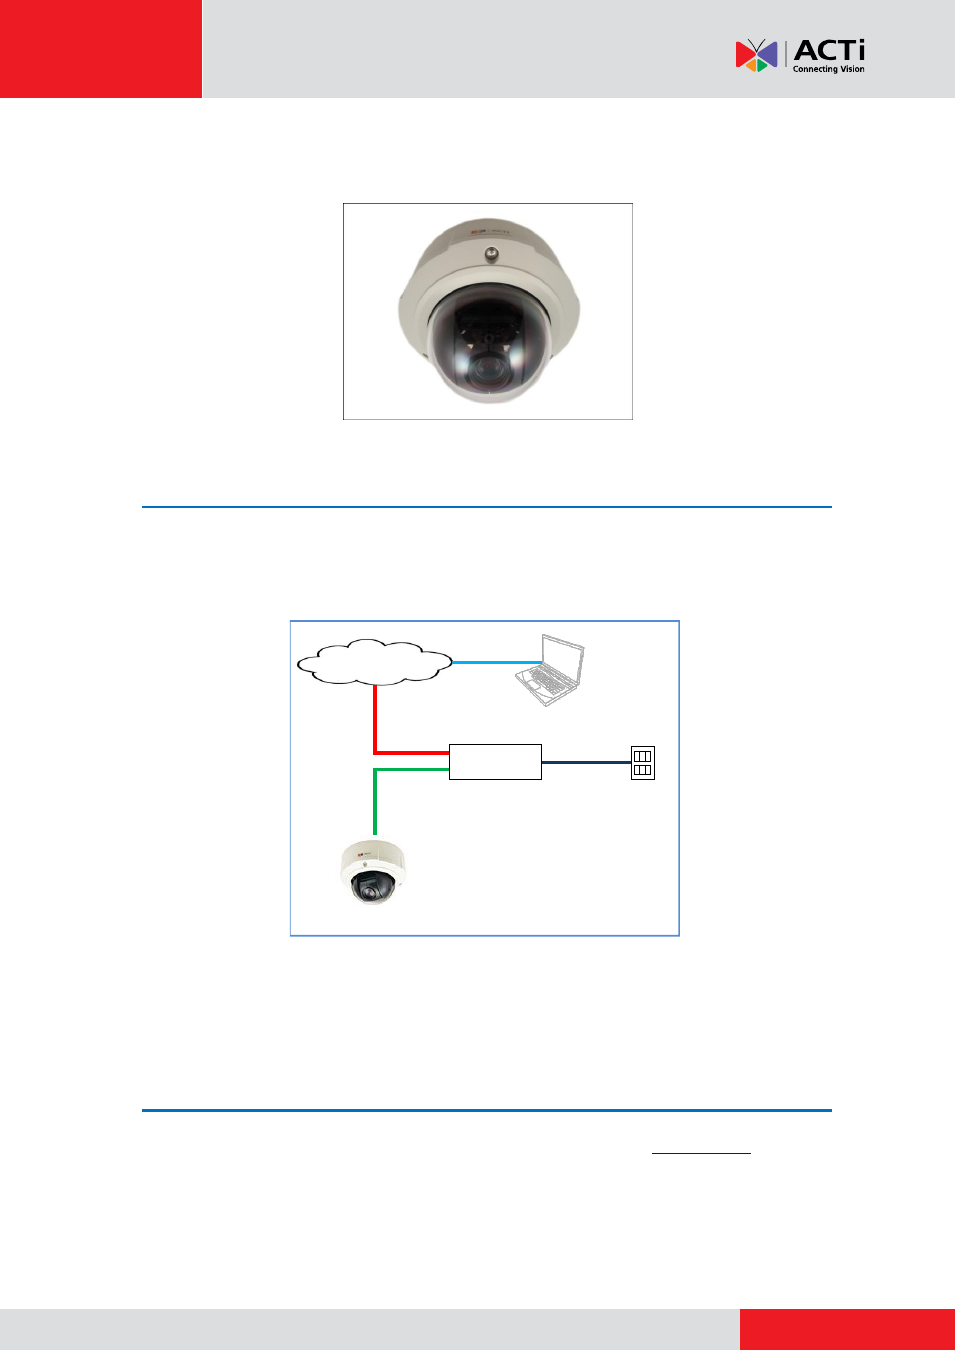
Step 6: Connect to the Network
Connect the other end of the network cable to a switch or injector. Then, connect the switch or
injector to a network or PC and a power source. See Power-over-Ethernet (PoE) example
connection diagram below.
Network
AC Power
Source
PoE Injector /
PoE Switch
Power Cable
Ethernet Cable
Ethernet Cable
(Data + Power)
Ethernet Cable
(Data)
Camera
In case of using a non-PoE switch, power up the camera using a power adapter (not supplied).
As needed, power up the other connected devices.
Step 7: Access the Camera Live View
Refer to the camera Hardware Manual downloadable from the website
for more
information.